Sniffles, coughs and general malaise have been our companions this past week, so when this weekend rolled around, I was looking for a fun, relaxing project that would take my mind off how well I am not feeling. That project turned out to be a set of Easter cards based on layered background dies. I was introduced to these dies back in November, when I watched Jennifer McGuire’s video, Crafting On-the-Go and Simple Textured Cards. Afterwards, I purchased Birch Press Designs’ Delfina Layer Set.

The idea behind layered background dies is to add texture to the card you are making. The dies are all sized to fit a standard A4-sized card measuring 4-1/4 x 5-1/2 inches. You can cut two of these cards from one 8-1/2 x 11-inch sheet of card stock, so if you decide to make one of these layered background cards, you may as well do two, for efficiency’s sake.
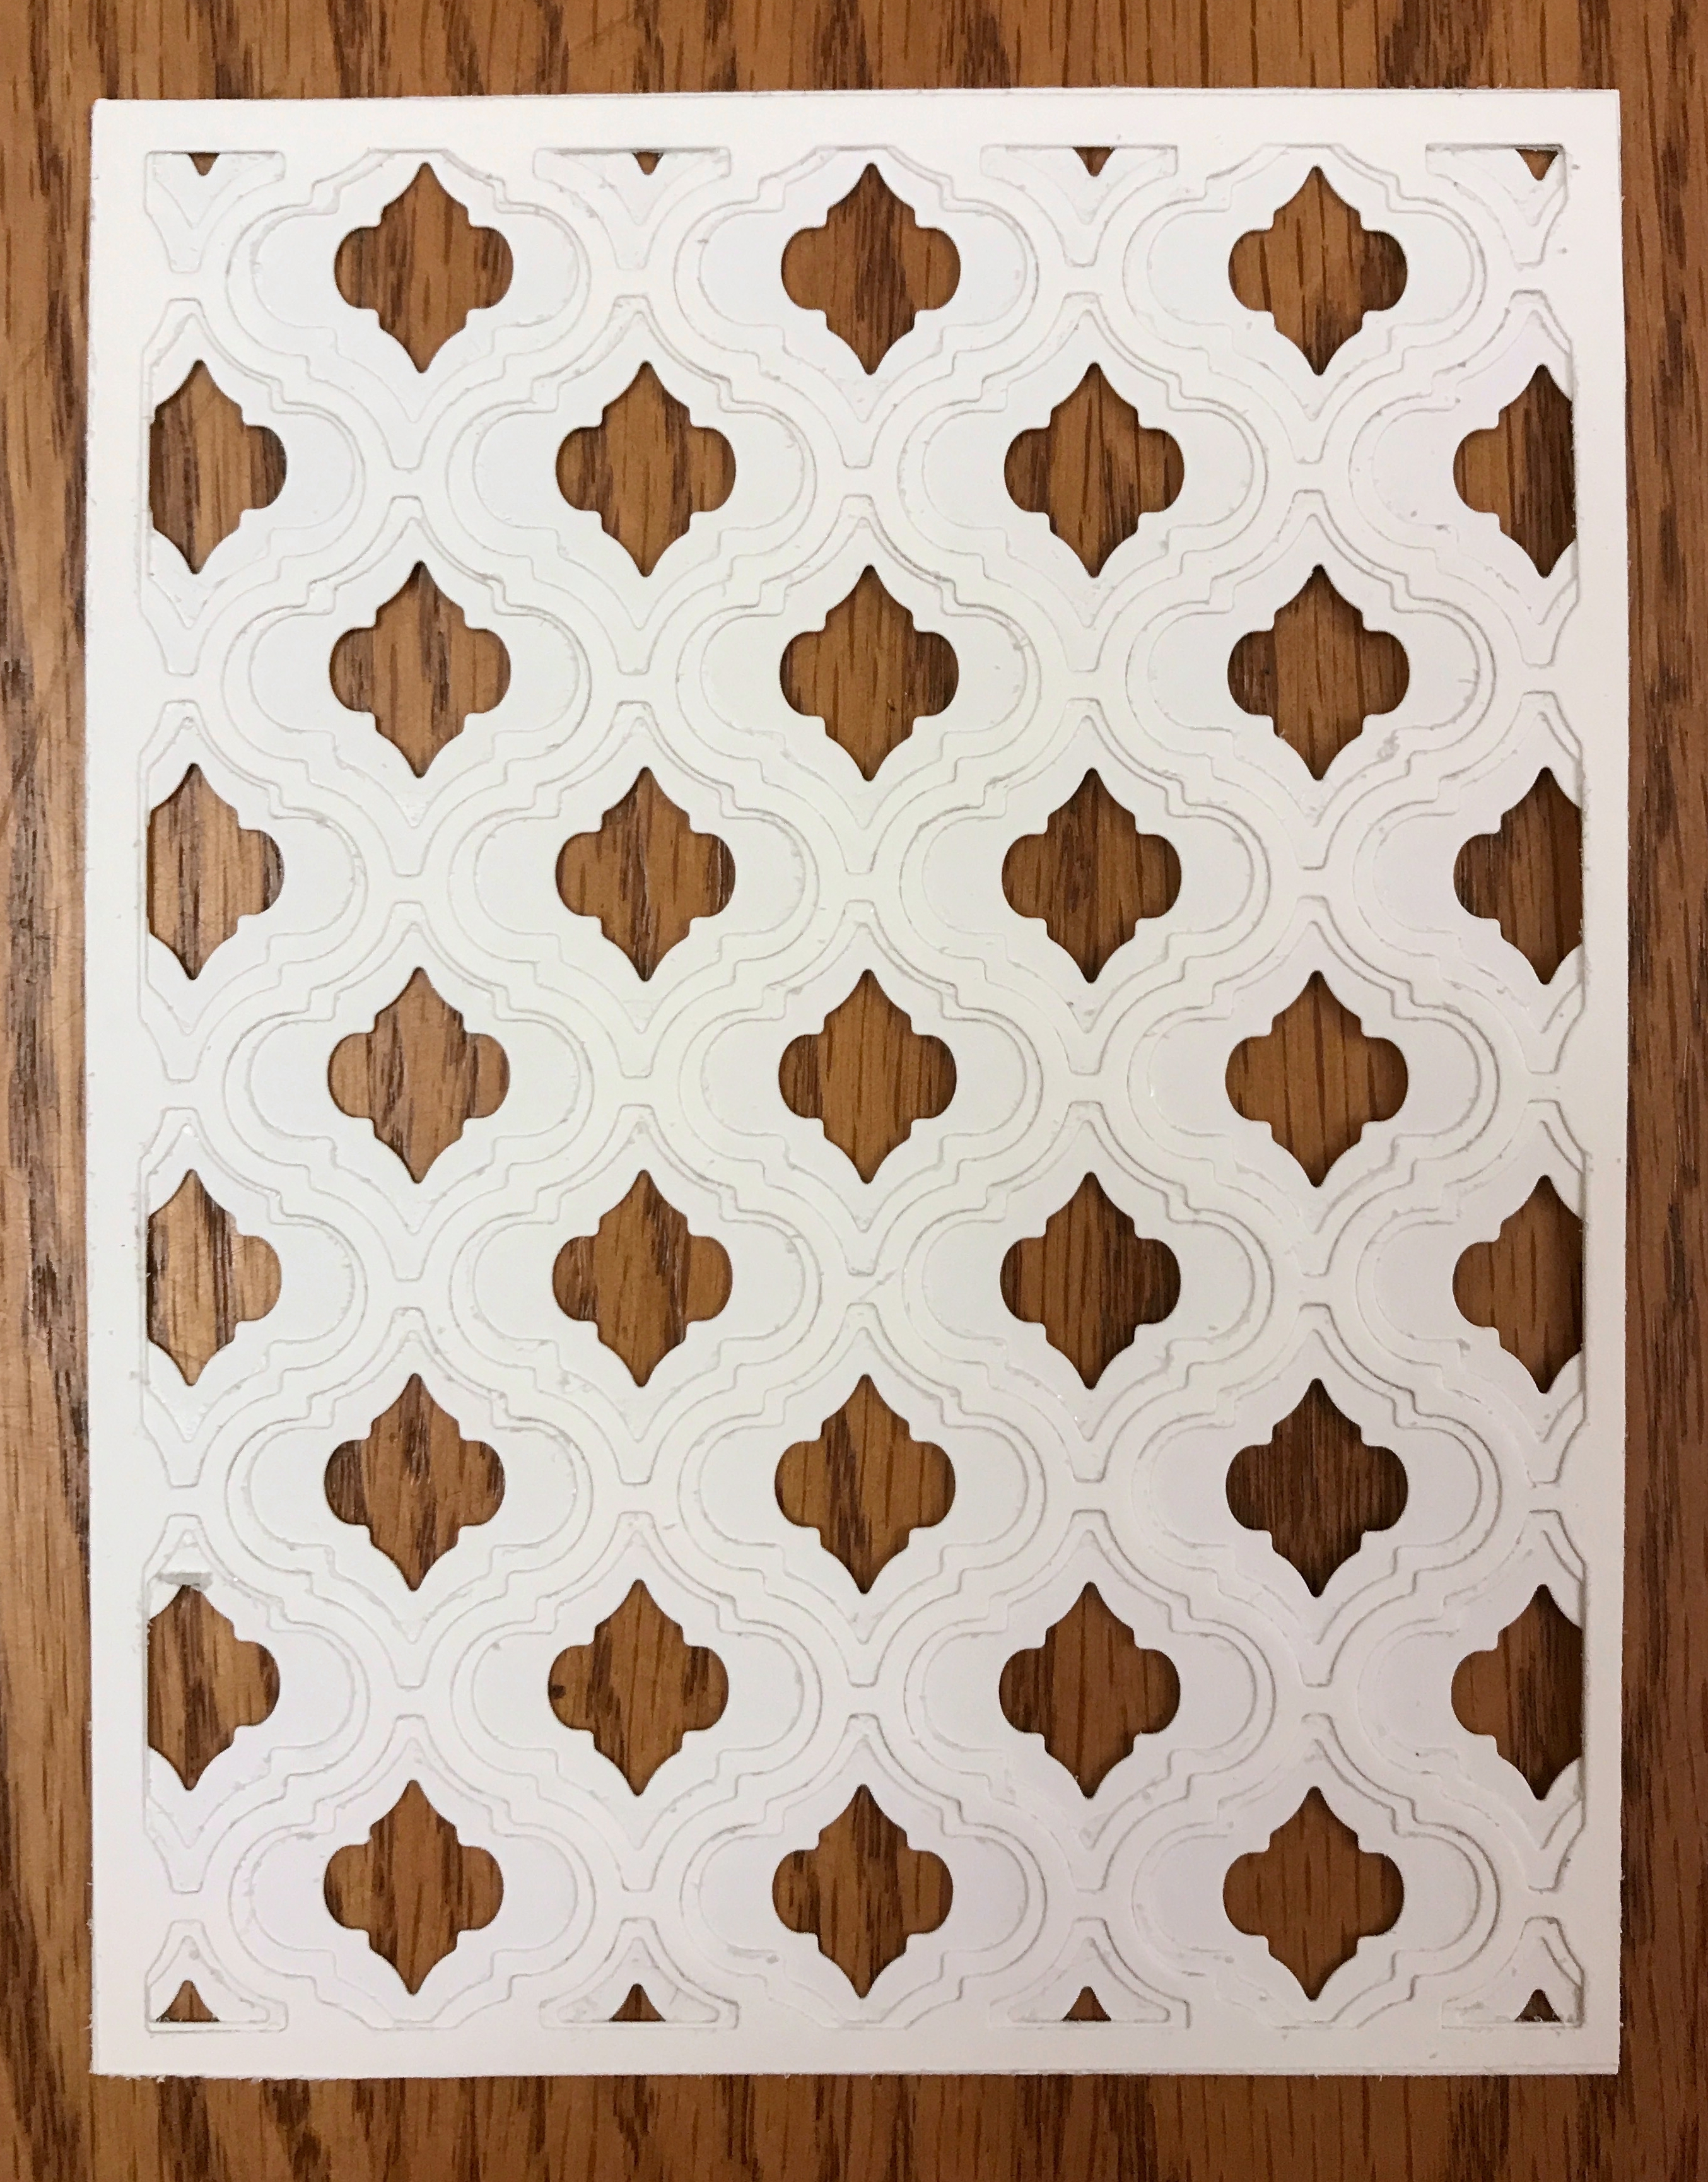
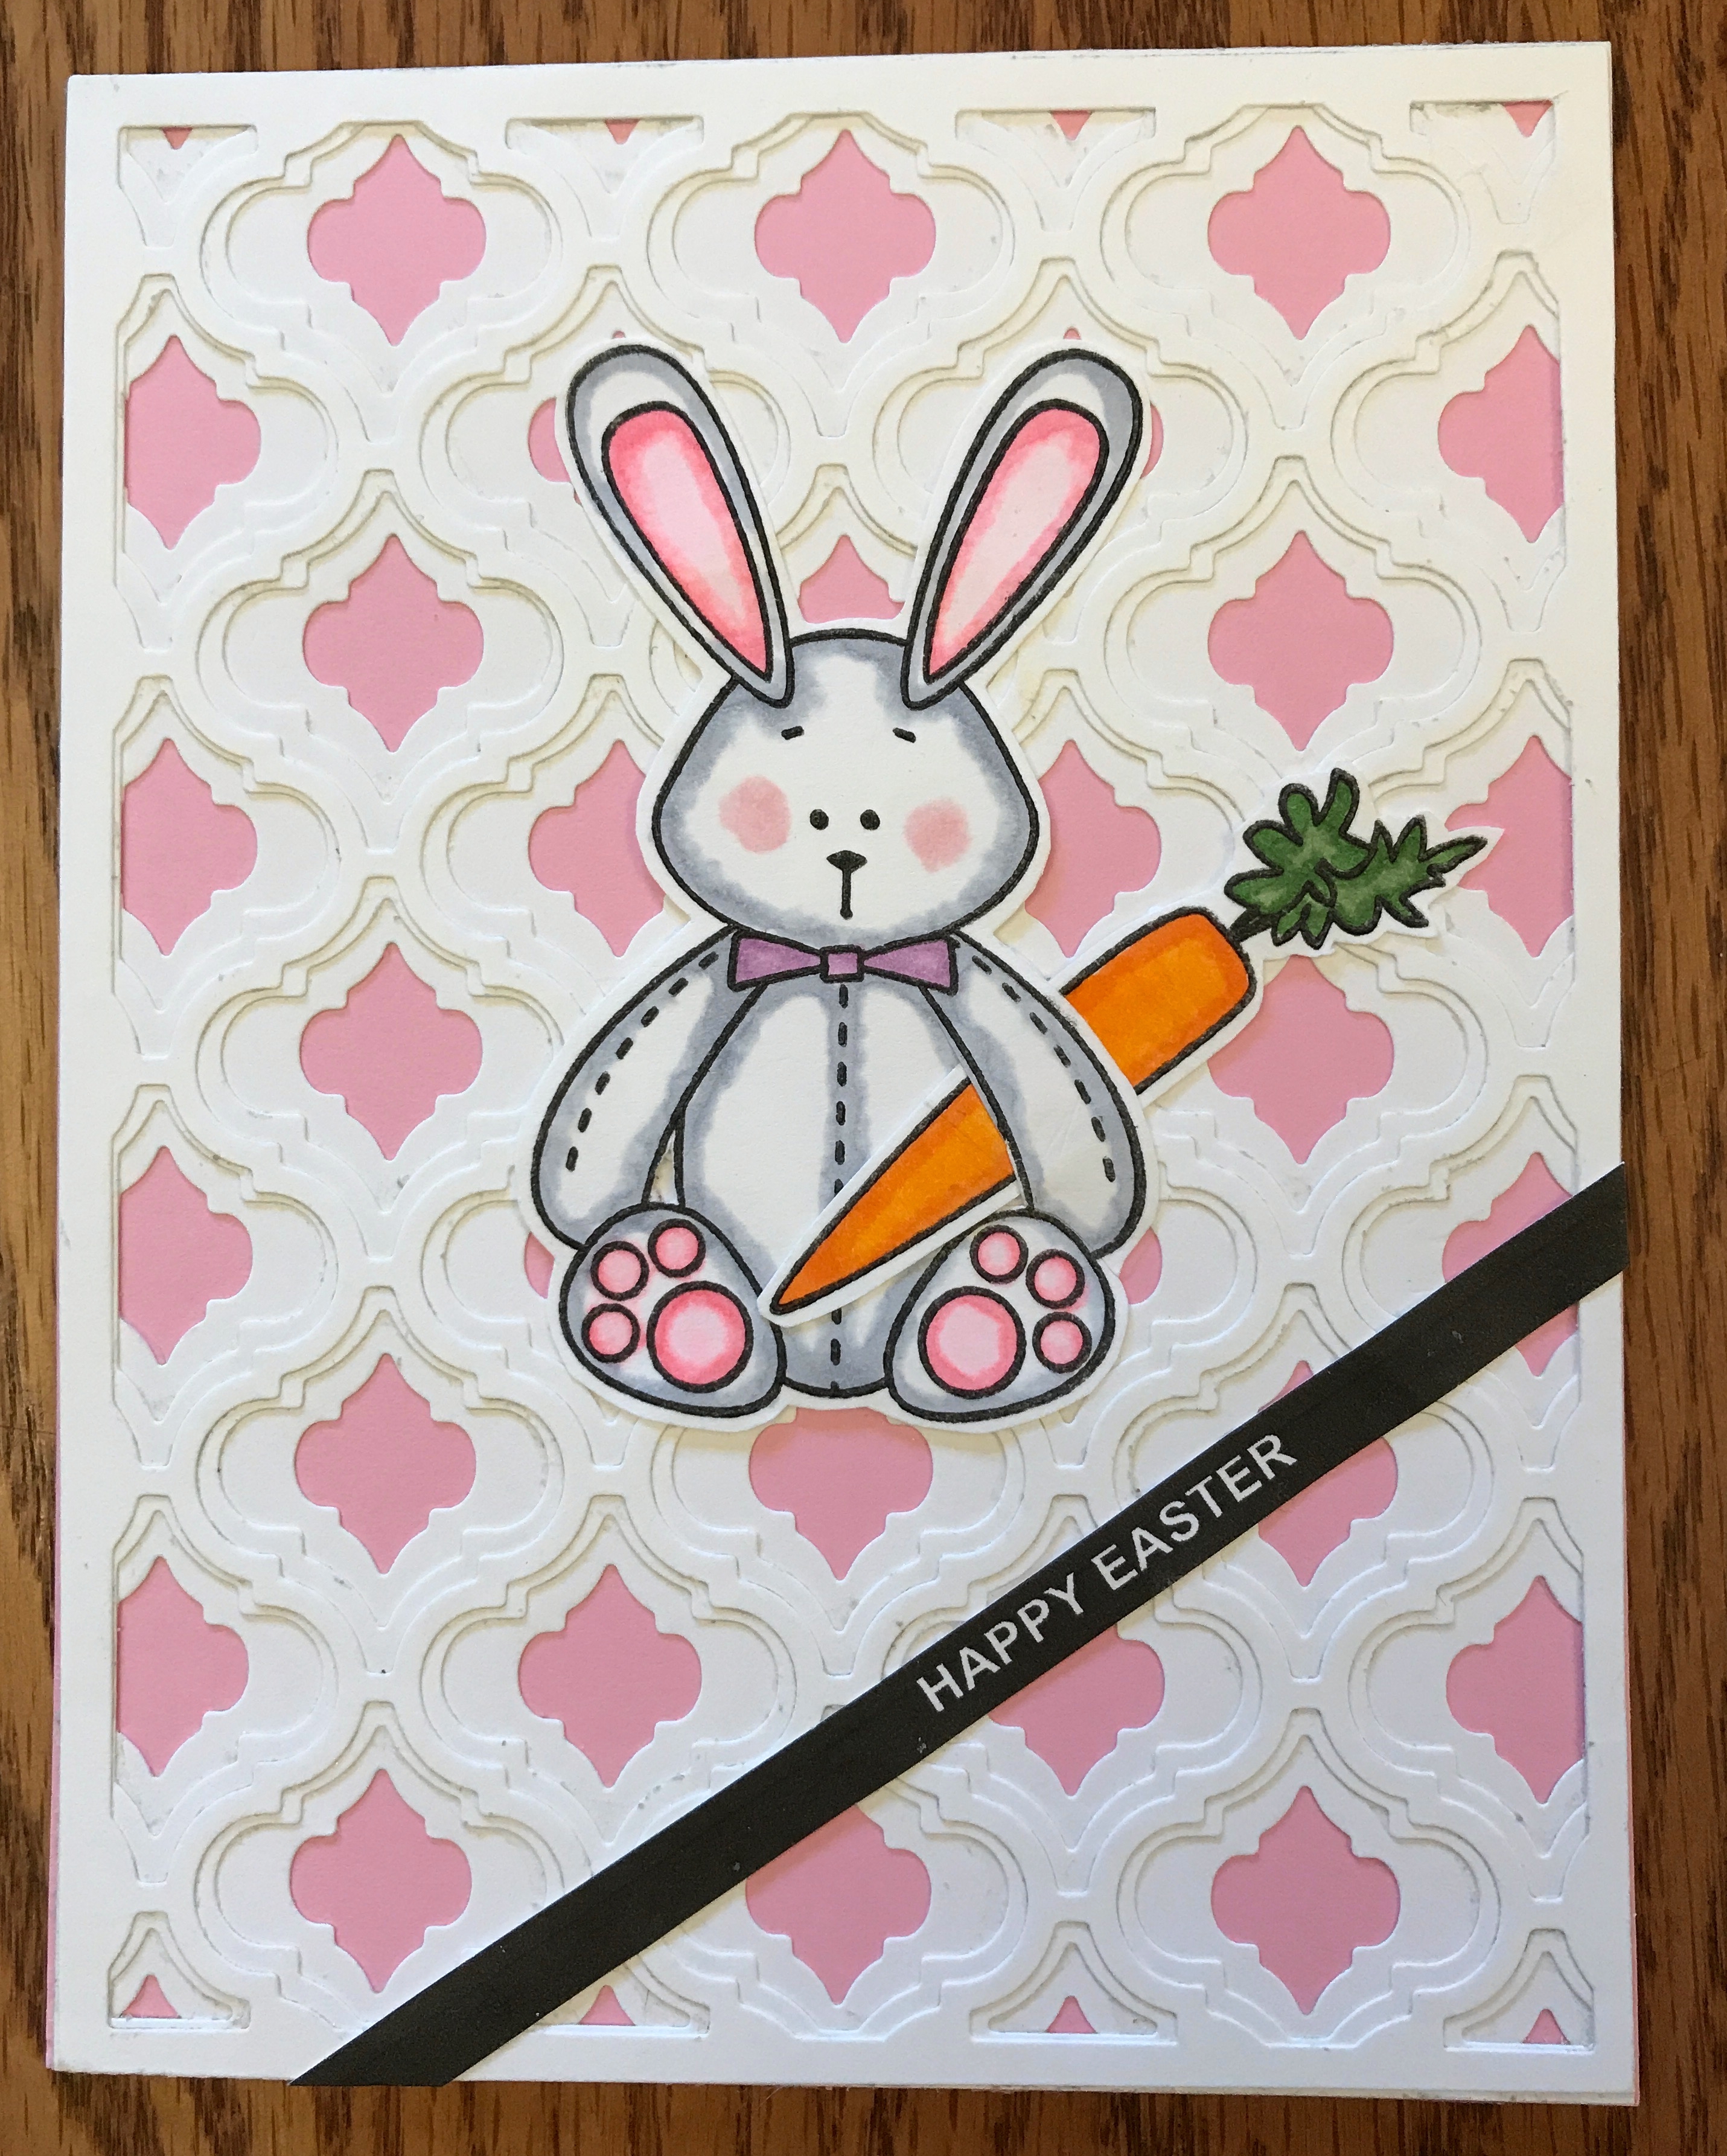
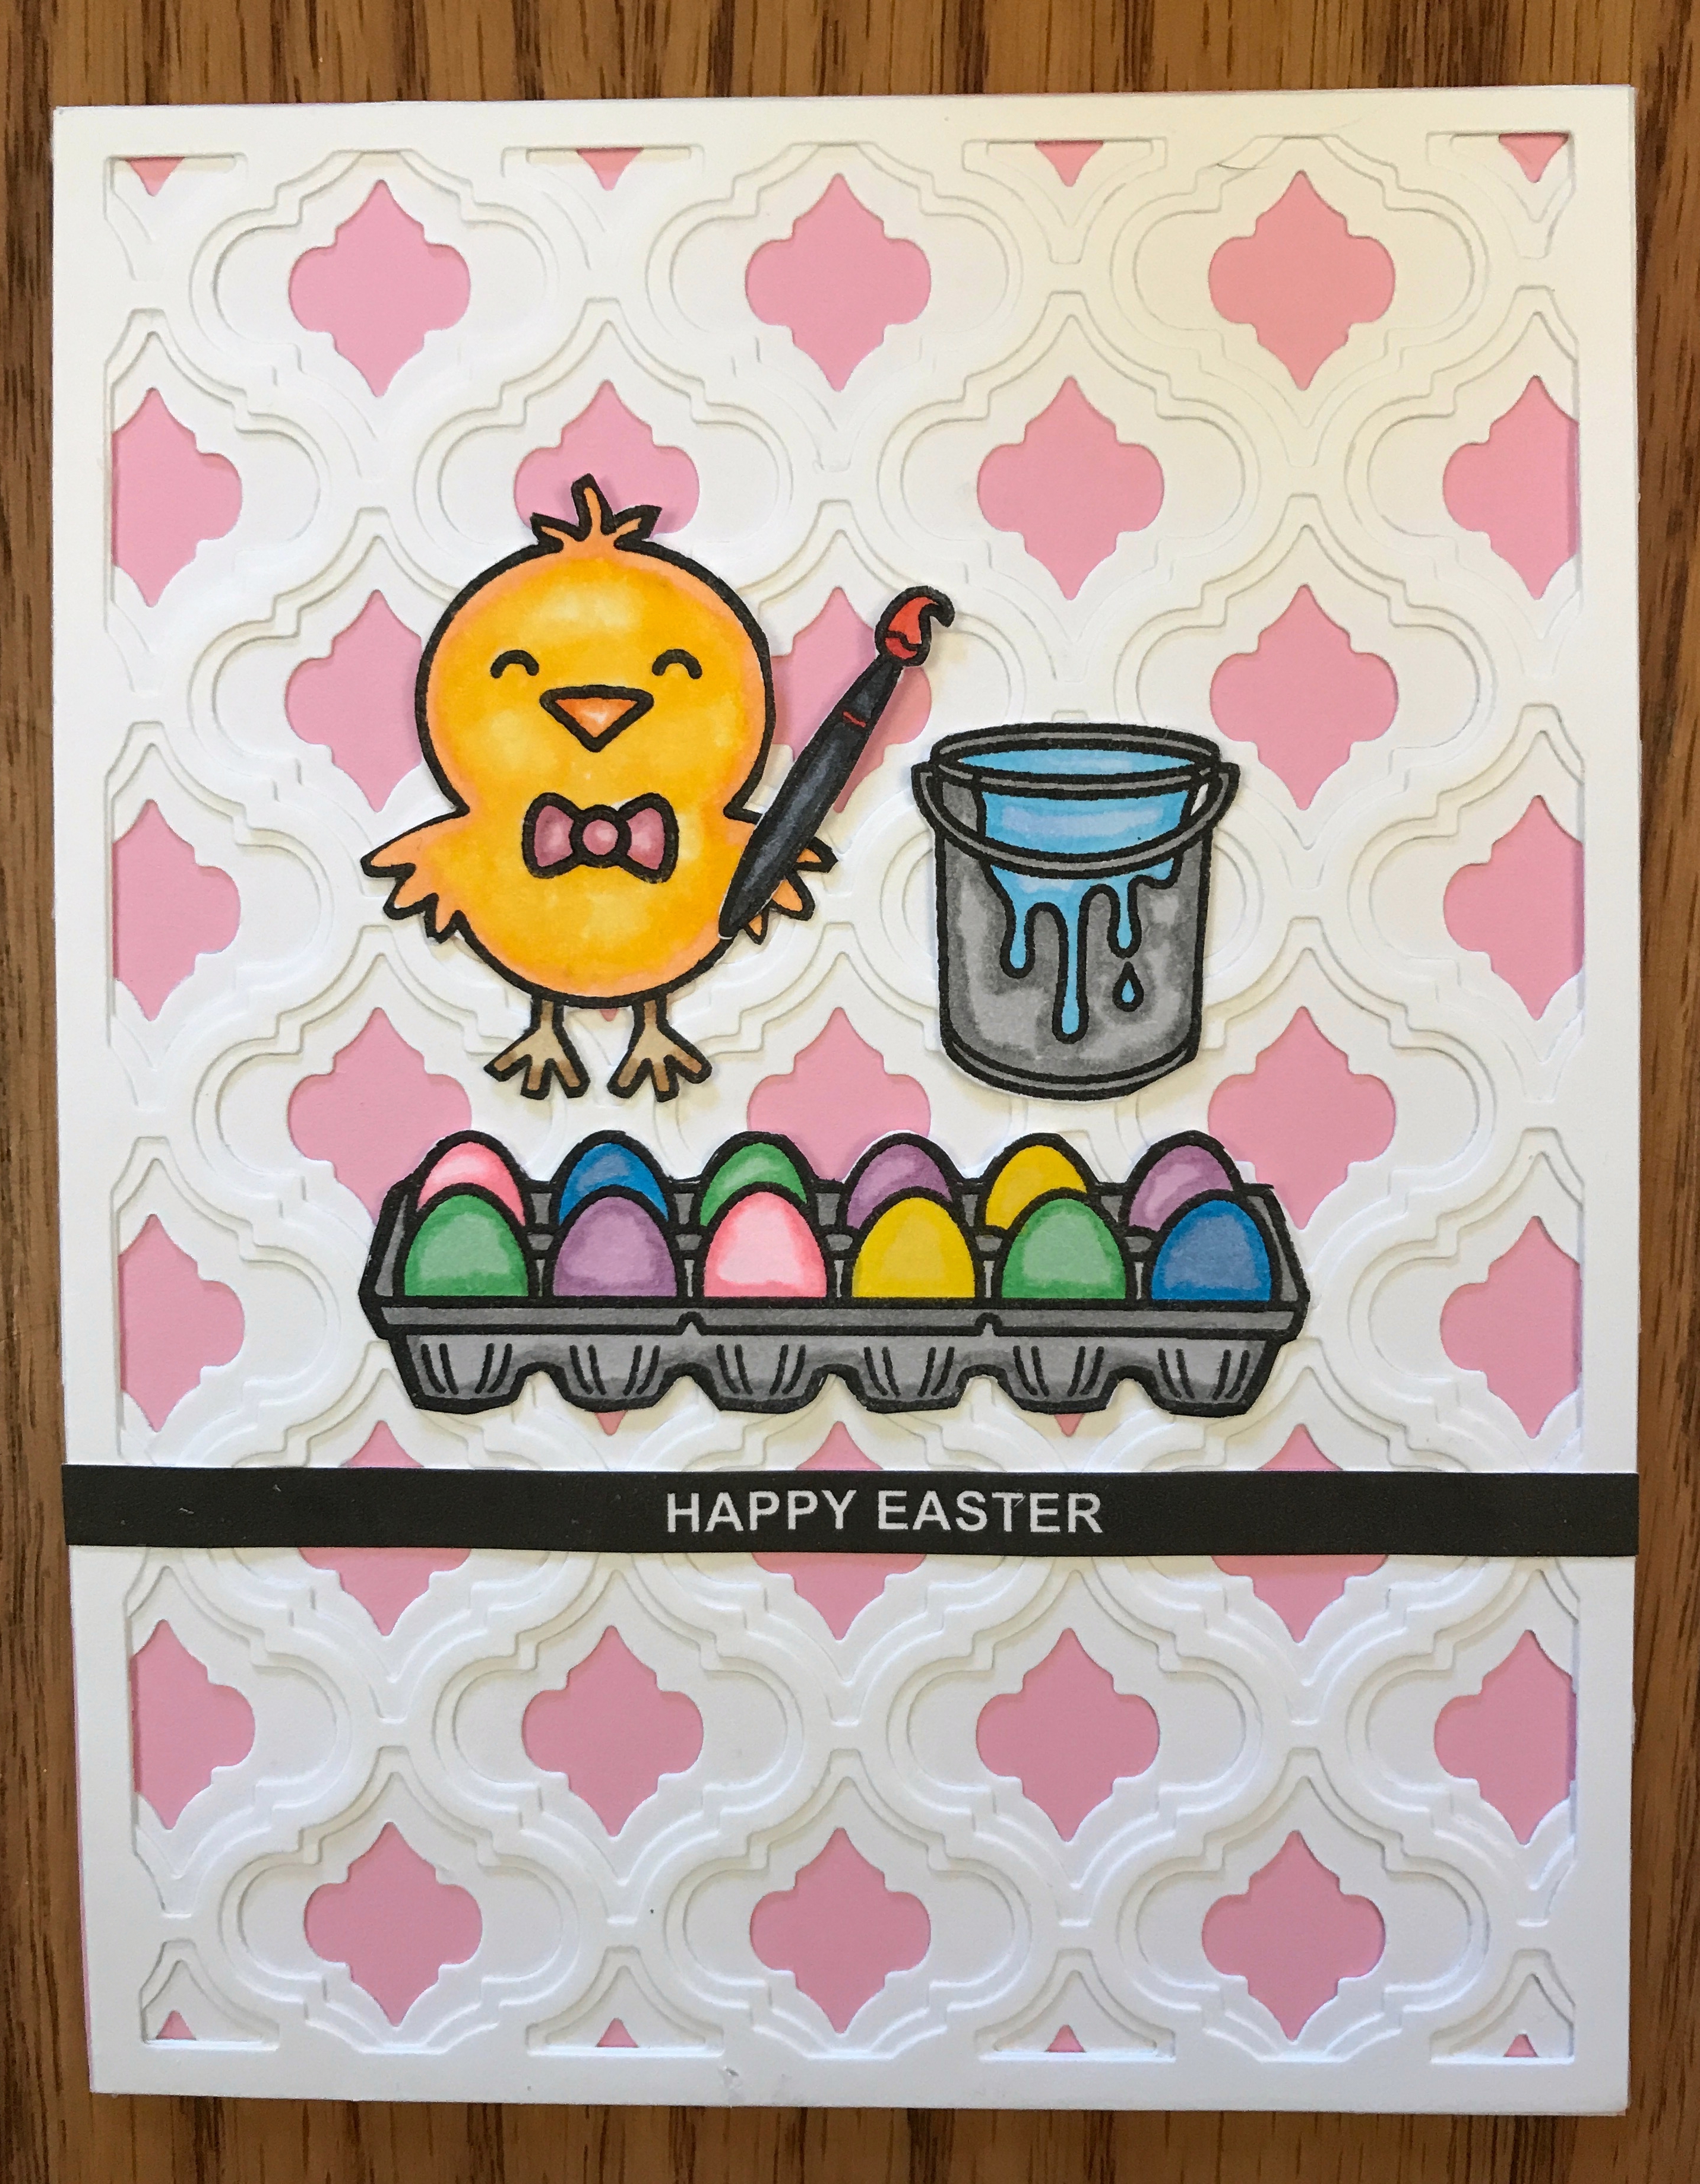
The Delfina Layer Set is designed as three rectangular dies that all work together. You can use one, two or all three at a time, and they coordinate beautifully, adding an intricate-but-lovely texture to your card. In the photo below, you can see that I layered three white rectangles, one on top of the next. Jennifer McGuire suggests using dots of Ranger Multi Medium Matte to adhere the layers together. This works well not only because the adhesive is strong, but also because a wet adhesive allows you to shift the layers until you get them aligned just right.
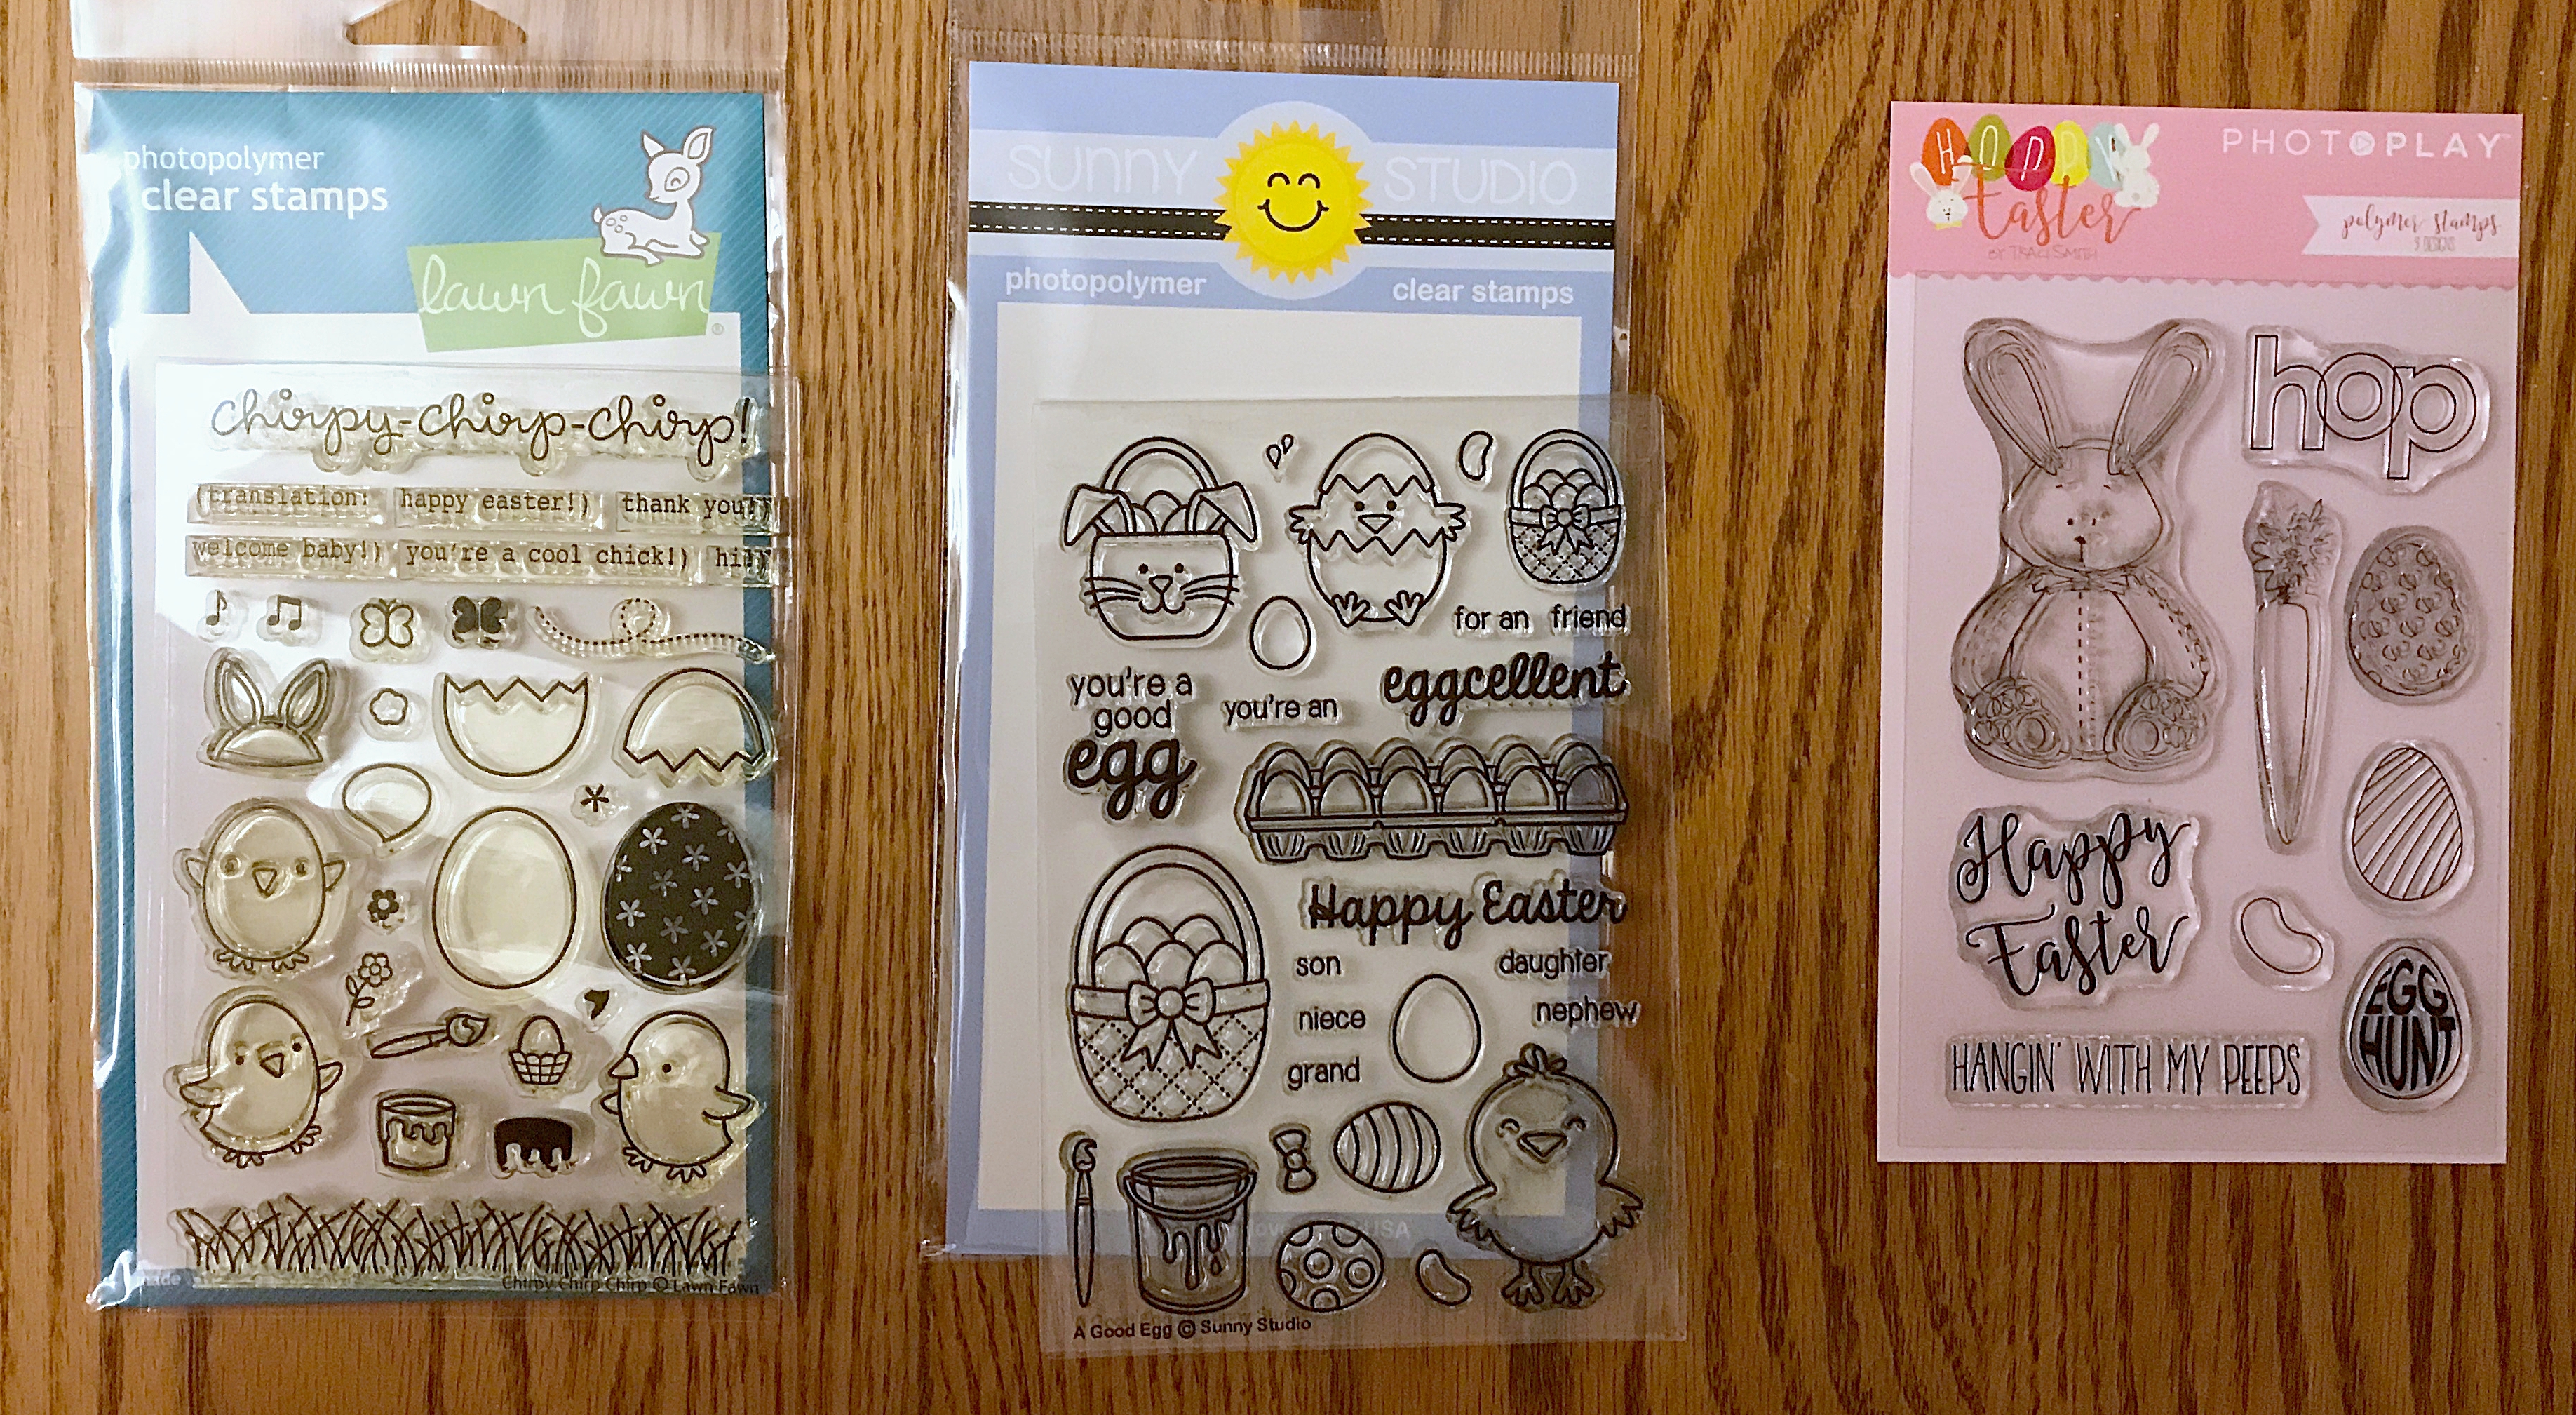
To make my Easter cards, I decided to mix and match components from three different stamp sets, shown below:
- Chirpy Chirp Chirp, by Lawn Fawn
- A Good Egg, by Sunny Studio
- Hoppy Easter, by Photoplay
I stamped the images with Tsukineko Brilliance Graphite Black Pigment Ink Pad because that’s what I have on hand, but not before doing a little research about what stamping inks work best with Copic markers, which I intended to use for coloring the images.
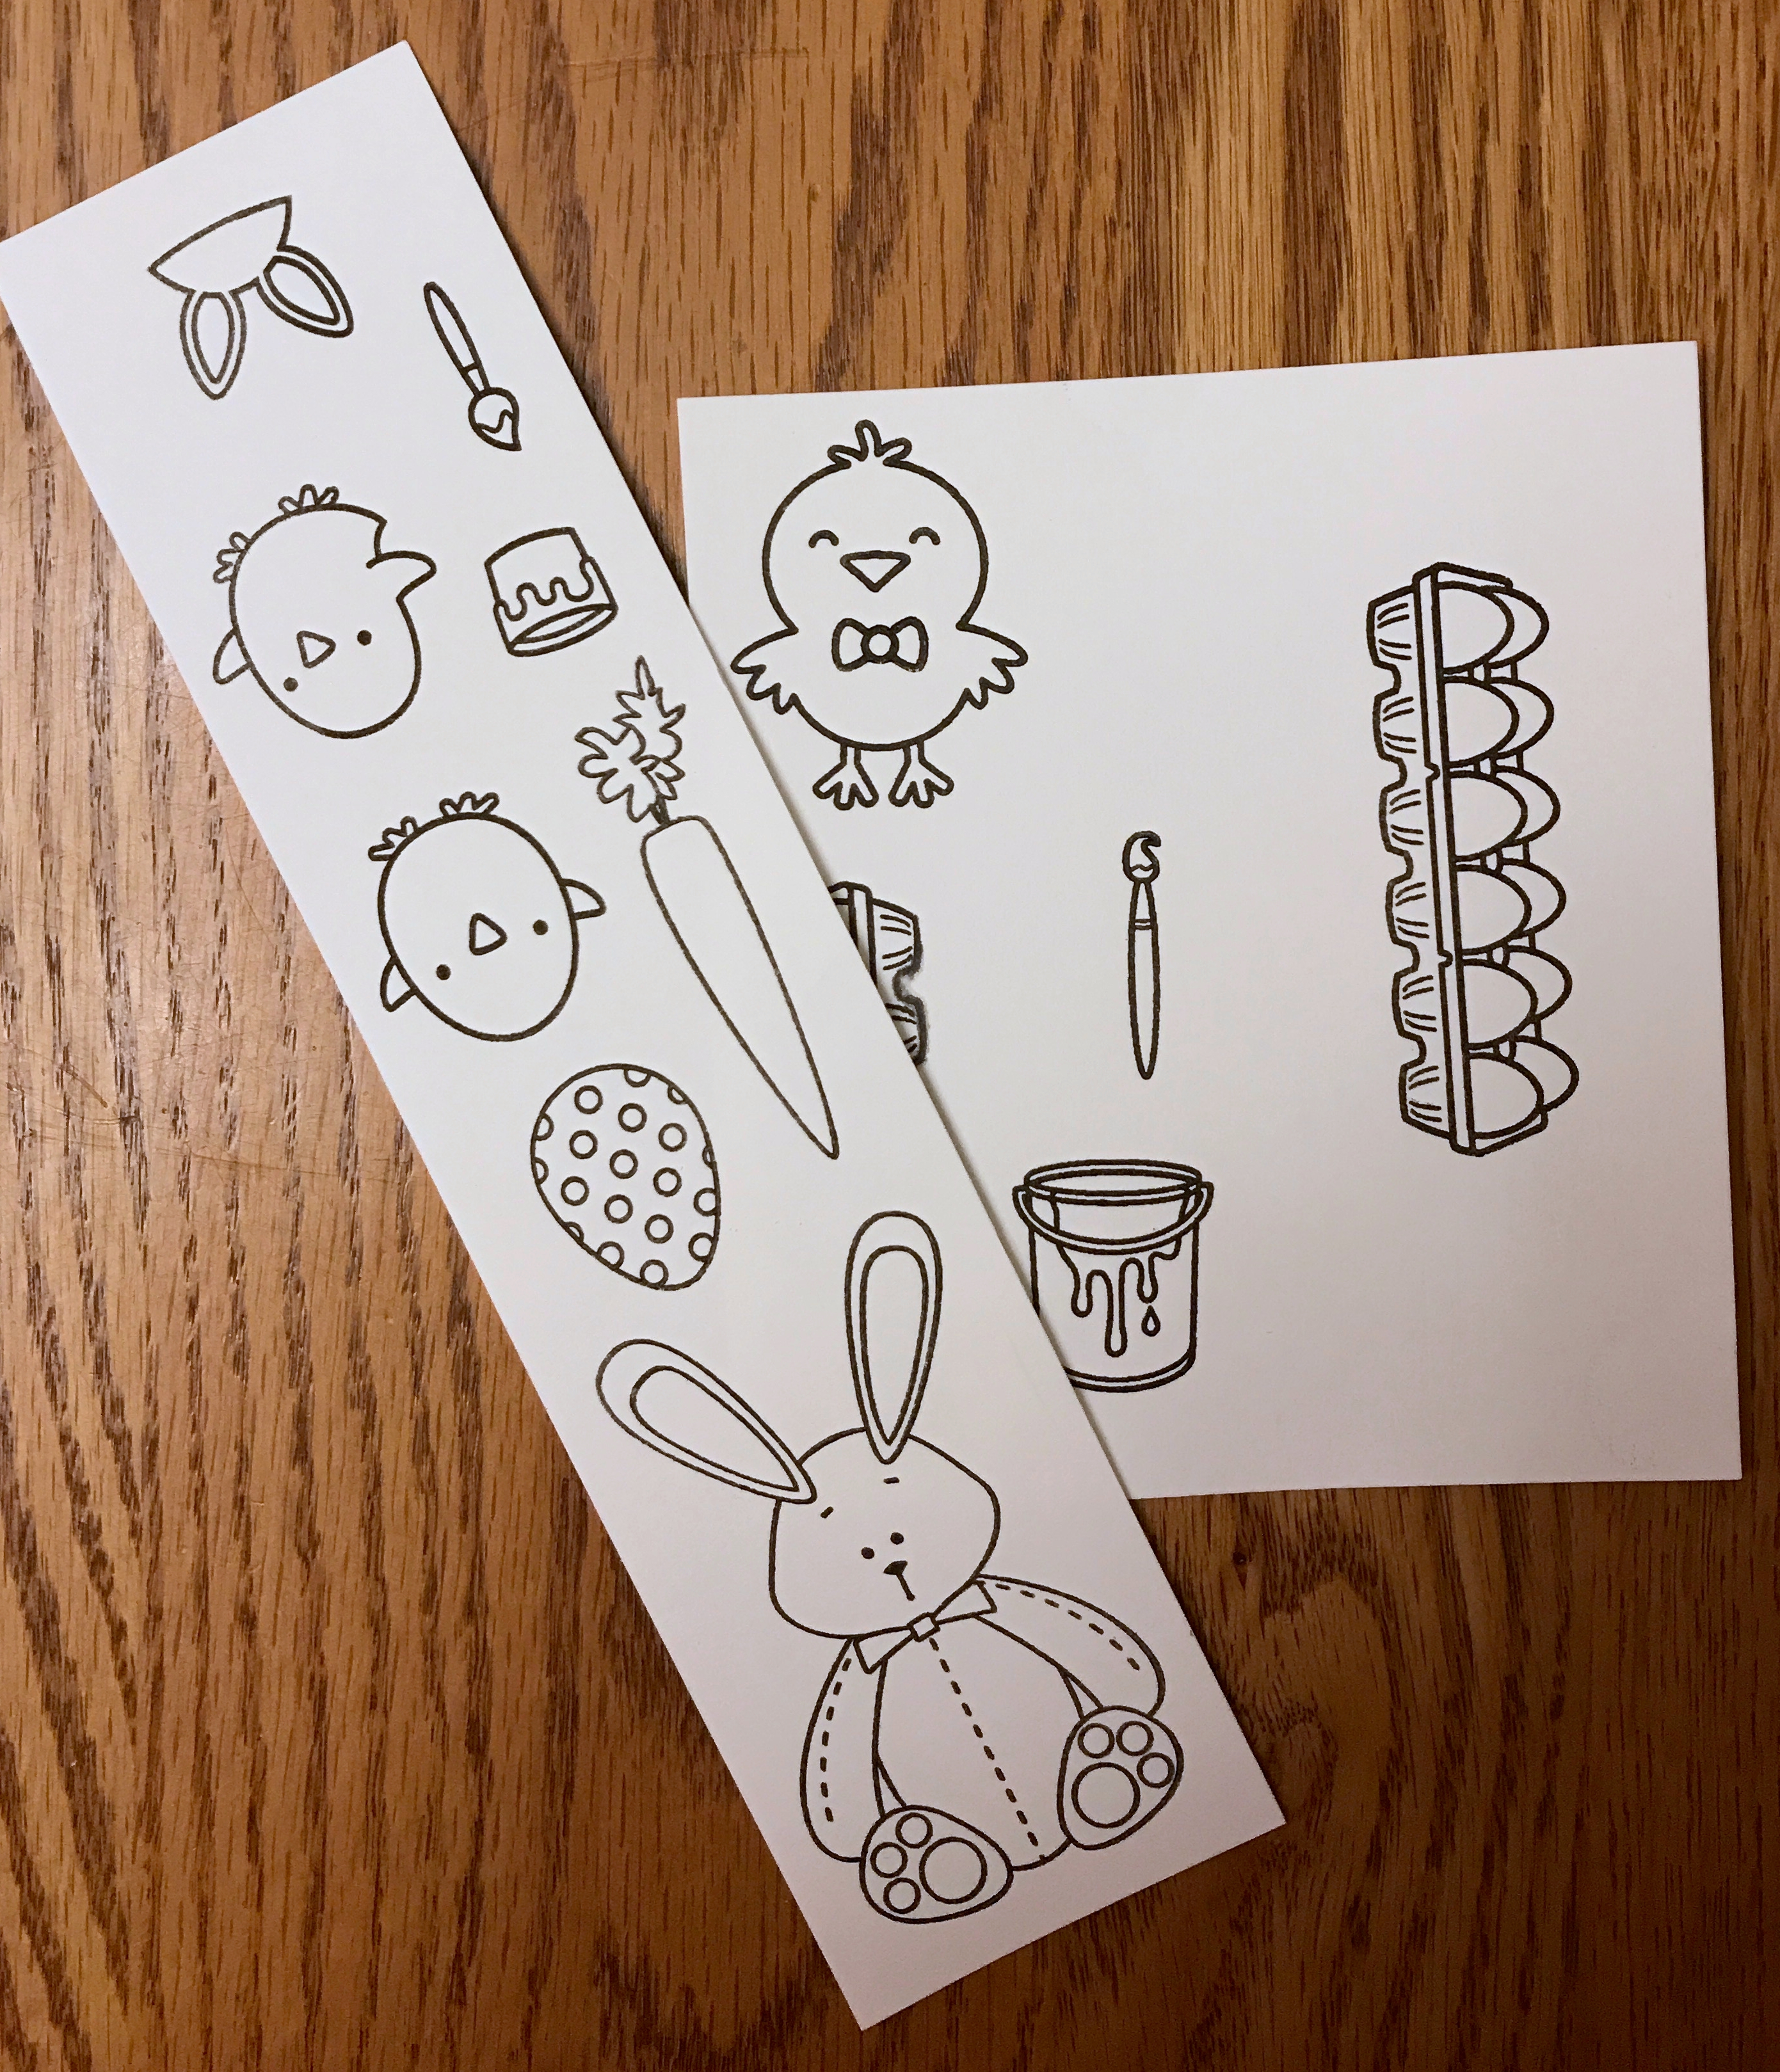
The last time I used Copic markers, I stamped the images with a pigment ink that took forever to dry, and did not agree well with the project, resulting in smeared ink. Many of my inks are older, so I figured someone out in Internet Land had already researched what I needed to know about stamping and Copic markers. Here’s what I learned:
- Guest blogger Sharon Harnist, in Best Inks To Use With Copic Markers by Sharon Harnist, likes Tsukineko Brilliance Graphite Black Pigment Ink Pad and Ranger Adirondack Earthtones Pitch Black Dye Ink. I am not sure that this second ink is sold anymore, to be honest (the post dates back to 2009), but the Tsukineko Brilliance Graphite Black Pigment Ink Pad is readily available. Sharon reports this ink is excellent, but you do need to let it air dry for an hour, or heat set it.
- Jennifer McGuire, in Inks for Copic Marks + Giveaway, cites Memento Tuxedo Black Fade-resistant Dye Ink, Studio Calico Color Theory Inky Black Pigment Ink and My Favorite Things Black Licorice Hybrid Ink as her favorite stamping inks to use with Copic markers.
- Jenny from CraftTestDummies shares the results of her test of 10 inks and 6 brands of markers, in Best Stamp Pads for Copics (and alcohol markers). For all types of markers, she says the three best inks to use are Hero Hues Dye Ink, Adirondack Dye Ink, and Memento Dye Ink.
After I colored the images I planned to adhere on top of the textured background layers, it was time to think about the sentiment I wanted to add to the cards. I really like the simplicity of thin sentiment strips, with white embossed text on black paper, that Jennifer often uses in her cards. Because the background of the cards is so intricate, a no-frills sentiment seems to work best. However, I do not have the library of sentiment stamps that Jennifer has, and did not want to purchase another stamp set just for the words, “Happy Easter.”My solution was a digital one that cost me nothing but the time to design it—a solution I can re-use by modifying it.
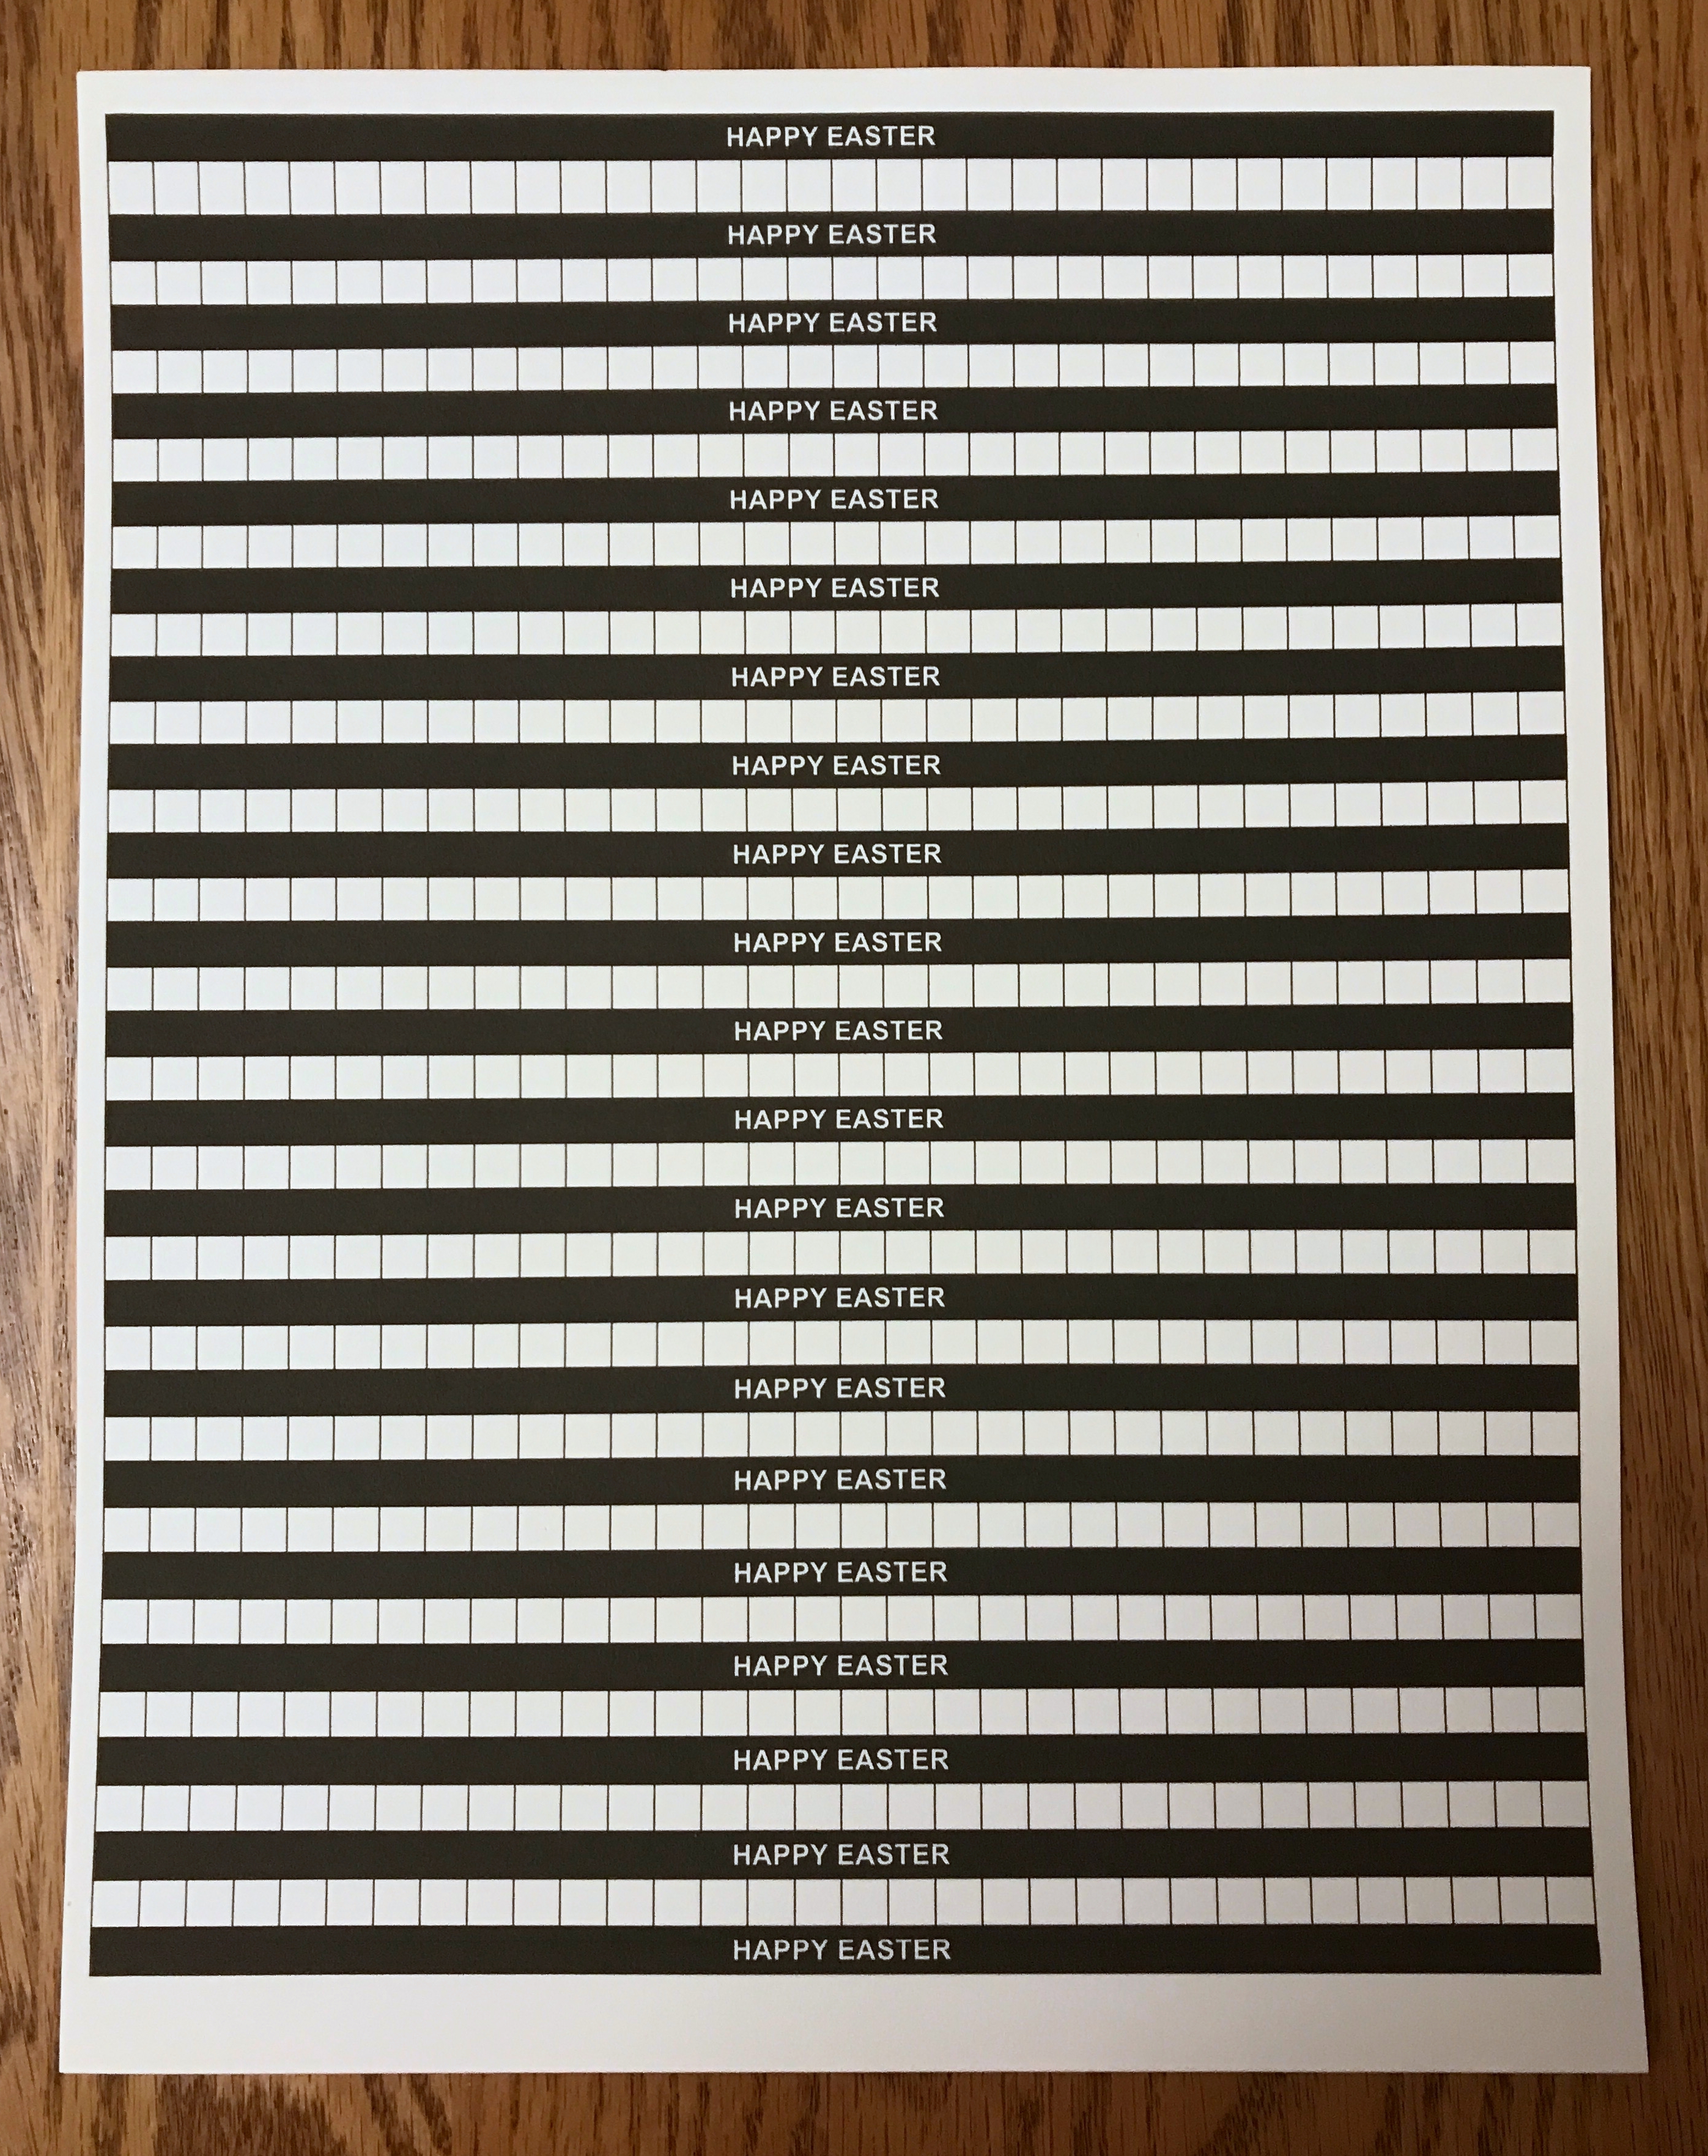
Using Microsoft Word, I designed graph paper and merged the cells of every other row to create sentiment strips. I shaded them in black, and centered text in white. Then I simply cut out the sentiment strips with scissors, and adhered them to the cards. If you click on the image above (or on this link), you can download my digital graph paper and modify the text for your own sentiment strips.
Below are the three Easter cards I crafted this weekend. I think using a layered background adds some nice texture to them, and suspect I’ll be using this technique again. Of course, at the moment I only own one set of layered background dies. They are costly at $69.99 a set, but you can use them over and over again.

There are different ways to add texture to your cards. Do you have a favorite technique?
© 2017 Judy Nolan. All rights reserved
What adorable cards! I love the detail that the background templates add. They’d be fun in different colors too. Your little stamped/colored images are so cute 🙂
Your cards are so cute! Thanks for the info on stamp inks and Copics. Coloring in stamps is something I’ve been wanting to try and I’m sure I would have jumped right in and ended up with smeared ink!
The lattice design with the pink showing through is so pretty! And what an adorable Easter bunny 🙂 I hope you feel better soon, Judy!