I enjoy custom orders. They give me a chance to do something different, to experiment, to learn something new, or simply to explore new techniques. Recently a buyer-and-friend asked me to design a “celestial†gratitude journal for her—basically, a book with a cover featuring the sun, moon and stars. Because so many of my handmade books feature flowers or a floral theme on the cover, a celestial-style journal represented a welcome departure from the norm. This post is about what happens behind-the-scenes after you click on the “Request Custom Order†button of my Etsy shop, MisterPenQuin.
The Request Custom Order button opens up a private conversation (convo) between you and your seller, initiated by you, that enables you to inform the seller about your preferences, and allows the seller to describe, both in words and pictures, how your wishes can (or can’t) be granted. I don’t know exactly how many messages are typical for a custom order convo stream, but I would guess it’s a half a dozen or more. For this order, 12 messages were exchanged, but I’ve done custom orders that involved as few as five messages or as many as 19. In any event, communicating clearly with my buyer before I click on the “Make this a Custom Order†button is a great way for me to “get things right.†I nearly always attach a PDF document with thumbnail photos to one of the messages within a convo stream. This helps my buyer narrow down choices and for me to ask questions that enable me to fill the order.
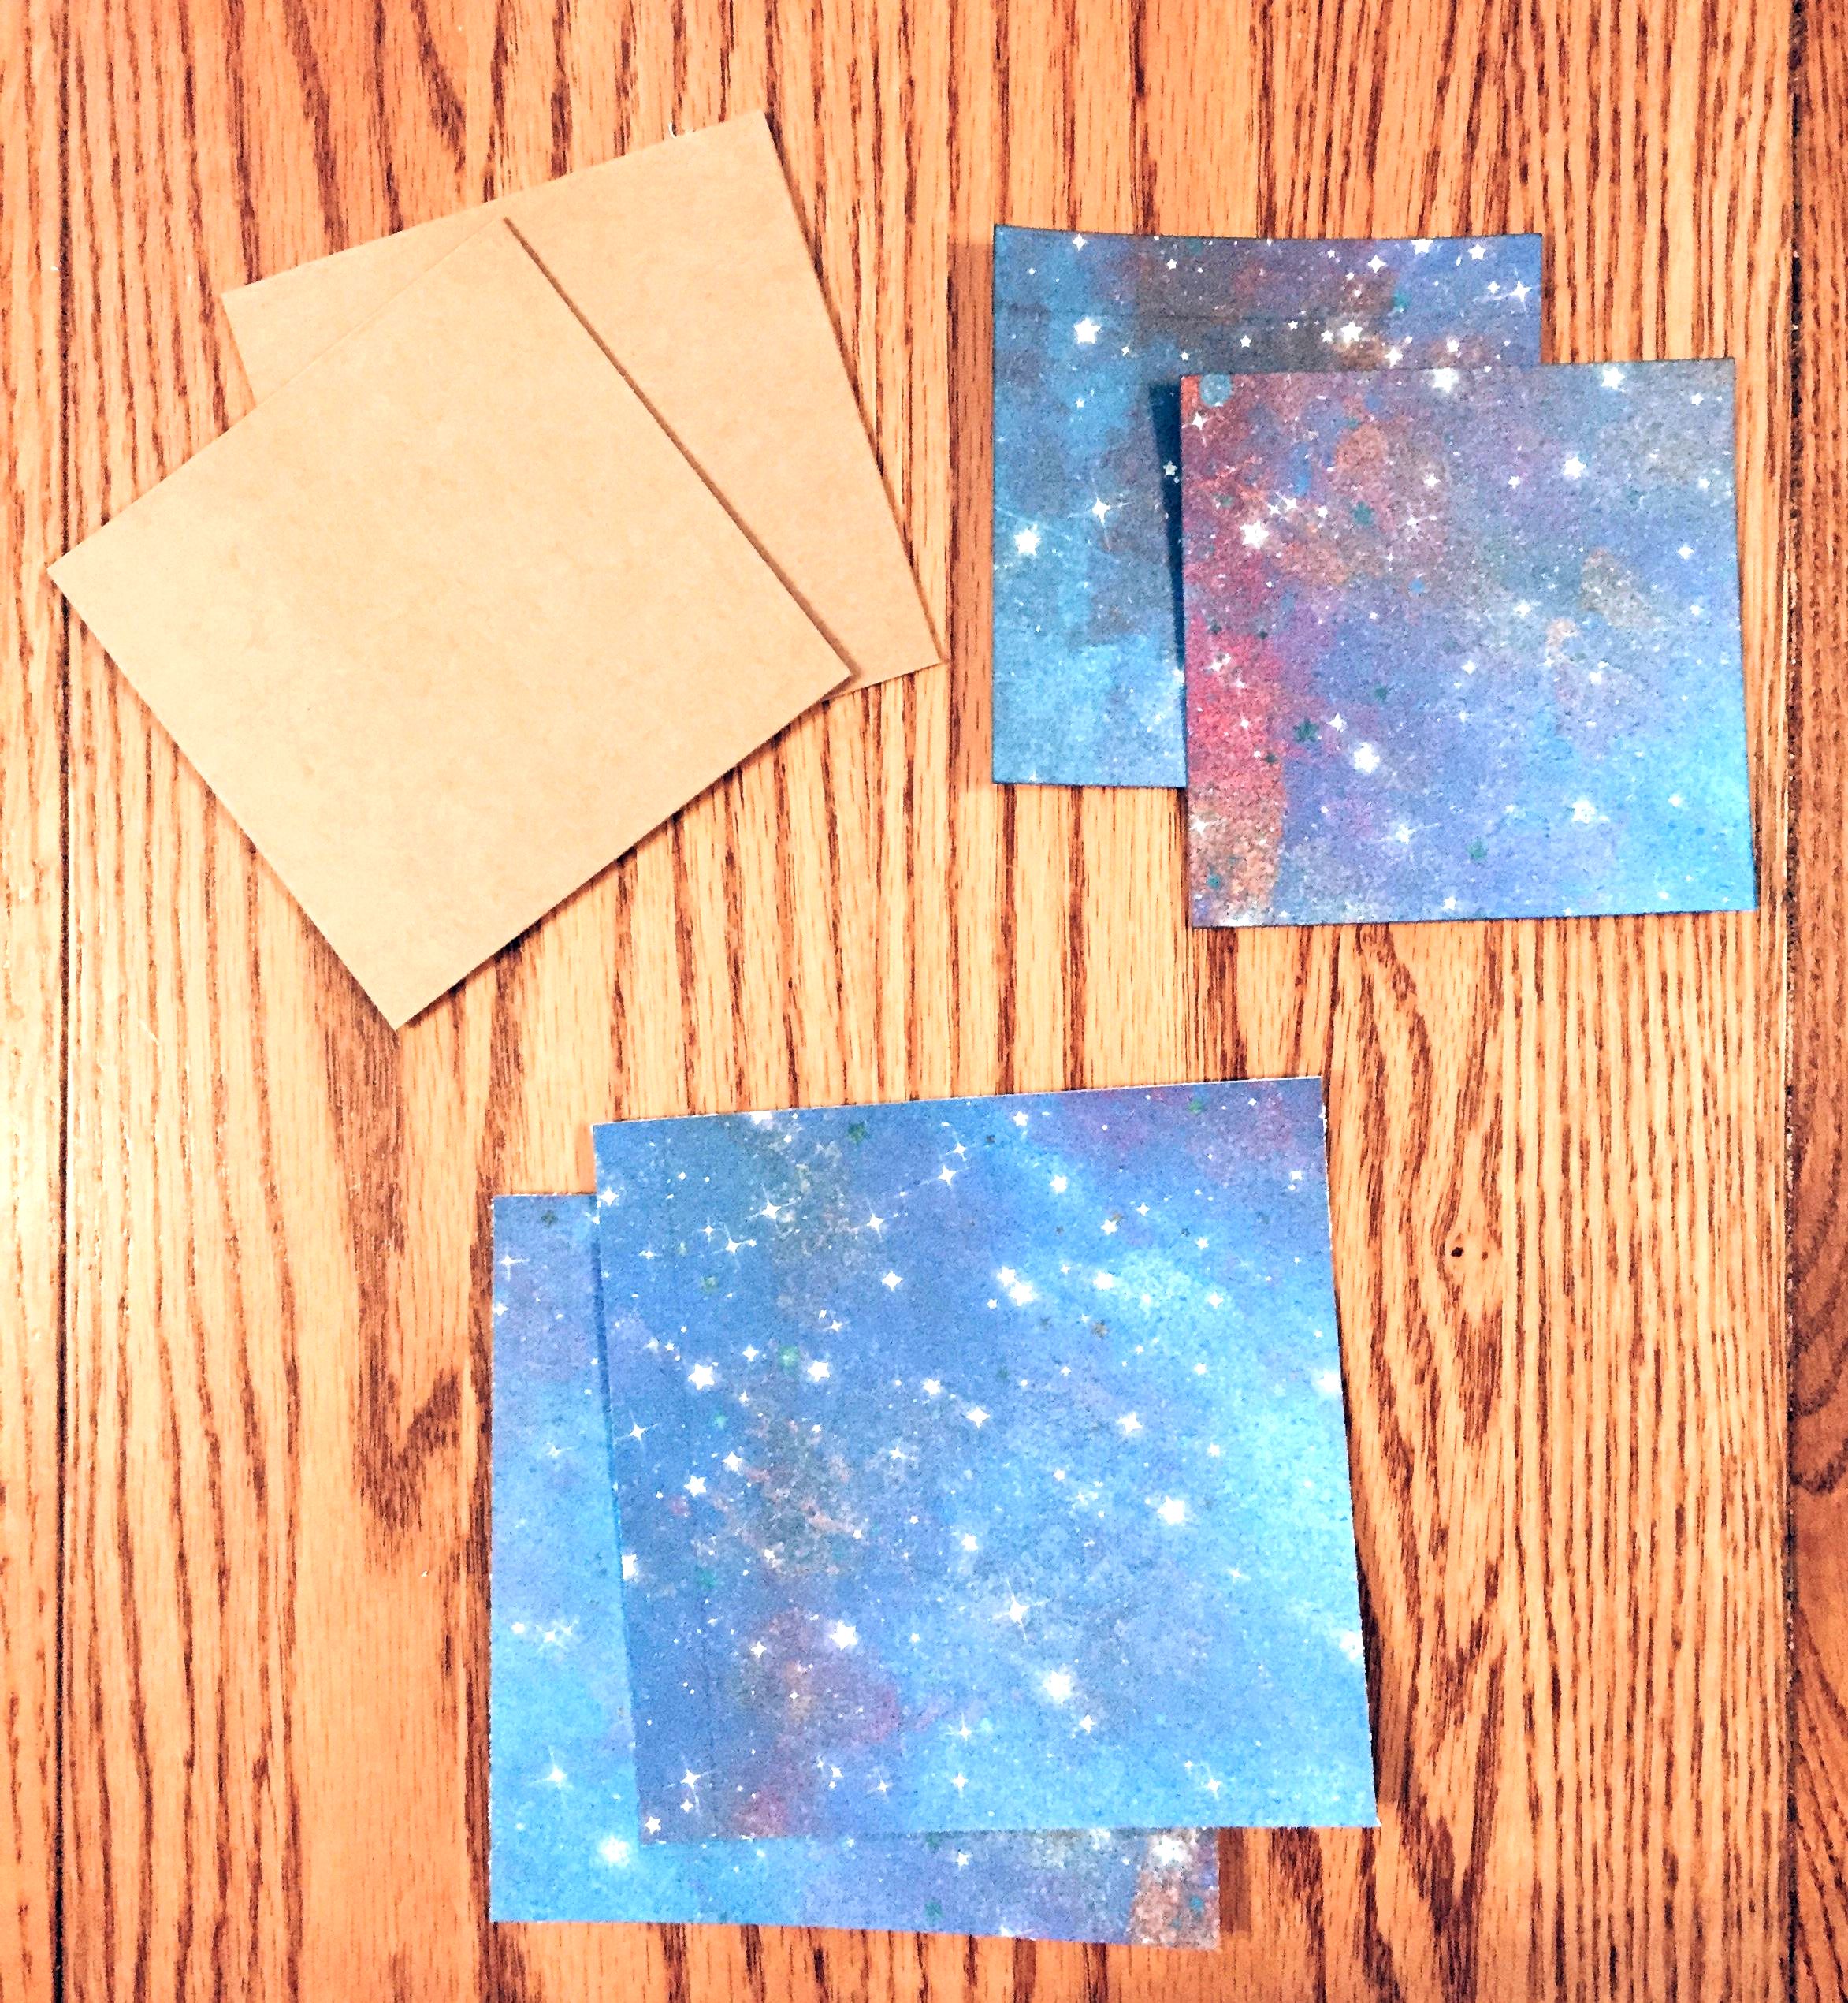
Because I didn’t already have celestial-style paper in my inventory, I made a trip to my local scrapbooking store, and discovered it only had paper with plain stars on a solid background, and Halloween-style paper that looked a bit garish for the purposes of this journal. The next best option was digital paper from an Etsy seller—something I can also re-use for other books. I researched a few options and shared them with my buyer, presenting a few ideas about how they could be combined with other options. In the end, the choices were narrowed down to one of the papers in the Galaxy Night Sky collection from FishScraps, and three celestial images from Sun and Moon Digital Collage Sheet, designed by Graphics Digital. If you use digital papers in a project you sell, by the way, make sure you check the seller’s policies. Some allow you to make and sell projects with their images, while others only allow for personal use. If in doubt, don’t make assumptions; check with the seller.

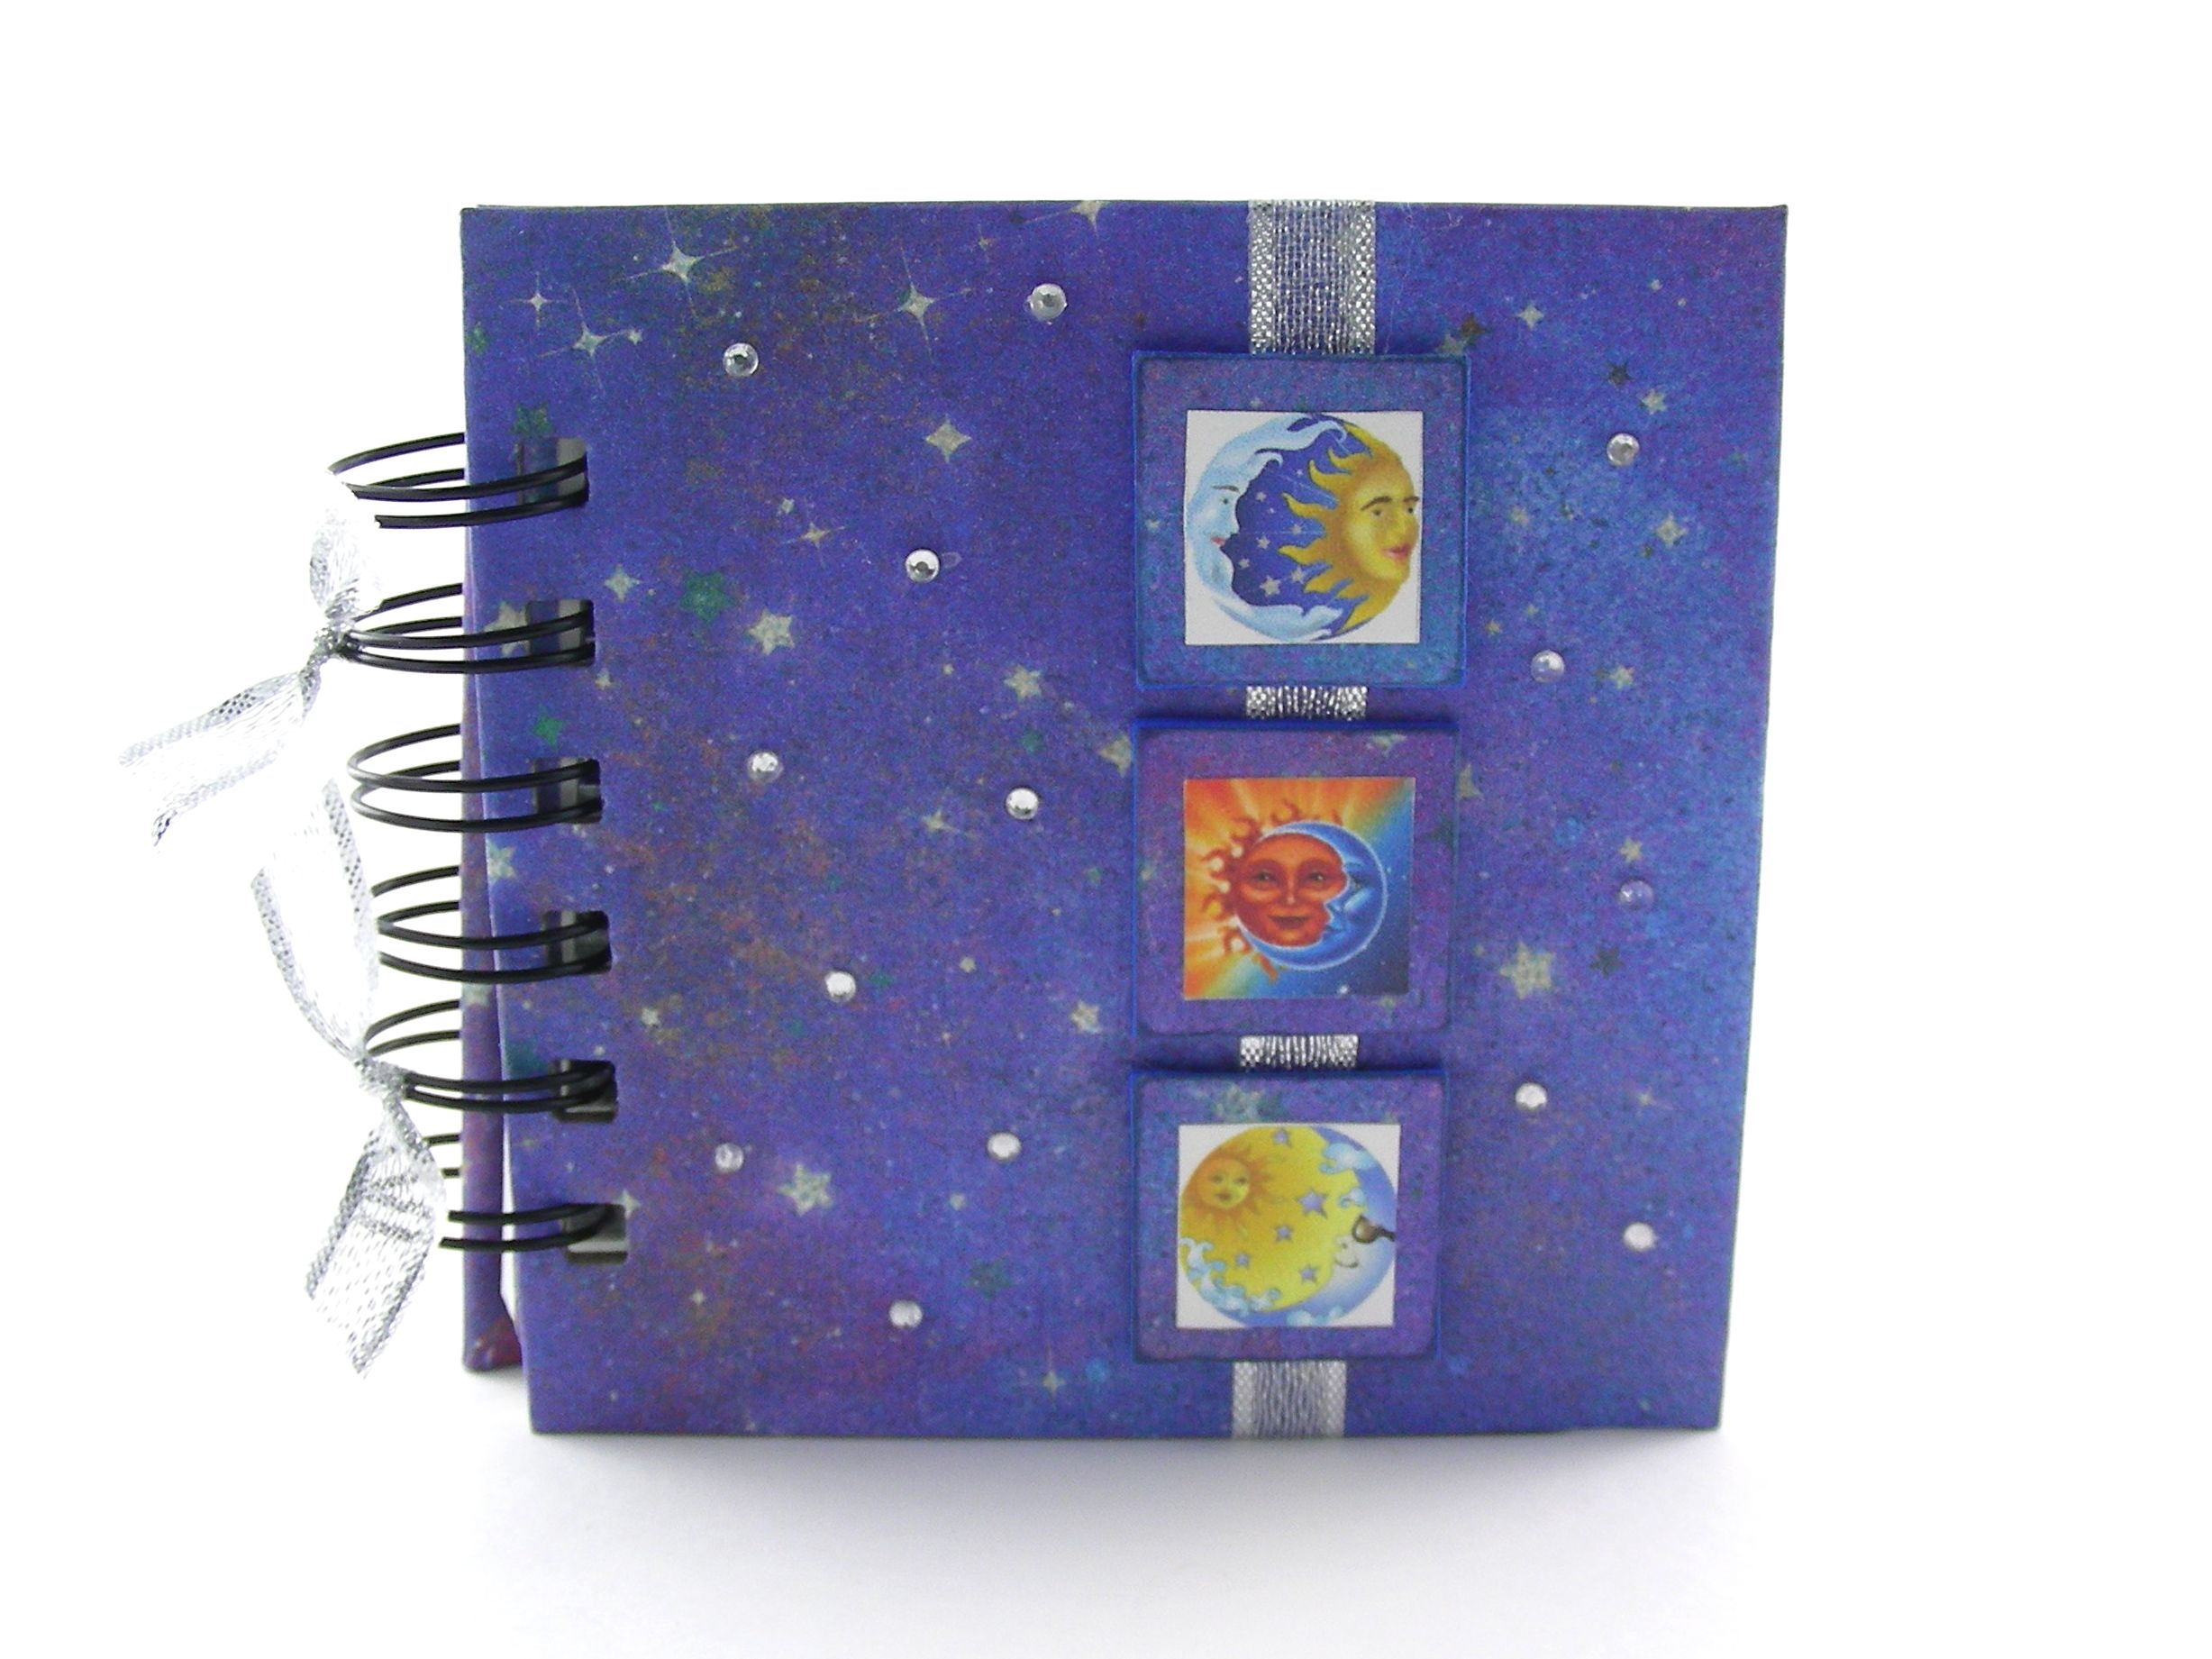
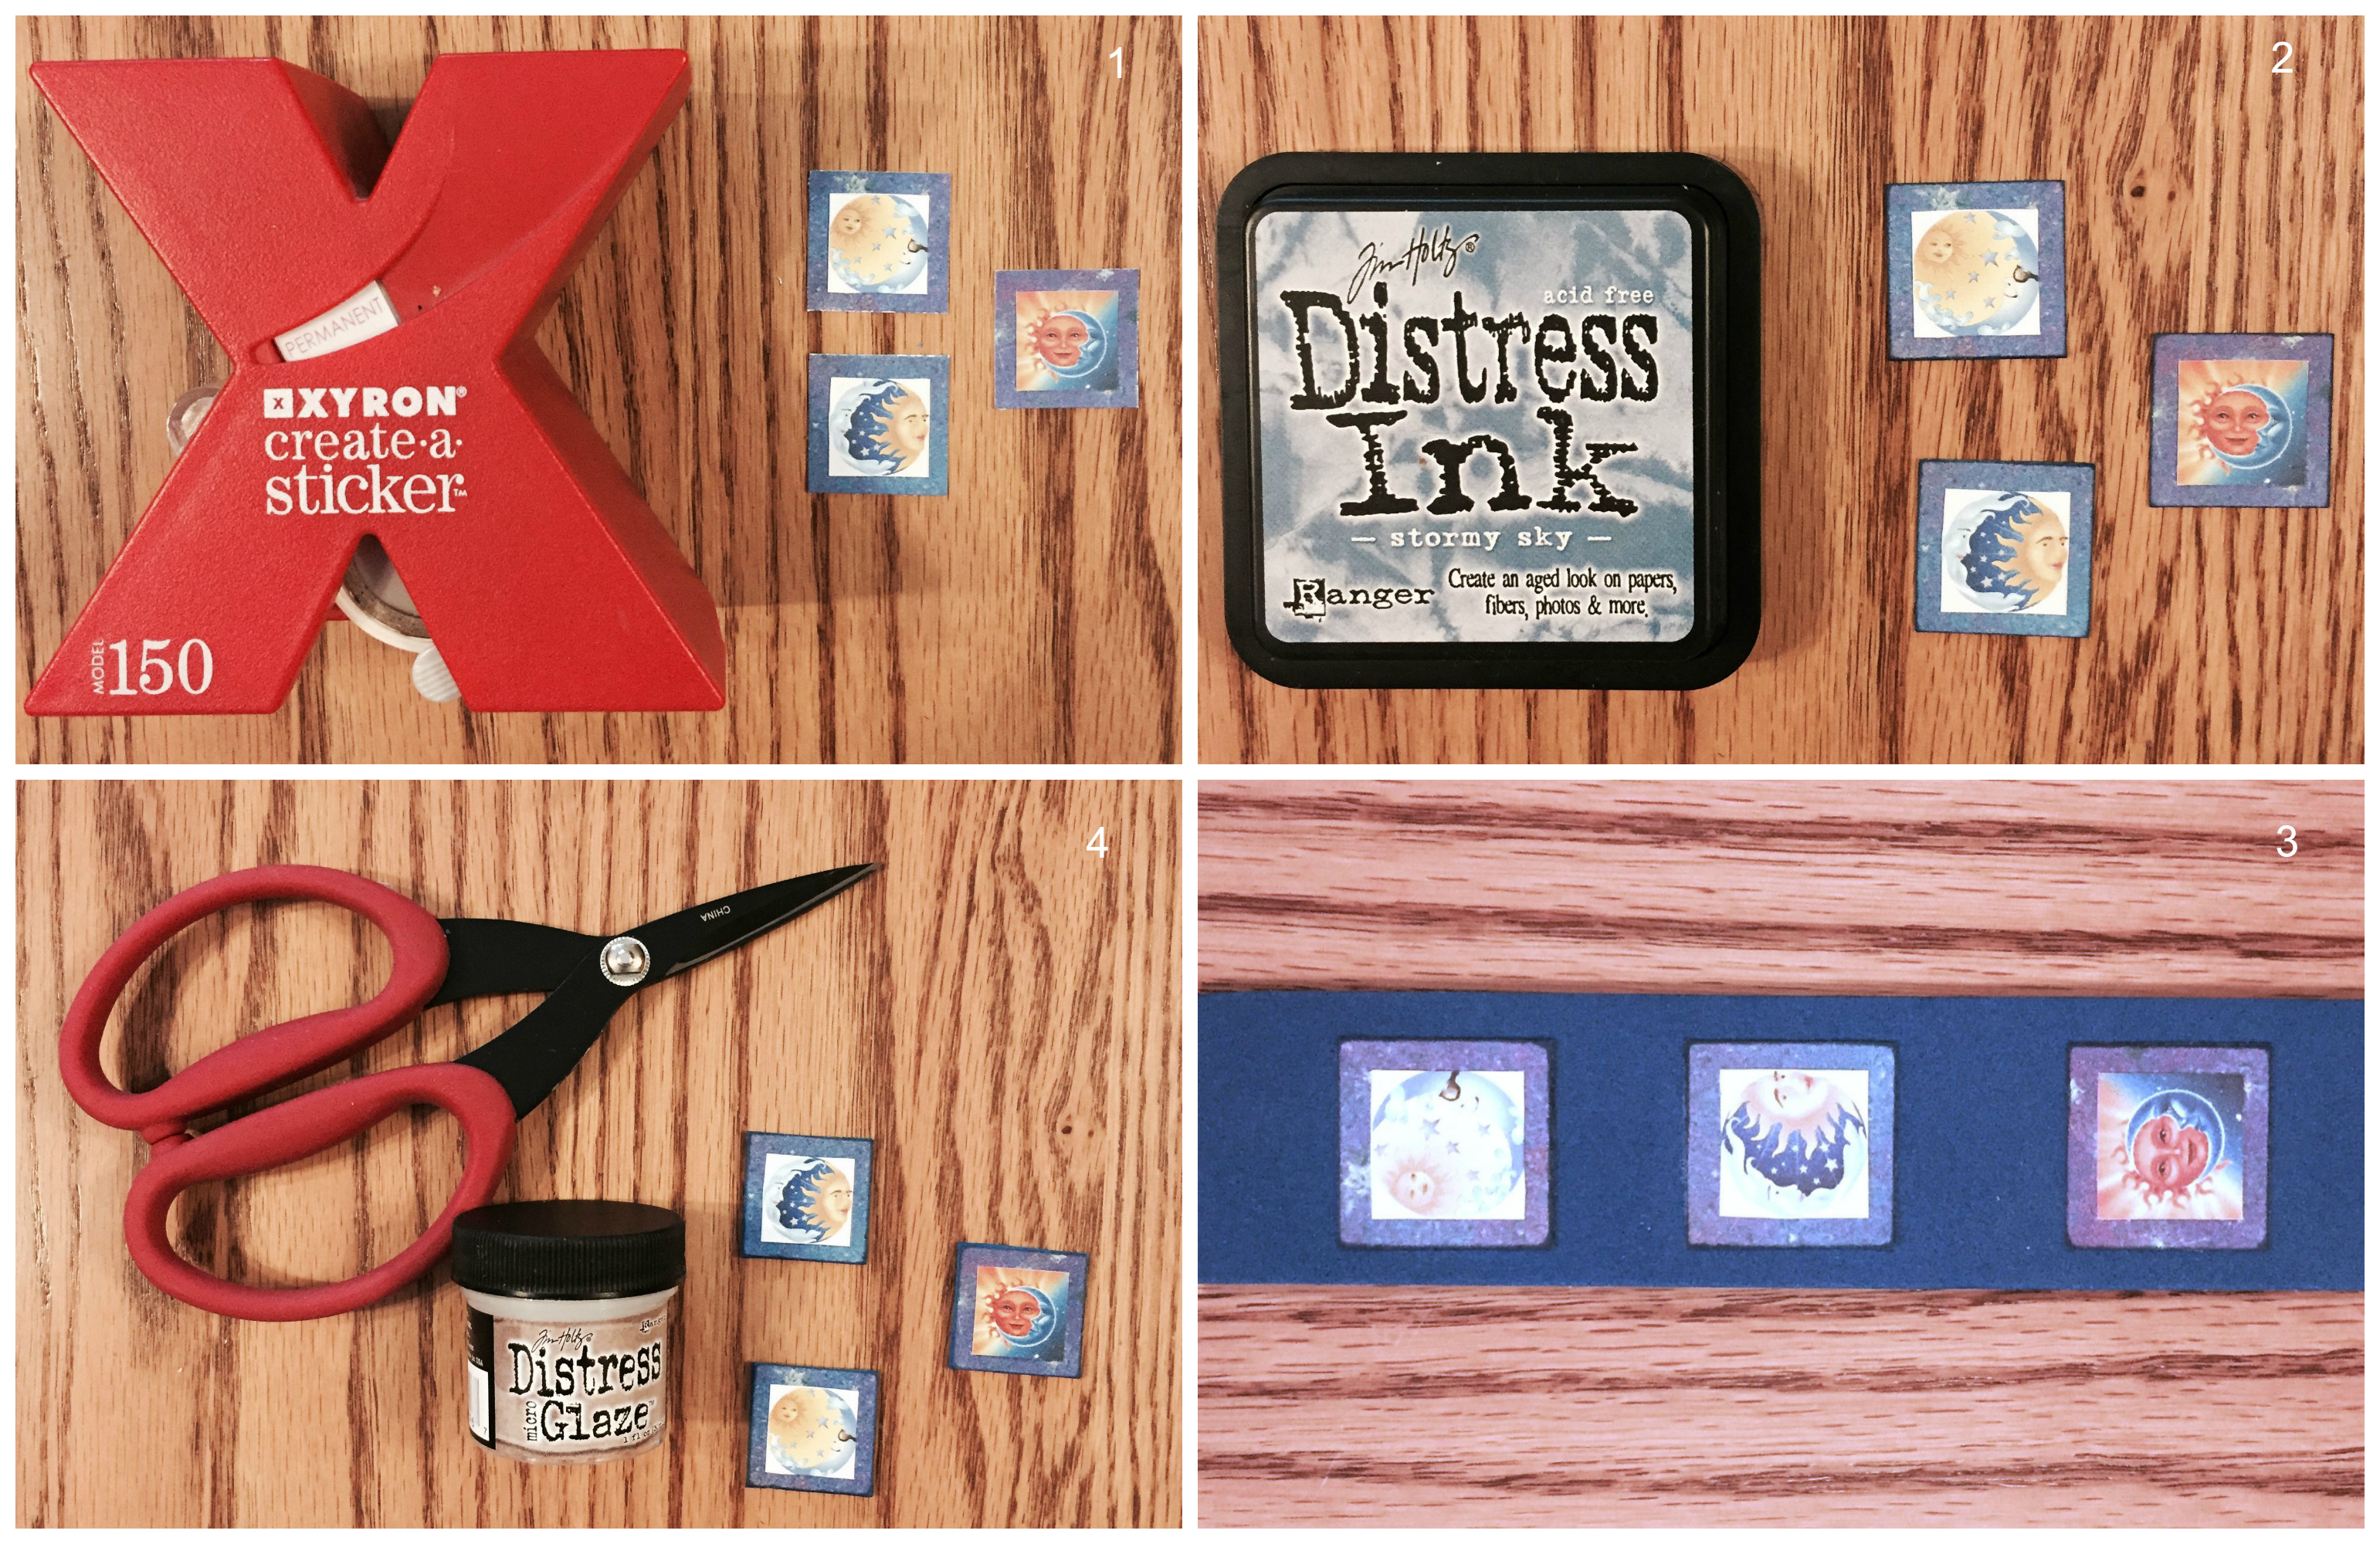
The first thing I had to figure out, once I began working on the order, was how to incorporate the celestial images. I had proposed making dimensional tiles with them, but the collage images were designed as one-inch tiles—a quarter-inch too large for a 4-inch by 4-inch journal after they are matted. I adjusted the settings within my printer’s dialog window, and “tricked†the printer into treating my paper as only six inches wide. This caused the collage images to print out as three-quarter-inch-wide tiles. Perfect! I matted them against one-inch squares of Galaxy Night Sky paper by running the celestial image squares through my Xyron® Create-a-Sticker™ (figure 1), then inked the edges with Tim Holtz Distress Ink in Stormy Sky (figure 2). I subsequently adhered the squares to craft foam to create dimensional tiles (figure 3). The last step was applying a sealant called Tim Holtz Distress Micro Glaze that makes the paper water-resistant (figure 4).
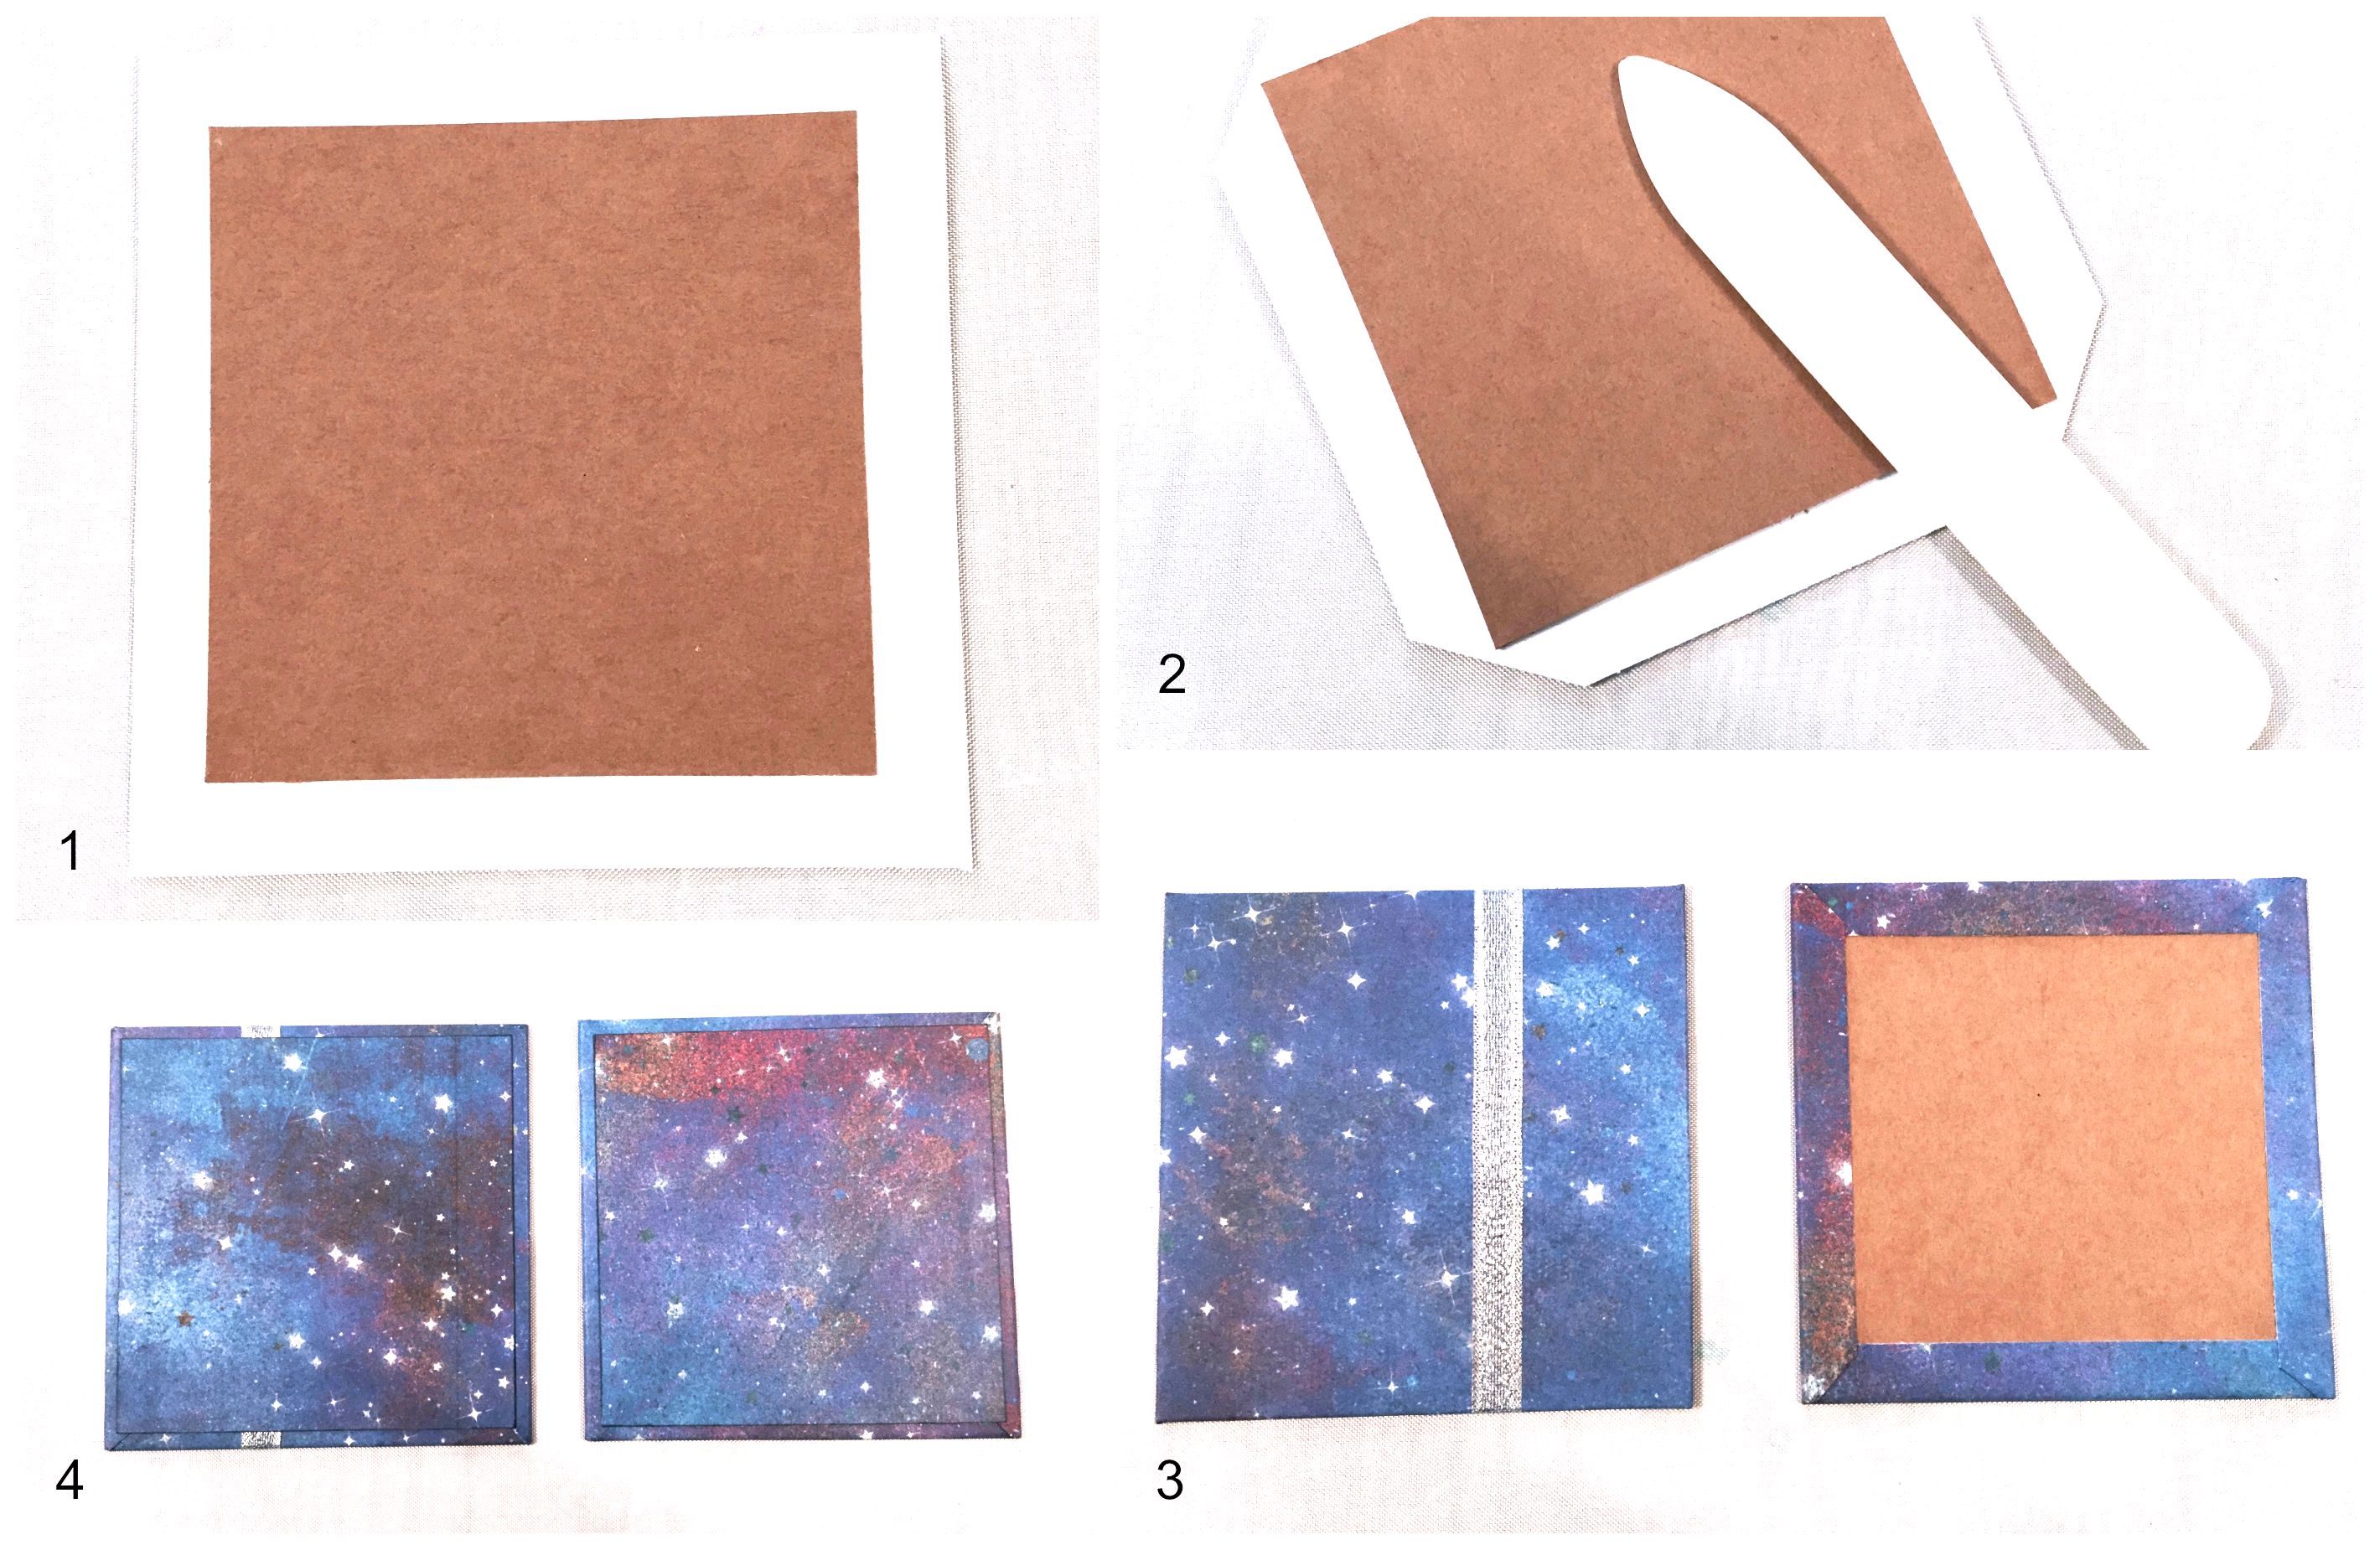
I set the tiles aside and began working on the cover. I always begin by cutting the chipboard and papers to size.
Then I adhered the paper to the chipboard and let it dry for a minute or so (figure 1). I sliced the corners off the paper for mitering purposes and scored around the edge of the chipboard (figure 2) with a bone folder (figure 2). This helps “train†the paper to fold more neatly around the edge of the chipboard when you adhere it to the chipboard (figure 3). I also applied silver ribbon down the front cover at this point, wrapping it to the inside cover. The last step involved adhering squares of paper to the inside front and back covers (figure 4).
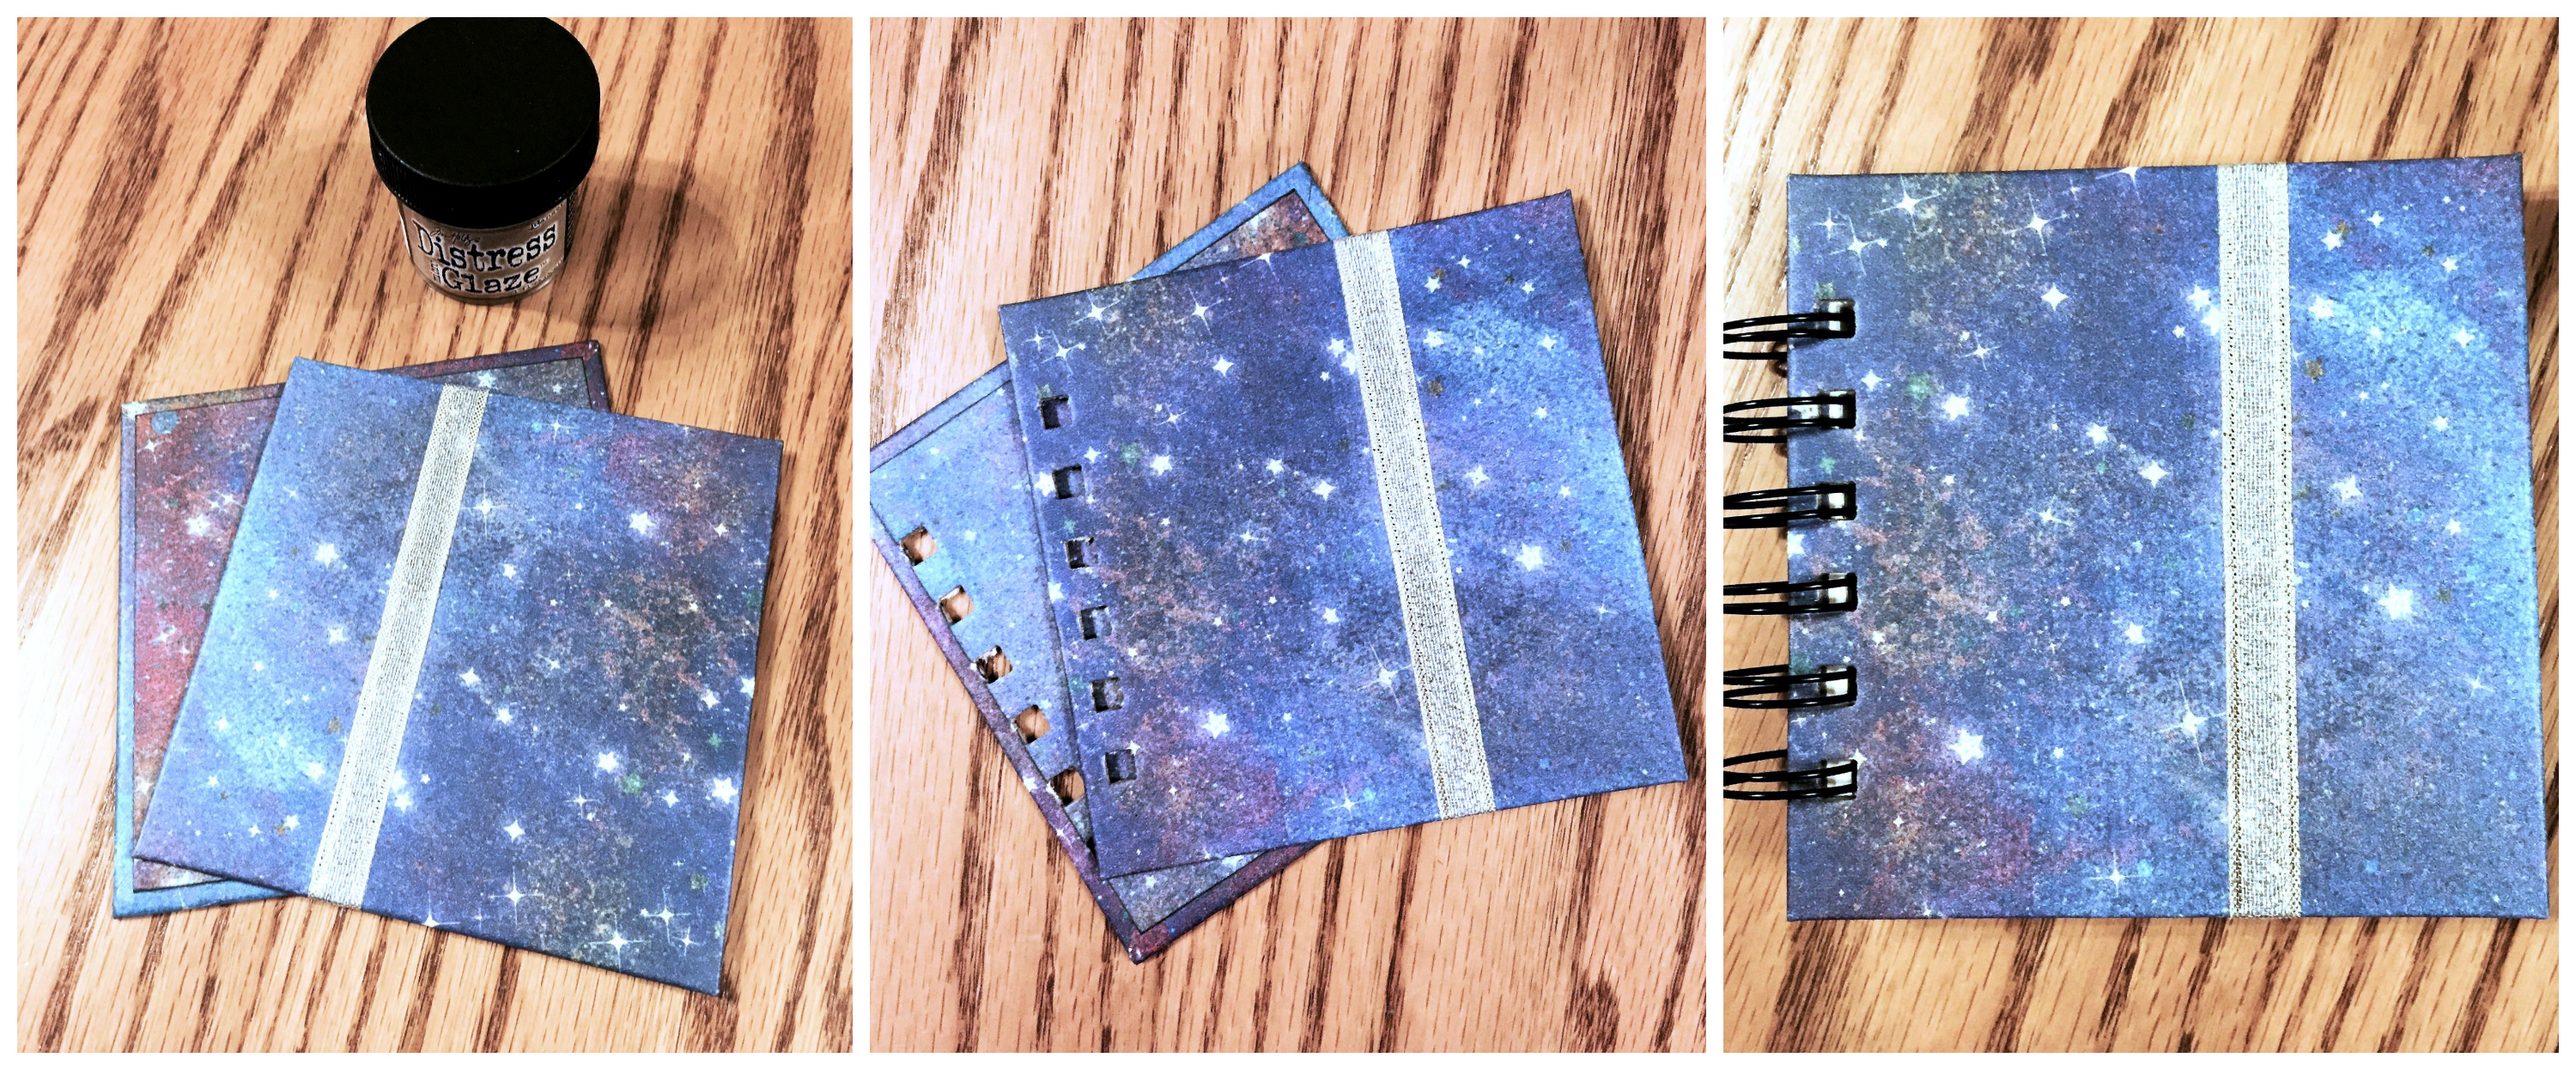
While I worked on the inside pages, I tucked the covers between two sheets of wax paper inside a book press. Without this step, the covers have a tendency to warp. I typically leave the book covers in the book press for at least a few hours, or overnight.

The inside pages were printed with my laser printer, four pages to a letter-sized sheet of paper. These were trimmed to size with my RotaTrim paper cutter (figure 1), after which I rounded off their corners with a Crop-A-Dile Corner Chomper (figure 2). Did you know that rounded corners tend to tear less than right-angle corners? That’s one reason for this extra step, but I also think it looks nice. The pages were pre-punched for spiral binding, for which I used my Cinch (figure 3). You can follow the directions on the platform of the Cinch to punch your papers, but I always use a paper jig for positioning because I think it’s faster and easier. This is simply a piece of cardstock that is the same size as the page, pre-punched with the appropriate number of holes and marked with a center line that aligns with the centering arrow on the Cinch. You can see the completed stack of punched pages in figure 4.

After I removed the covers from the book press, I applied micro glaze to them (first image). This is especially important for inkjet-printed papers, as you never know how colorfast the ink is. The protectant does not waterproof the paper, but it does make it water-resistant. I punched holes in the cover to match the holes in the pages (second image), and finally assembled the entire book, fastening everything together with an owire (third image).
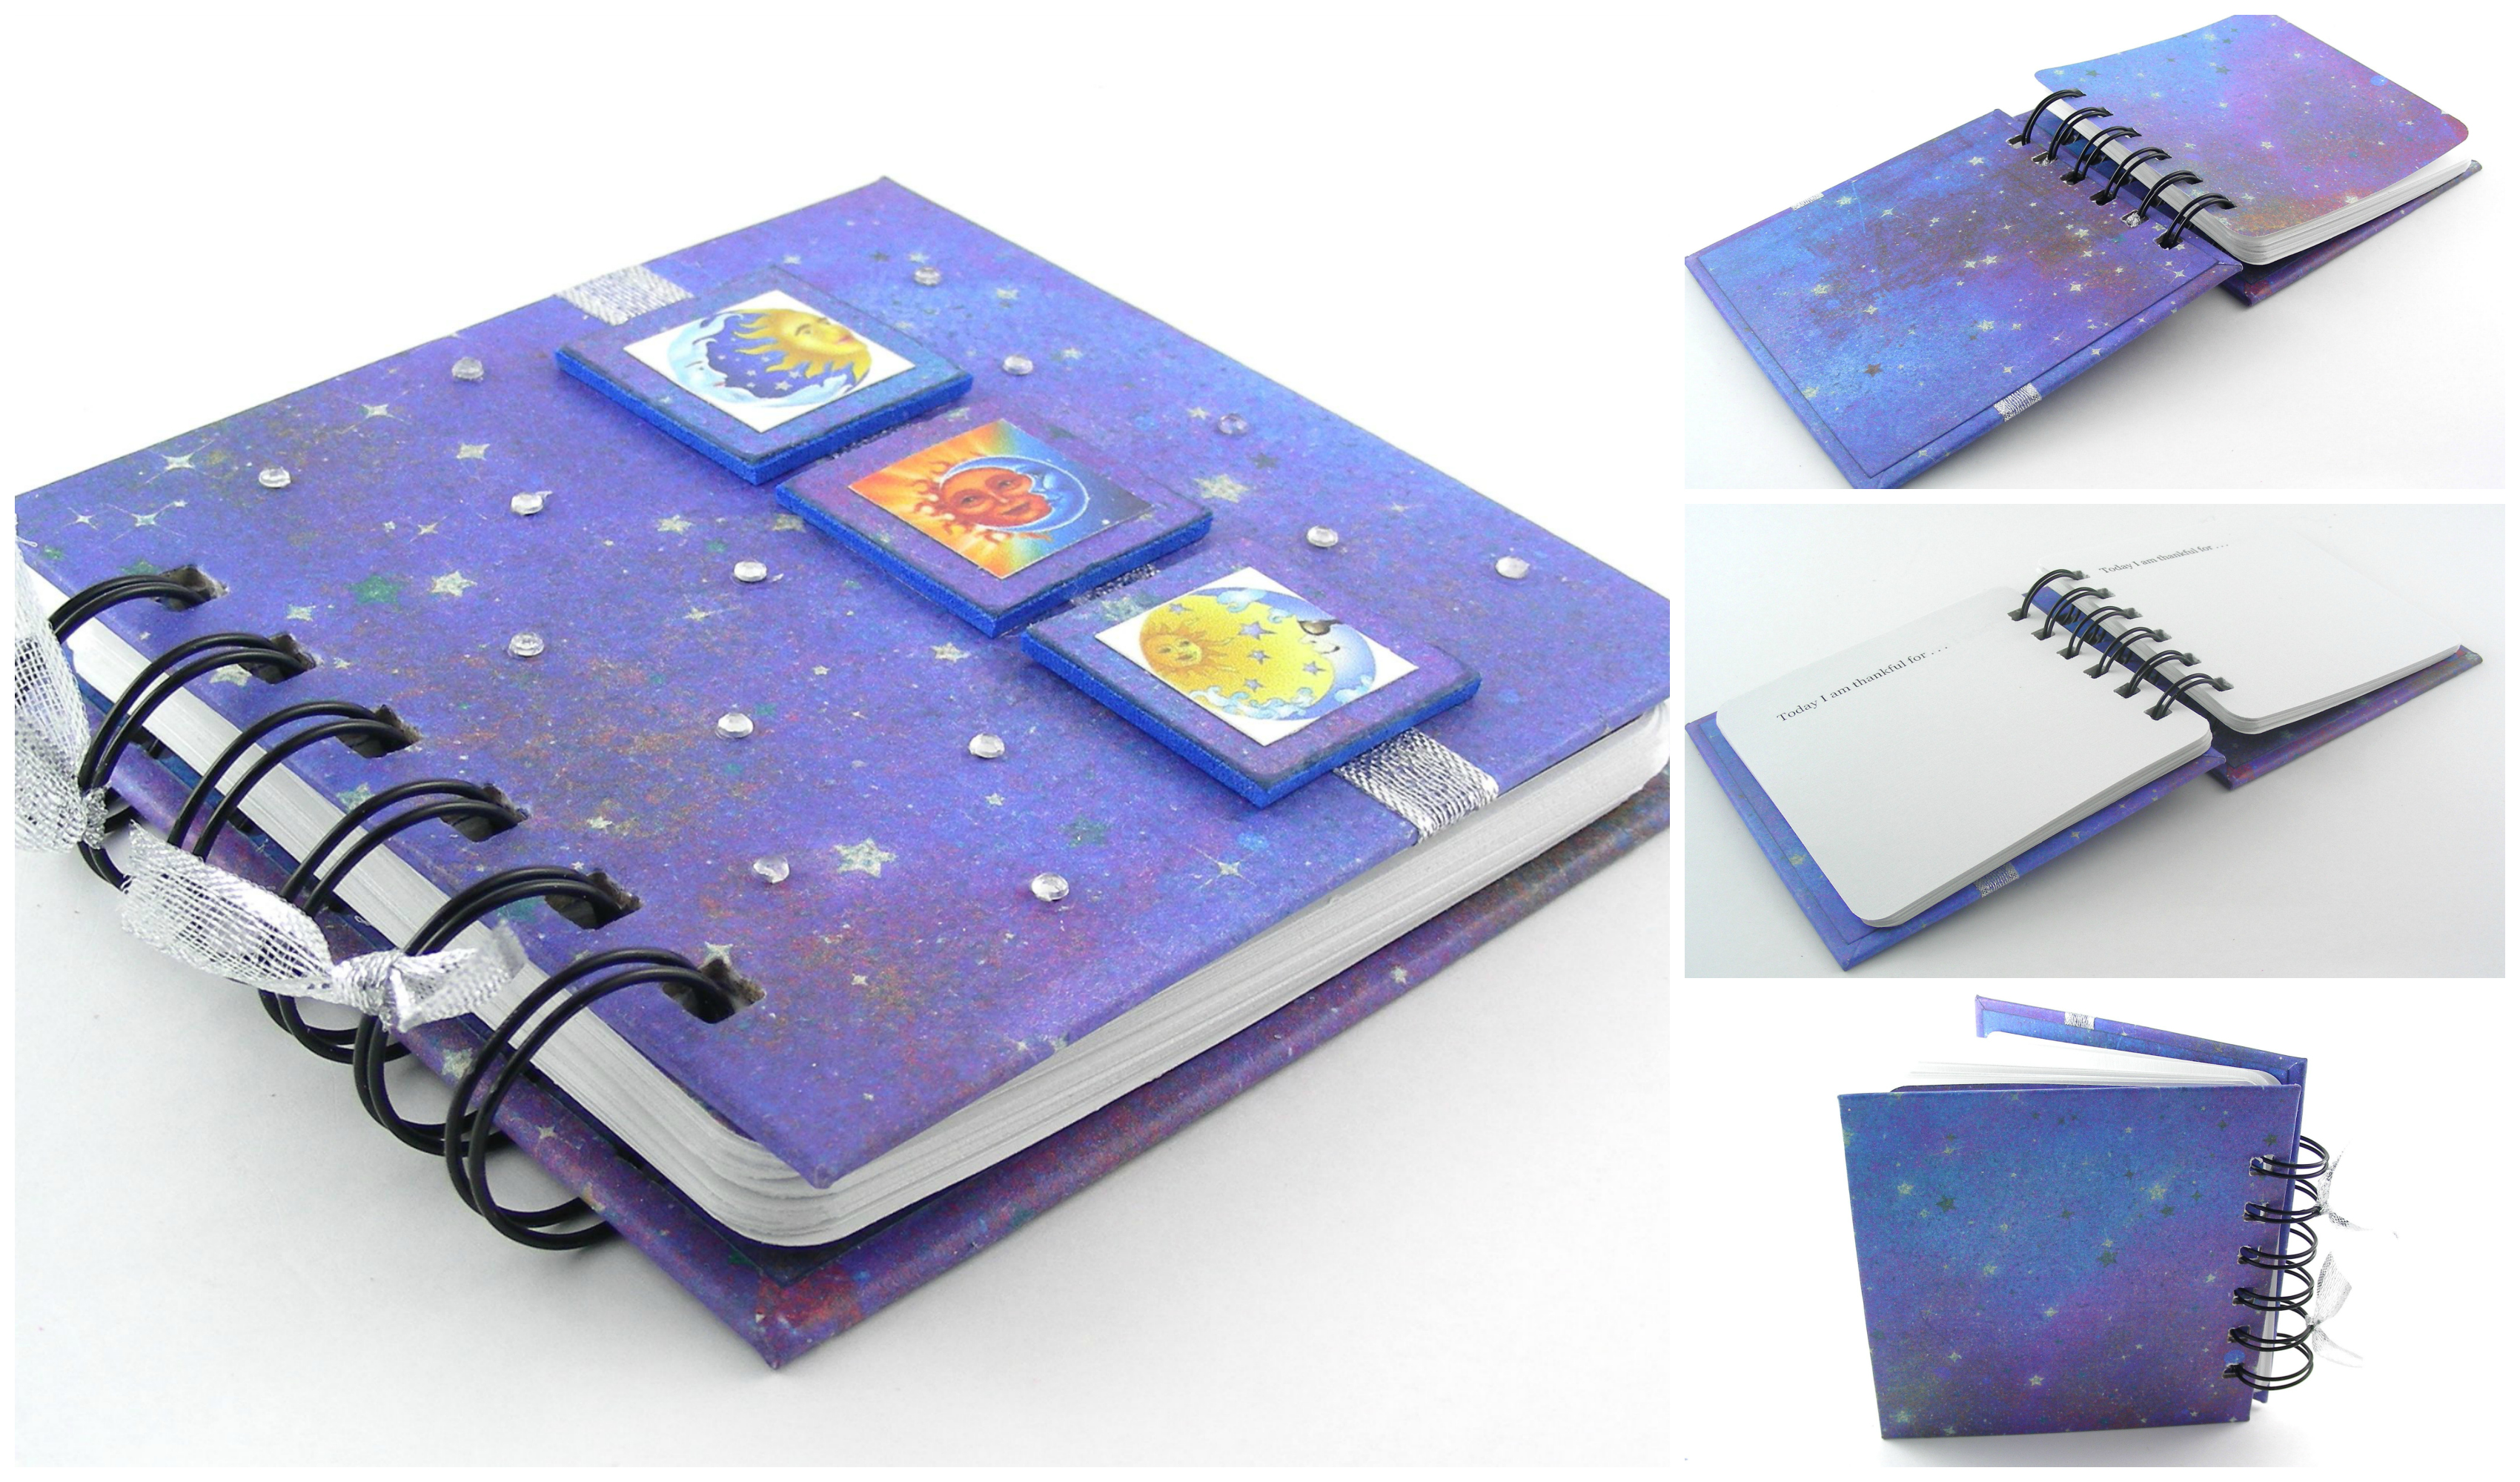
The last stage of book design is always my favorite: embellishing the cover. As you can see below, I adhered the foam-backed tiles to the ribbon. Then, because I knew my buyer/friend likes a little bling, I adhered some tiny crystals to the Galaxy Night Sky paper, which give the appearance of twinkling stars. I reinforced the sticky-back adhesive on the crystals with Ranger Multi Medium Matte to make sure they won’t come off easily during the life of the journal. Finally, I tied some silver ribbon “bows†to the owire, something I do with nearly all of my journals. When the book was done, I took photos for this post and for my own records.
To be fair, most of the stages of development for this celestial-style journal are involved in my entire bookmaking process, except for the series of messages that initiated this particular order. But if you’ve ever wondered what goes on behind the scenes of one of my books, from “conception†to “giving birthâ€â€”especially if you have a custom request—now you know how things work. I really enjoyed customizing this gratitude journal for my buyer.
© 2015 Judy Nolan. All rights reserved.
It’s so interesting to see your whole production process! I don’t really work with paper, so a lot of this is new to me. I also think it’s funny how many messages are exchanged between some customers versus others. Back when I was still making wedding jewelry, we’d get to 20 messages all the time. Haha.
Beautiful! It is such a great idea to have a PDF with pictures of the options! I’m sure it really helps with communication.
This is a great way to show all your work putted behind your craft. I think way more appreciative for viewers to see all necessary steps for creating this special memories. Unfortunately I’m so involved with my art process and totally forget to documenting those steps, almost till it done 🙂 maybe I will have to make myself a timer to make me stop … well … I think I will do that today!!!
Love seeing the process! Very interesting! thanks for sharing it!
The journal turned out really nice — love the addition of the twinkling stars! I had no idea that so much went into making your journals 🙂
Great design! And I’m loving the periwinkle.