Although it’s not a new product line in my Mister PenQuin shop on Etsy, I took some time this week to make some Post-it® Note Mini Clipboards to add to the shop.You wouldn’t know it by looking at them, but there are a lot of tools and steps involved in making mini clipboards.
The materials
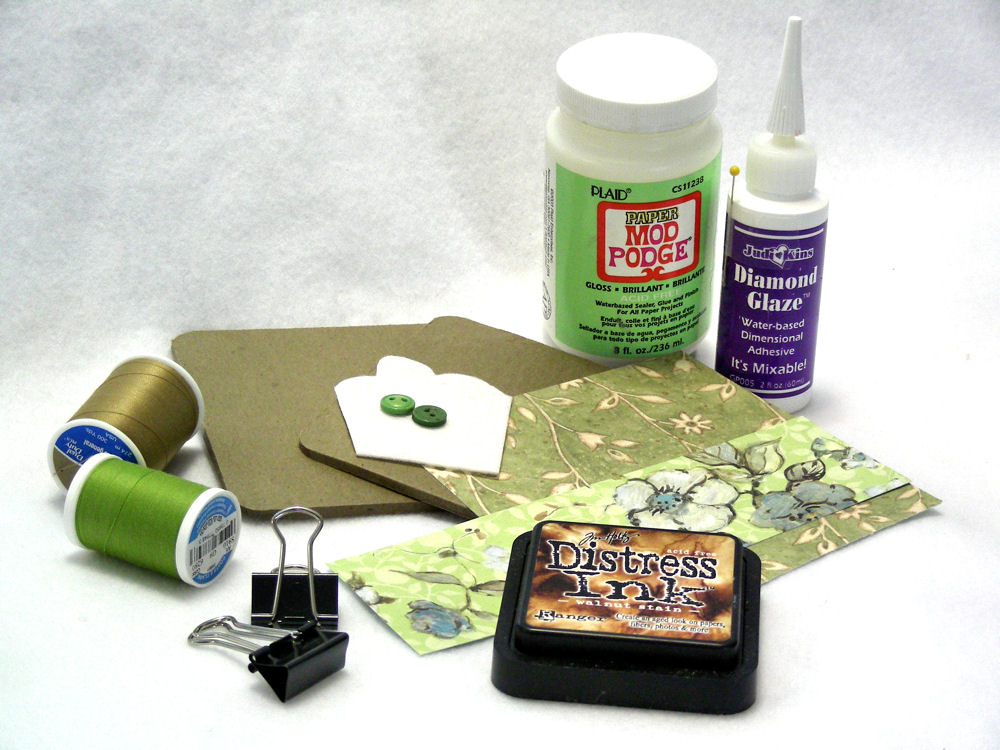
I start off by gathering the raw materials: chipboard, card stock, binder clips, heavyweight stabilizer scraps left over from sewing projects, buttons, thread, adhesives, and distress ink. Most of the mini clipboards I make are cut from old three-ring binders that have seen better days. The chipboard behind the vinyl covers is much thicker than any chipboard I can find locally, and the price is certainly right. As for the card stock, I use designer scrapbook paper left over from other projects. I store my scraps by color group inside sheet protectors in a three-ring binder. How do you store your paper scraps?
The tools
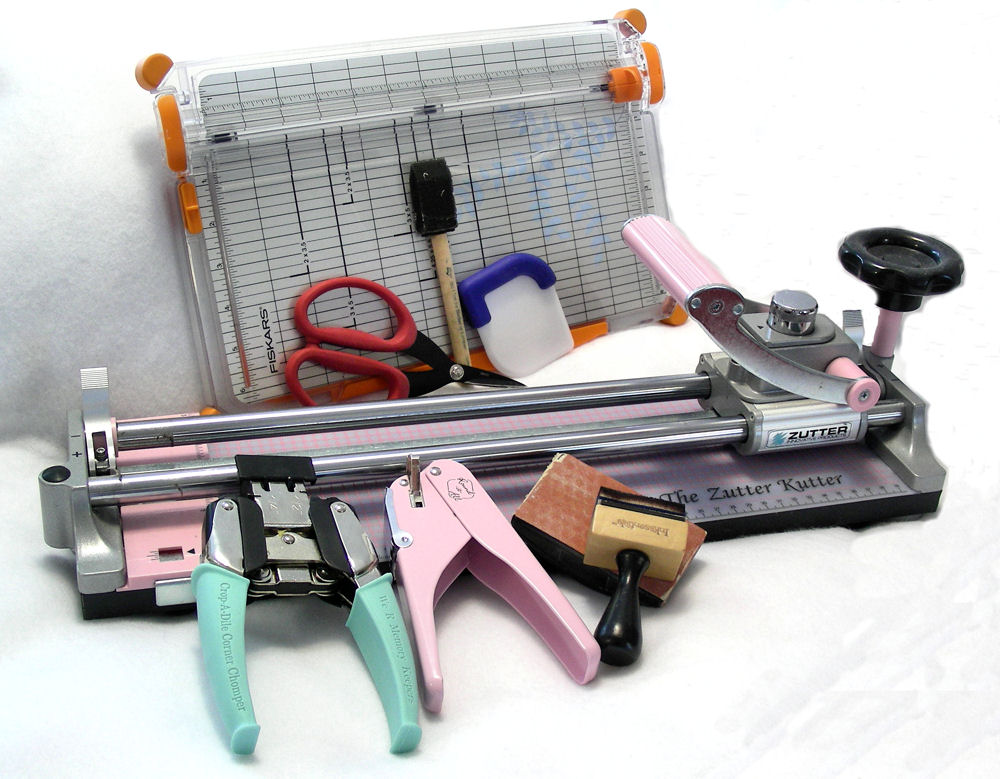
Next, I gather my tools: Zutter™ Kutter to cut the unusually thick chipboard, Round-it-All to round the chipboard corners, paper cutter to cut the card stock and Crop-A-Dile Corner Chomper to round the corners, sanding block, foam brushes to apply adhesive and distress ink, cutting dies and Sizzix® Big Shot to cut flower layers from card stock, and a petal roller to curve flower petals. Adhesive is applied to the chipboard with a foam brush before I glue the card stock to the chipboard squares. I use a pot scraper to smooth the adhesive evenly; if you have an old plastic credit card or gift card lying around, that works well, too.
As I complete the paper gluing step, I stack chipboard squares beneath a heavy stack of magazines to give the paper time to dry and the chipboard-and-paper combination a chance to form a strong bond. I separate the layers with ordinary kitchen cellophane wrap so there is no chance for one chipboard square to accidentally stick to another one. (Sadly, this is based on experience.) After a couple of hours (or the next day, depending on how much time I have), I use scissors to trim the excess paper from the chipboard squares. I sand the edges smooth with a sanding block, then ink the edges with distress ink, mainly because I like how the walnut-colored ink looks, compared to the naked card stock.
When the chipboard squares are completely finished, I dig into my card stock scraps once more, seeking the best colors and prints that will coordinate with the decorated chipboard squares. Some of that card stock is used to cover a binder clip, while the rest of it is used to make layered flowers. I use cutting dies from different companies to cut the petals, curve them with a petal roller, stack them and sew them together with a button on the center front, and a circle of heavyweight stabilizer on the back. The flower is fastened to the binder clip with the help of a little adhesive to make it more secure.
The results
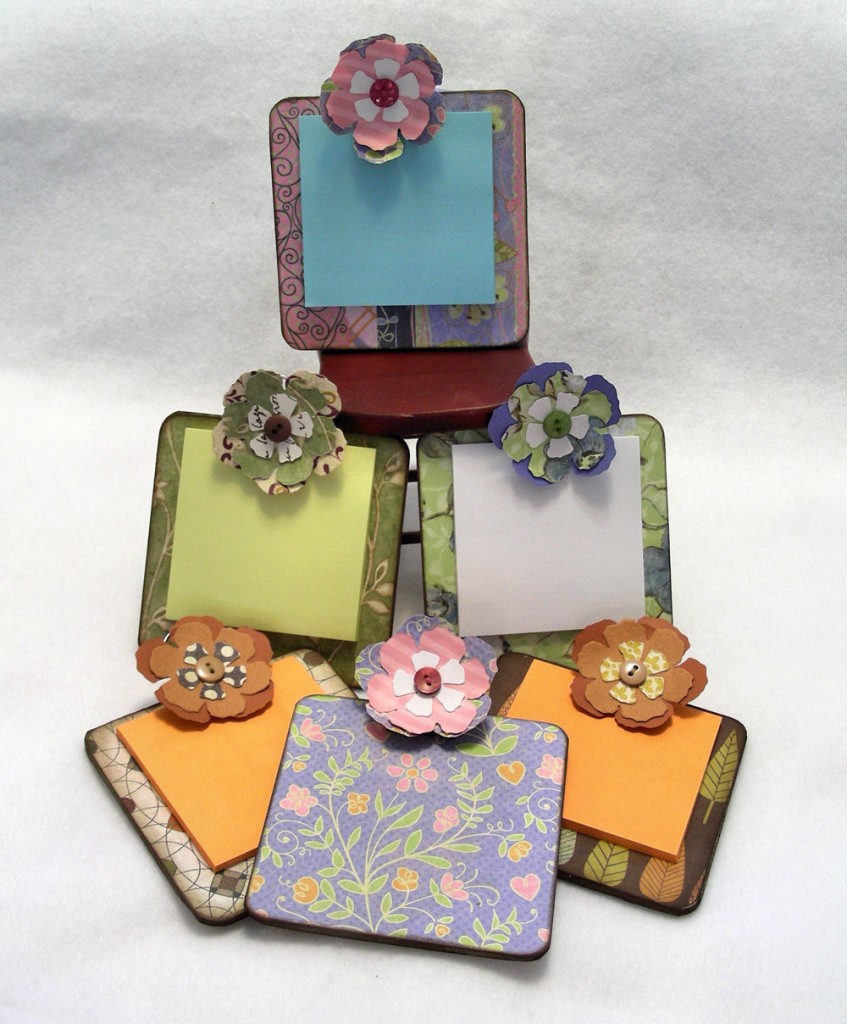
When the mini clipboards are finished, a process that takes two to three evenings to complete, it’s fun to lay them out and compare them. No two clipboards are ever exactly alike. It feels good to be able to use materials that many people would discard. What are some items that you make using recycled materials?
© 2012 Judy Nolan. All rights reserved.


That was fun! I liked seeing your big pile of supplies 🙂
Using old clipboards is a great idea! Your mini clipboards are great. I love how each one is different.
the clipboards will make for nice teacher gifts!
Beautiful! It was nice to learn a bit about your process…those are materials I’ve never used before.
What a beautiful way to recycle and to start enjoying writing sticky notes! This is inspiring me to make some mini clipboards for myself to hold stacks of recycled office paper that’s been cut into 4-1/4 x 5-1/2″ pieces.
I appreciate your idea for using the inside cardboard in old binders, too – what a clever thing to think of, and taking advantage of the extra sturdiness of it.
Question -which size corner rounder do you use for the chipboard covers? I love the way they look! Than you for sharing.