Sitting at the foot of the basement stairs is a box piled high with sewing projects I haven’t gotten around to starting. “What’s that red and black and white stuff?” asked John. “Maybe you need to donate it.”

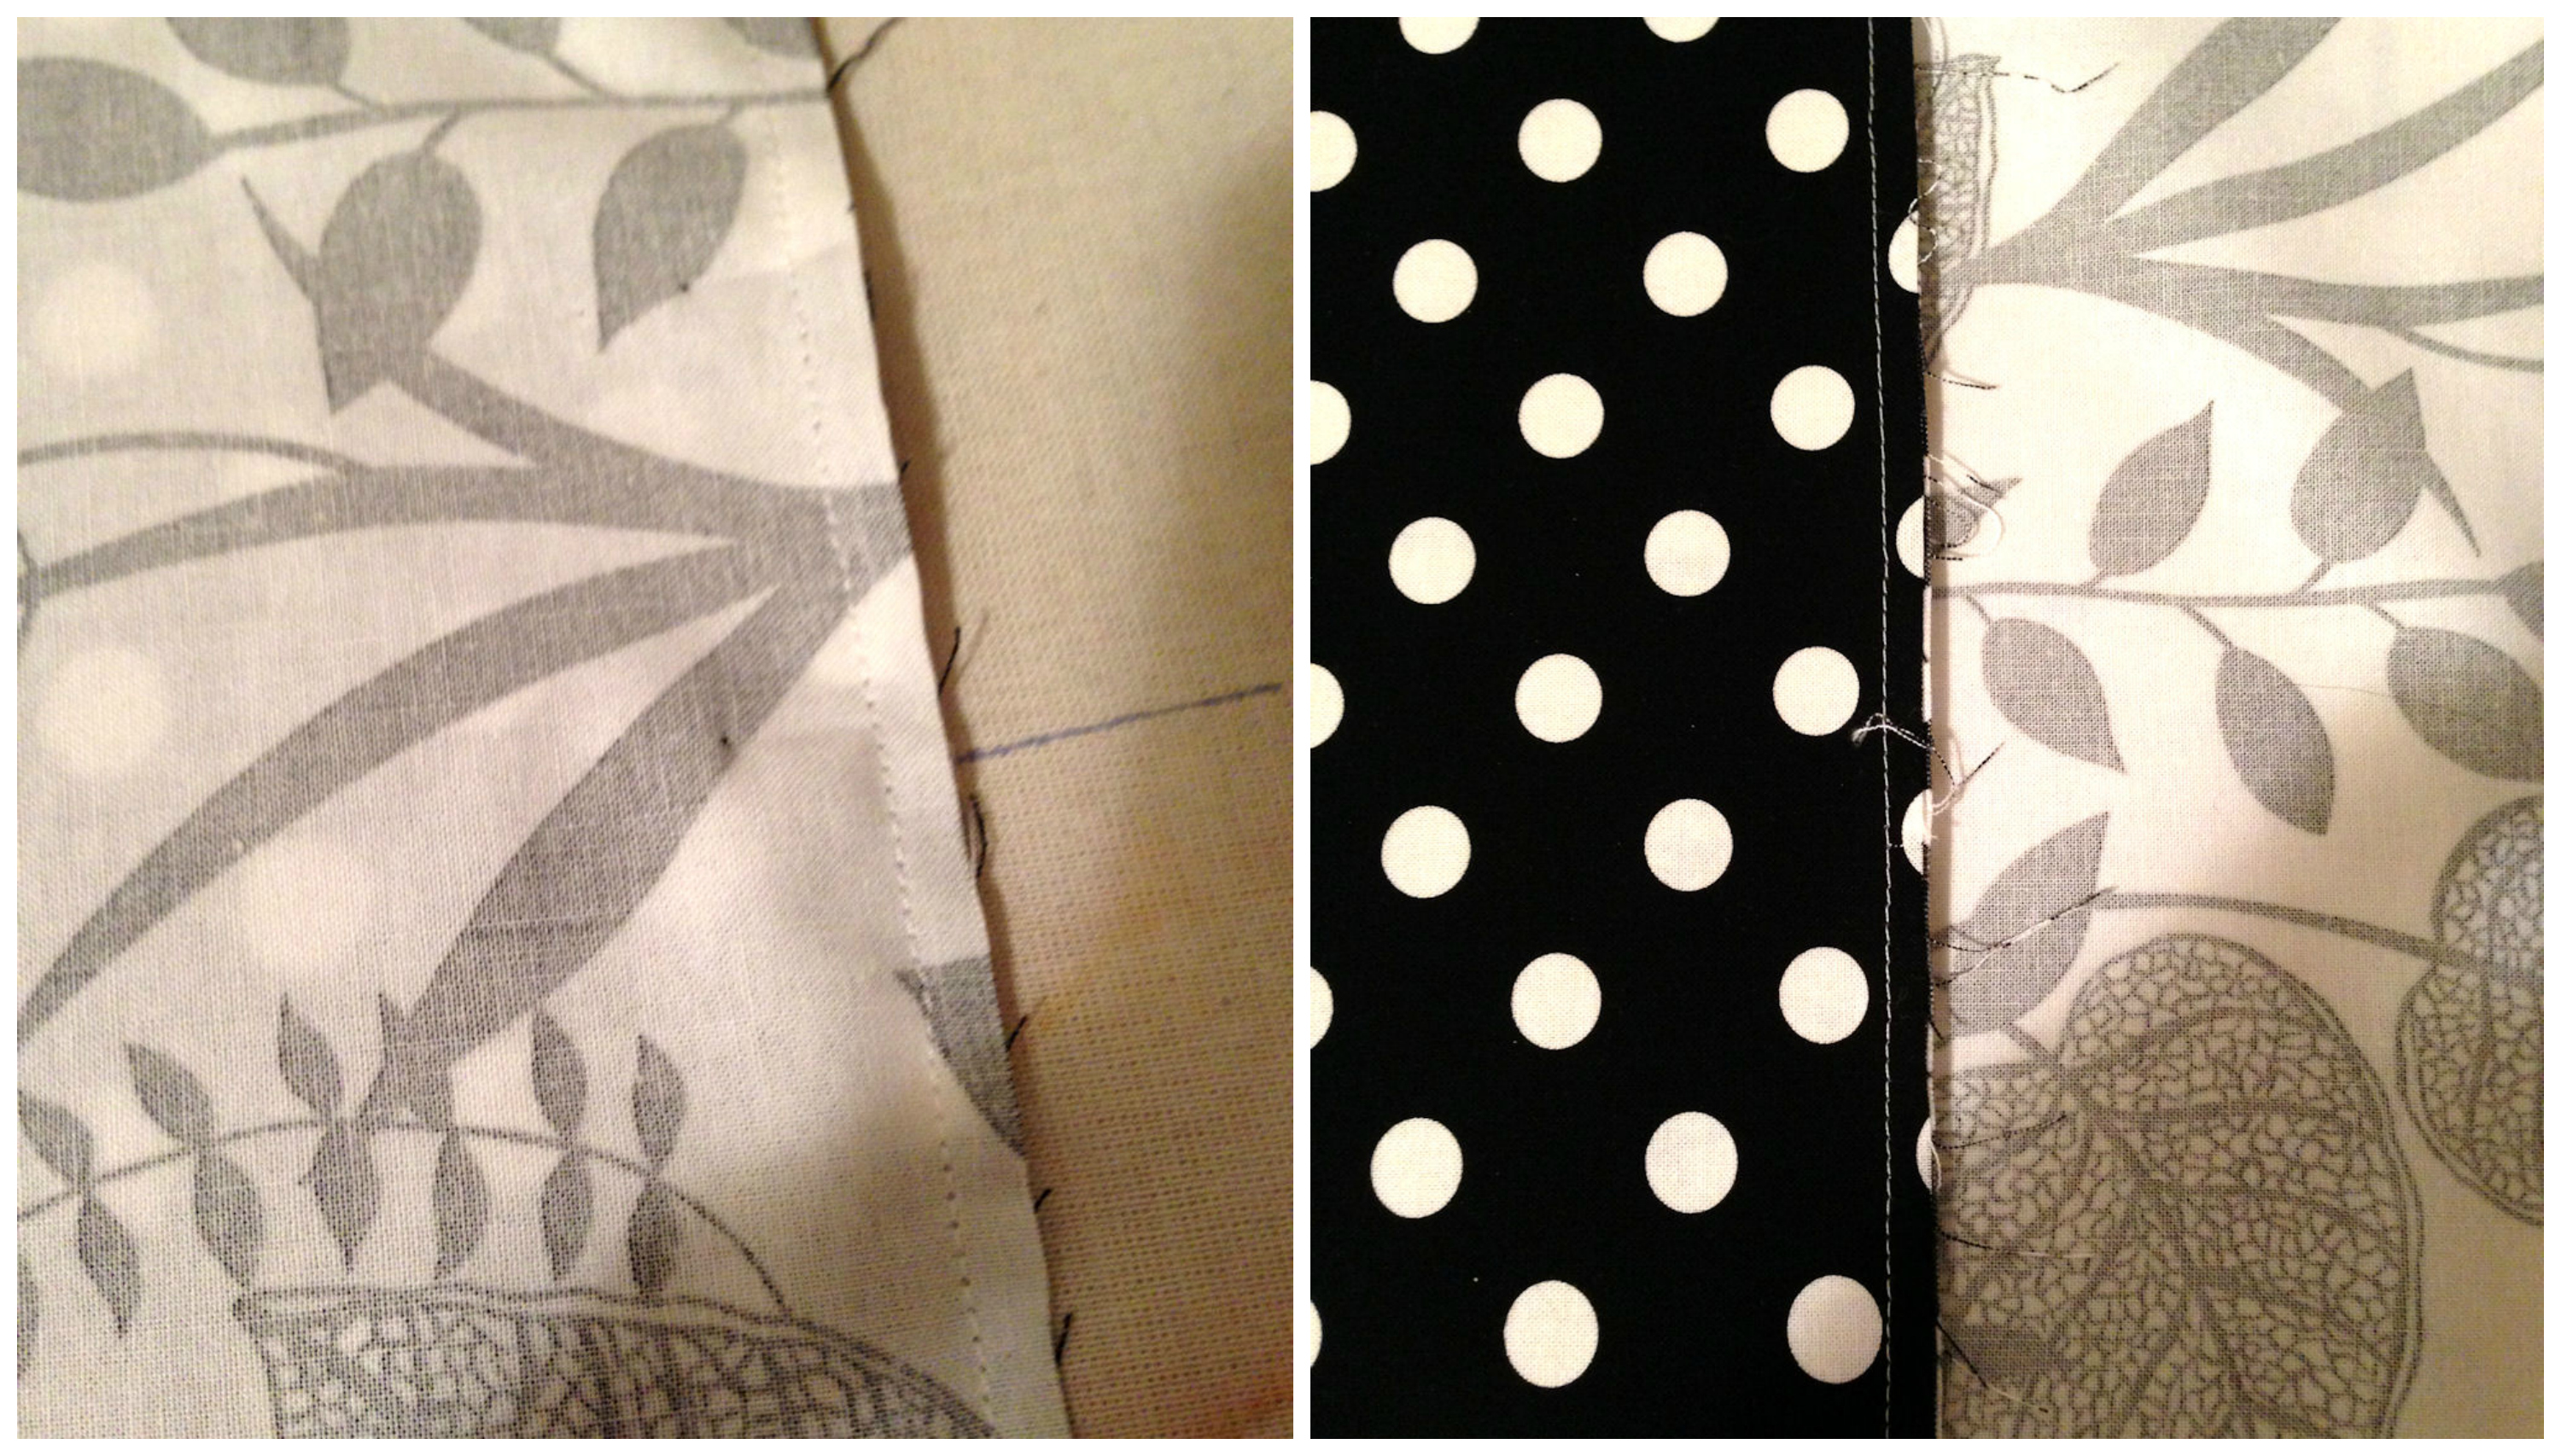
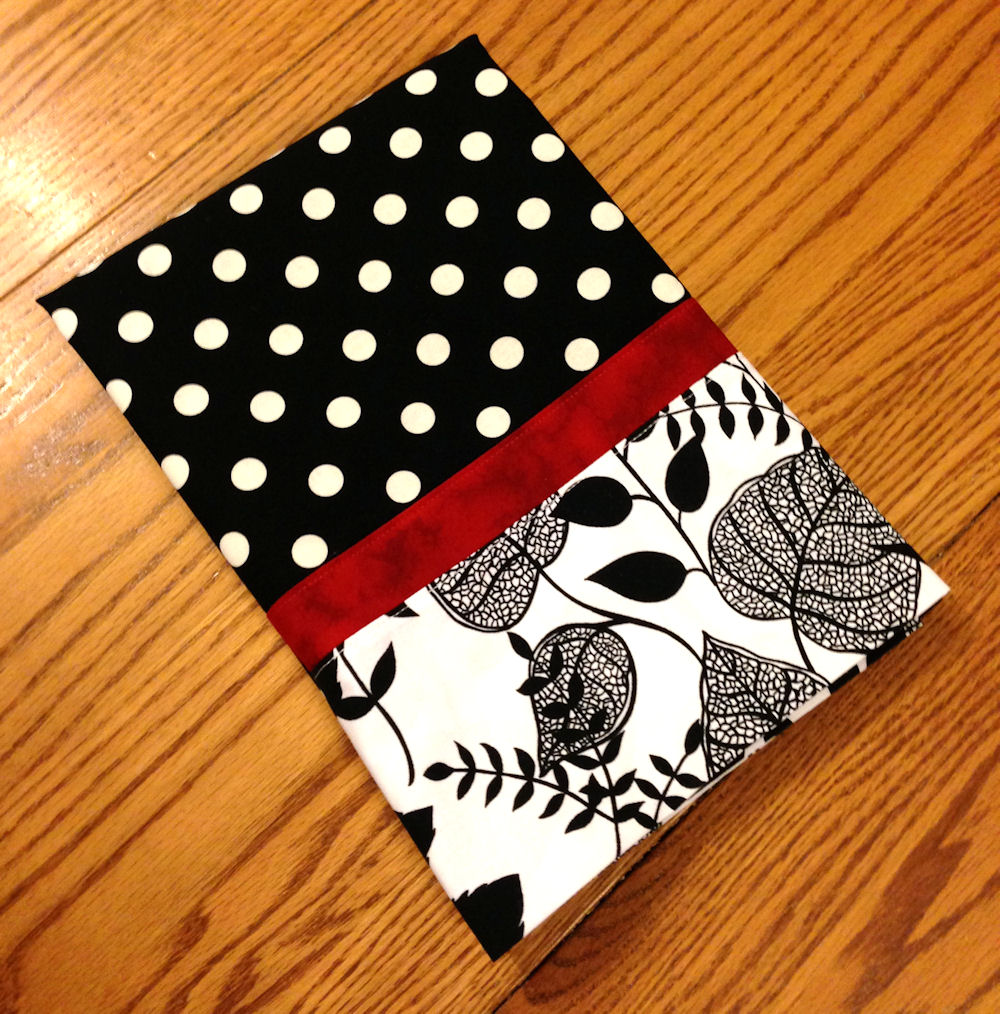
Well, I guess that wasn’t too subtle a hint that it’s time to work on UFOs (UnFinished Objects). Quite some time ago, I was shopping at Herrschners in Stevens Point, Wisconsin, when I picked up the above fabrics in kit form, intended for a pillowcase. I don’t usually buy my fabrics pre-packaged that way, but I liked the combination and had someone in mind to whom I wanted to give the finished item. The black and white polka dot fabric, incidentally, is “That It Dot” by Michael Miller Fabrics; the black and white floral fabric is “Night and Day” by Robert Kaufman. I have no idea who designed the red marbled fabric, but I’ll bet you can find something similar in just about any quilt shop.
There are many ways to sew a pillowcase, but the method I used to sew this one happens to be Herrschner’s. Sewing a pillowcase is easy—so easy, in fact, that it should be one of the first projects beginning sewers tackle. Pillowcases sew up quickly and easily, always look nice, and are guaranteed to make novices feel like pros. Once you sew your own pillowcase, you won’t want to go back to store-bought ones. Ready to sew along with me?
Getting started
To make a standard sized pillowcase measuring approximately 21 inches by 32 inches, you’ll need:
- One rotary cutter and cutting mat
- Steam iron
- Thread
- Cotton fabrics, 44-45 inches wide, folded in half and sliced as follows:
- main fabric at 28 in.
- cuff fabric at 9-3/4 in.
- accent fabric at 2-1/2 in.
Instructions
1. Pin together the right side of cuff fabric to the wrong side of main fabric across the long side. Sew using a ¼-in. seam. Press the seam toward the cuff.
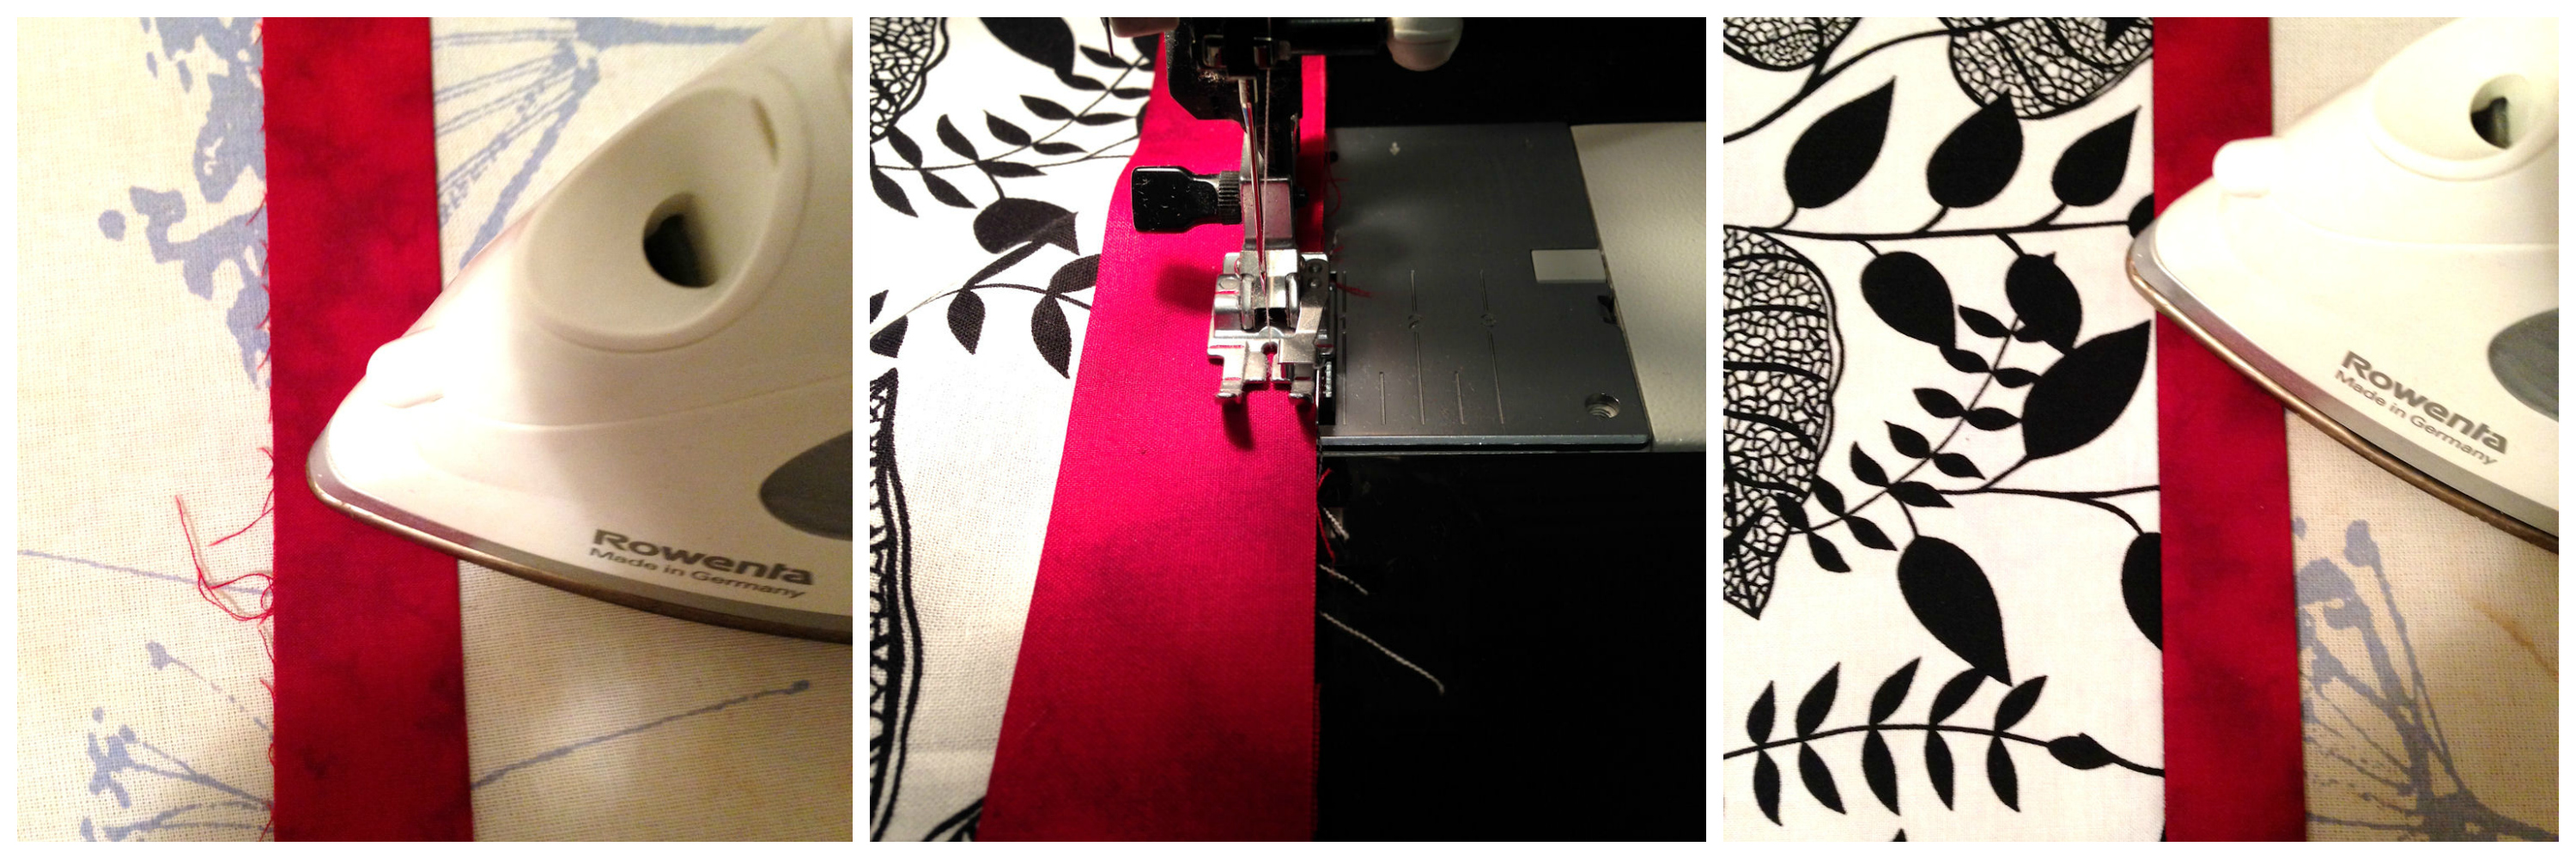
2. With wrong sides together, press the accent strip in half, lengthwise. Pin and sew the raw edges of the accent strip to the right side of the cuff’s raw edge with a ¼-in. seam, matching raw edges. I have a quarter-inch presser foot that makes this easy. Press the strip out and away from the cuff.
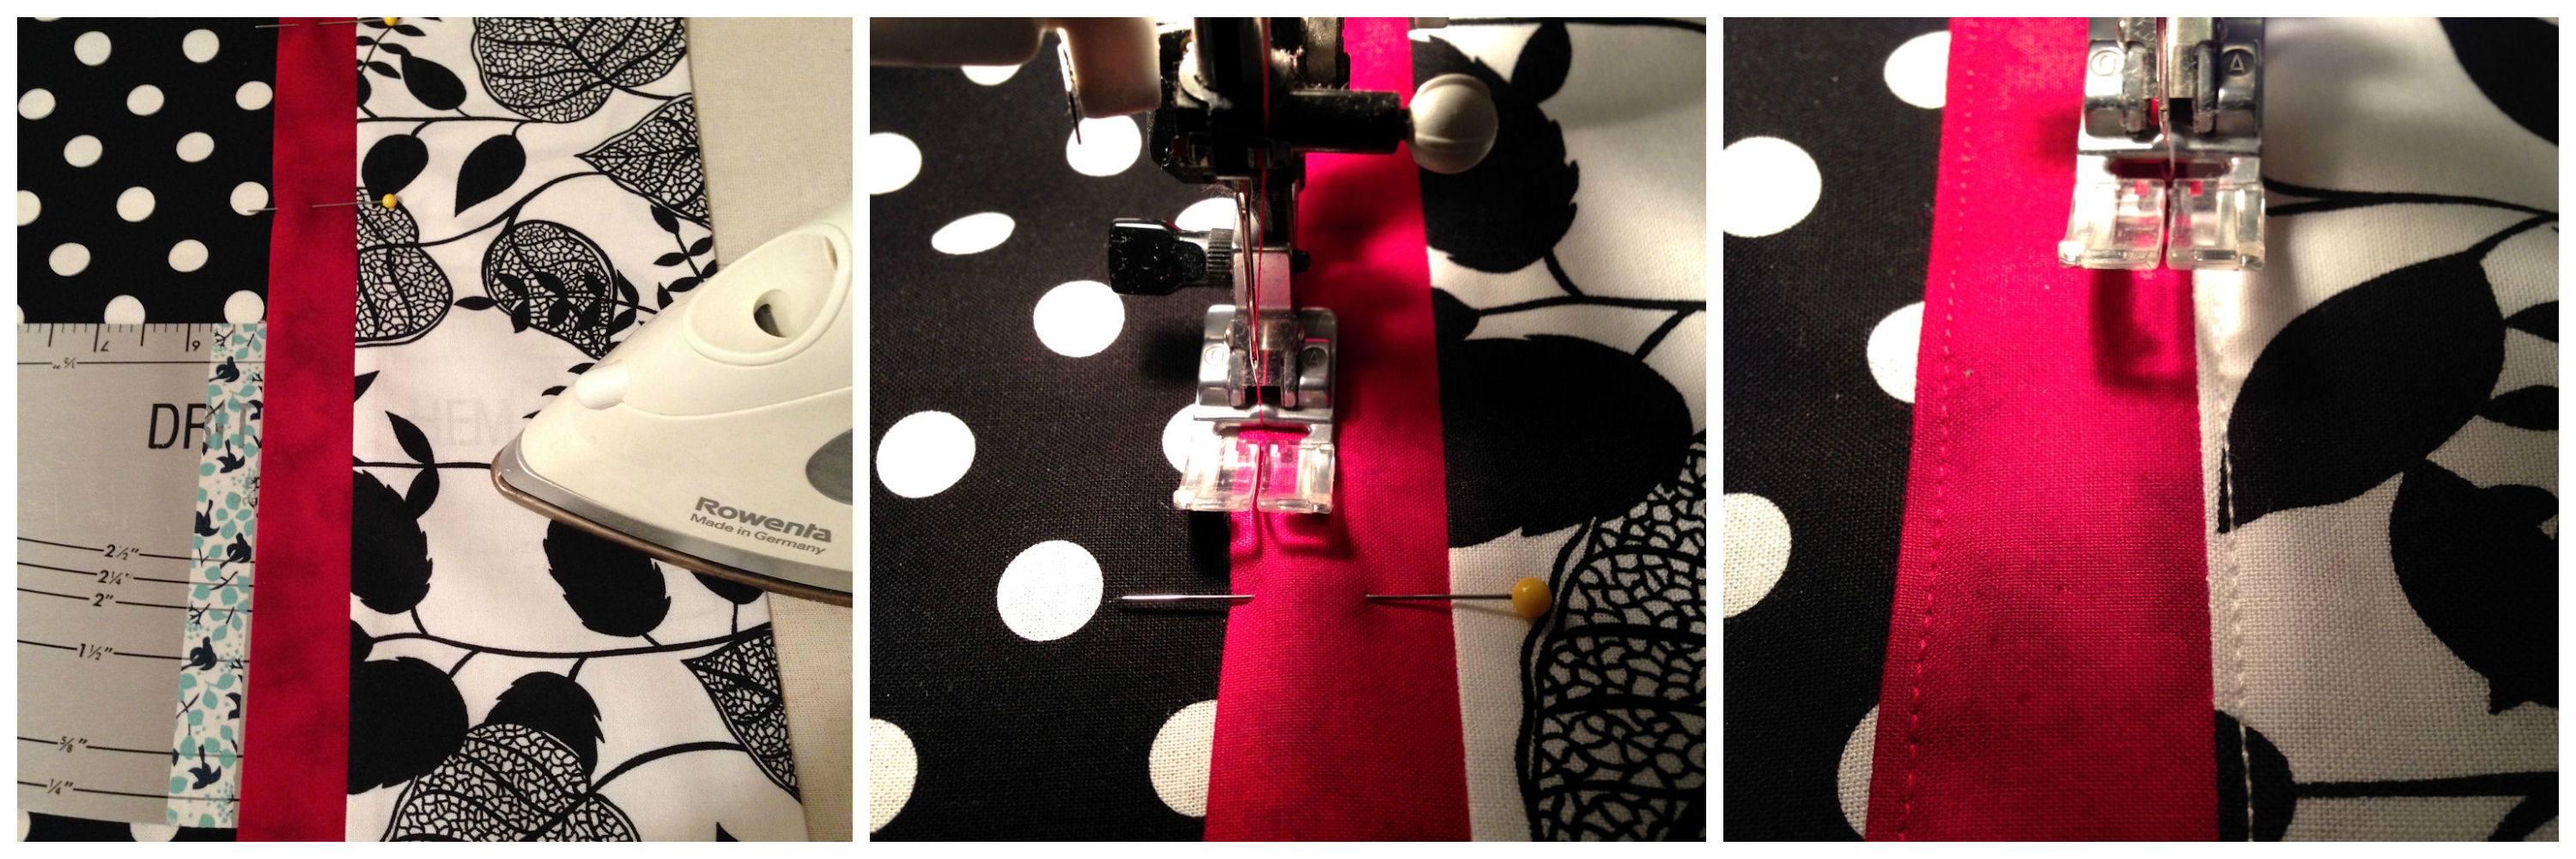
3. Fold the cuff and accent strip toward the right side of the main fabric. Overlap the seam below by about 1/8-in. to ¼-in., and pin in place. You’ll notice, in the first photo, that I didn’t want to eyeball things. I wanted to fold over my cuff at 5-1/8 inches, so I stuck a strip of washi tape on my Dritz Ezy-Hem aluminum iron guide at exactly that point. If you don’t have one of these, just mark a manila file folder at the appropriate distance, and slide that beneath the fabric fold before you iron the cuff down. Topstitch the edge of the accent strip in place, as well as the cuff. Press! You can never use your iron too much when you’re sewing.
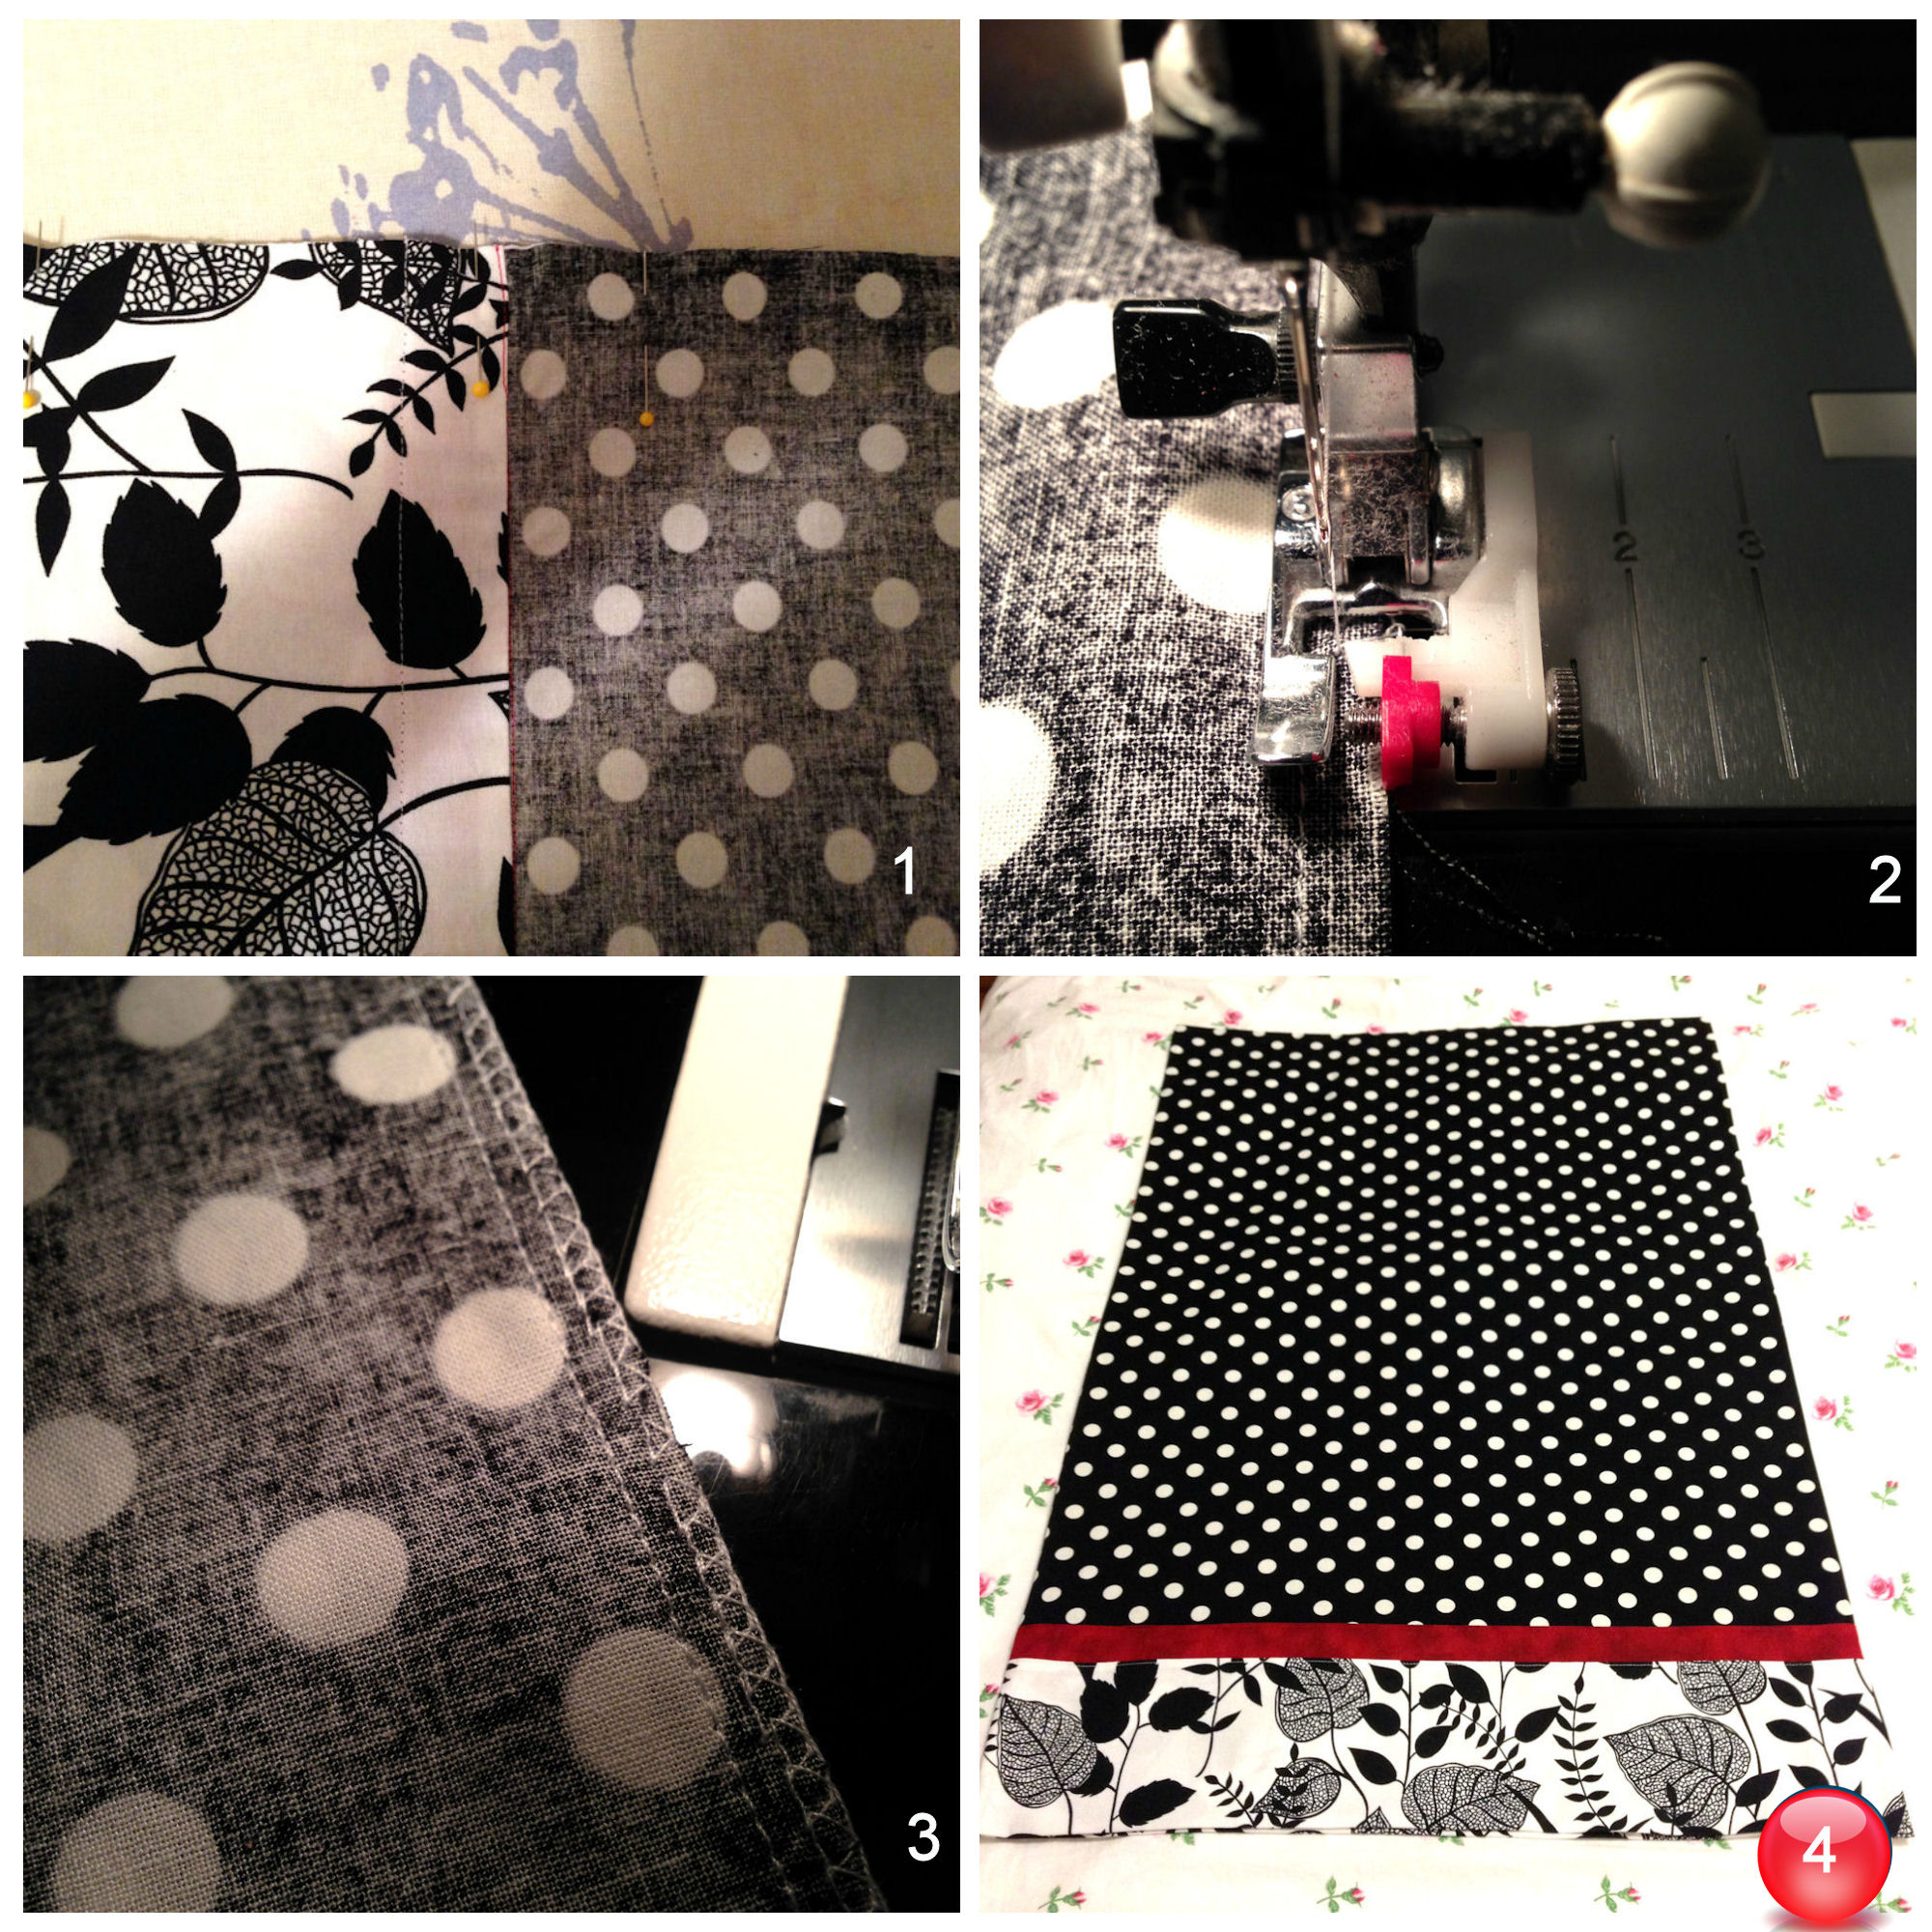
4. Fold the entire piece in half, right sides together, matching cuff and accent pieces. Trim away the selvages from the long side. The bottom should be even. If not, trim it. Pin and sew using a ¼-in. seam. Zig-zag or overcast the edges of the fabric using a sewing machine or serger to keep the seam from fraying. In the second photo, I used my overcasting foot and a corresponding stitch on my sewing machine, since I don’t own a serger. Repeat for the bottom seam. Press and turn right side out.
You can easily make a pillowcase in one evening, maybe even two pillowcases if you don’t stop to take photos at every stage of sewing. Some other methods of construction can be found at these links:
- Pillowcases with Hidden Seams, by Quilt with Aimee! (video)
- How to Sew a Pillowcase, by A Spoonful of Sugar
- Quick Pillowcase Tutorial, by 44th Street Fabric
- Easy Pillowcase: standard, queen & king/beginner sewing pattern/nicely finished hem, at Craft and Fabric Links
- 1 Million Pillowcase Challenge: Free Patterns, by All People Quilt
Tomorrow I will finish a matching second pillowcase. The first one is folded, all ready for gift-giving!
© 2014 Judy Nolan. All rights reserved.
I love this idea…and have the fabric stash to go with it! Time is a problem though 🙁
Great job Judy!
Great pillowcase! And a great tutorial, too! I use the “hot dog” method for making pillowcases that I donate to ConKerr Cancer, and I use French seams.
Great colors! And you’re right, a great project for a beginner like me 🙂
Great pillow tutorial! That reminds me I have a massive stash of fabric to go though and either use, sell, or give away.
My fabric stash is relatively under control, but my beads… Hoo boy. That’s where I really need to do some sorting.
Your pillow case is so cute!
UFOs – I like it! My mom has a drawer called “unlikely to be finished projects.” It can be so easy to collect cool fabrics and things that just never get finished!