I’ve made case bound books before, with my own version of stitched pages, but not classic kettle-stitched signatures, so I decided it was time to learn how to assemble a standard text block. If you’re not sure what a case bound book is, basically it’s a hardbound book where the pages are sewn together in signatures, and the stitching along the spine is glued to reinforce it. Then the spine itself is “encased” in a hard cover, hence the term “case bound.” That, anyway, is a layperson’s explanation.
My goal this weekend was not necessarily to finish a book, but to learn how to assemble the text block, or the pages that are inserted between the book covers. I have books on my shelf that provide instructions, but if you’re a visual learner, the Sea Lemon video below by Jennifer Bates is real easy to follow.
Before you begin, it’s helpful to gather your tools. On the left you’ll see a packet of binder’s needles, but crewel embroidery needles work quite well. The rule of thumb is that you should use the smallest needle that works for the job. In the middle is a rectangle of foam core. When I bought an e-reader, I saved the foamcore insert for needle punching. You’ll need a ruler, some binder clips, a bone folder (or something with a smooth edge, such as the dull side of a knife), an awl (or a thumbtack) for punching holes, a pencil for marking holes, and some scraps of paper to protect your signatures when you bind them together with binder’s clips. On the right you’ll see some beeswax through which I run my thread because it keeps it from tangling, as well as strengthens it. Missing from the photo are a pair of scissors, a craft knife, and a foam brush or paintbrush to apply glue.

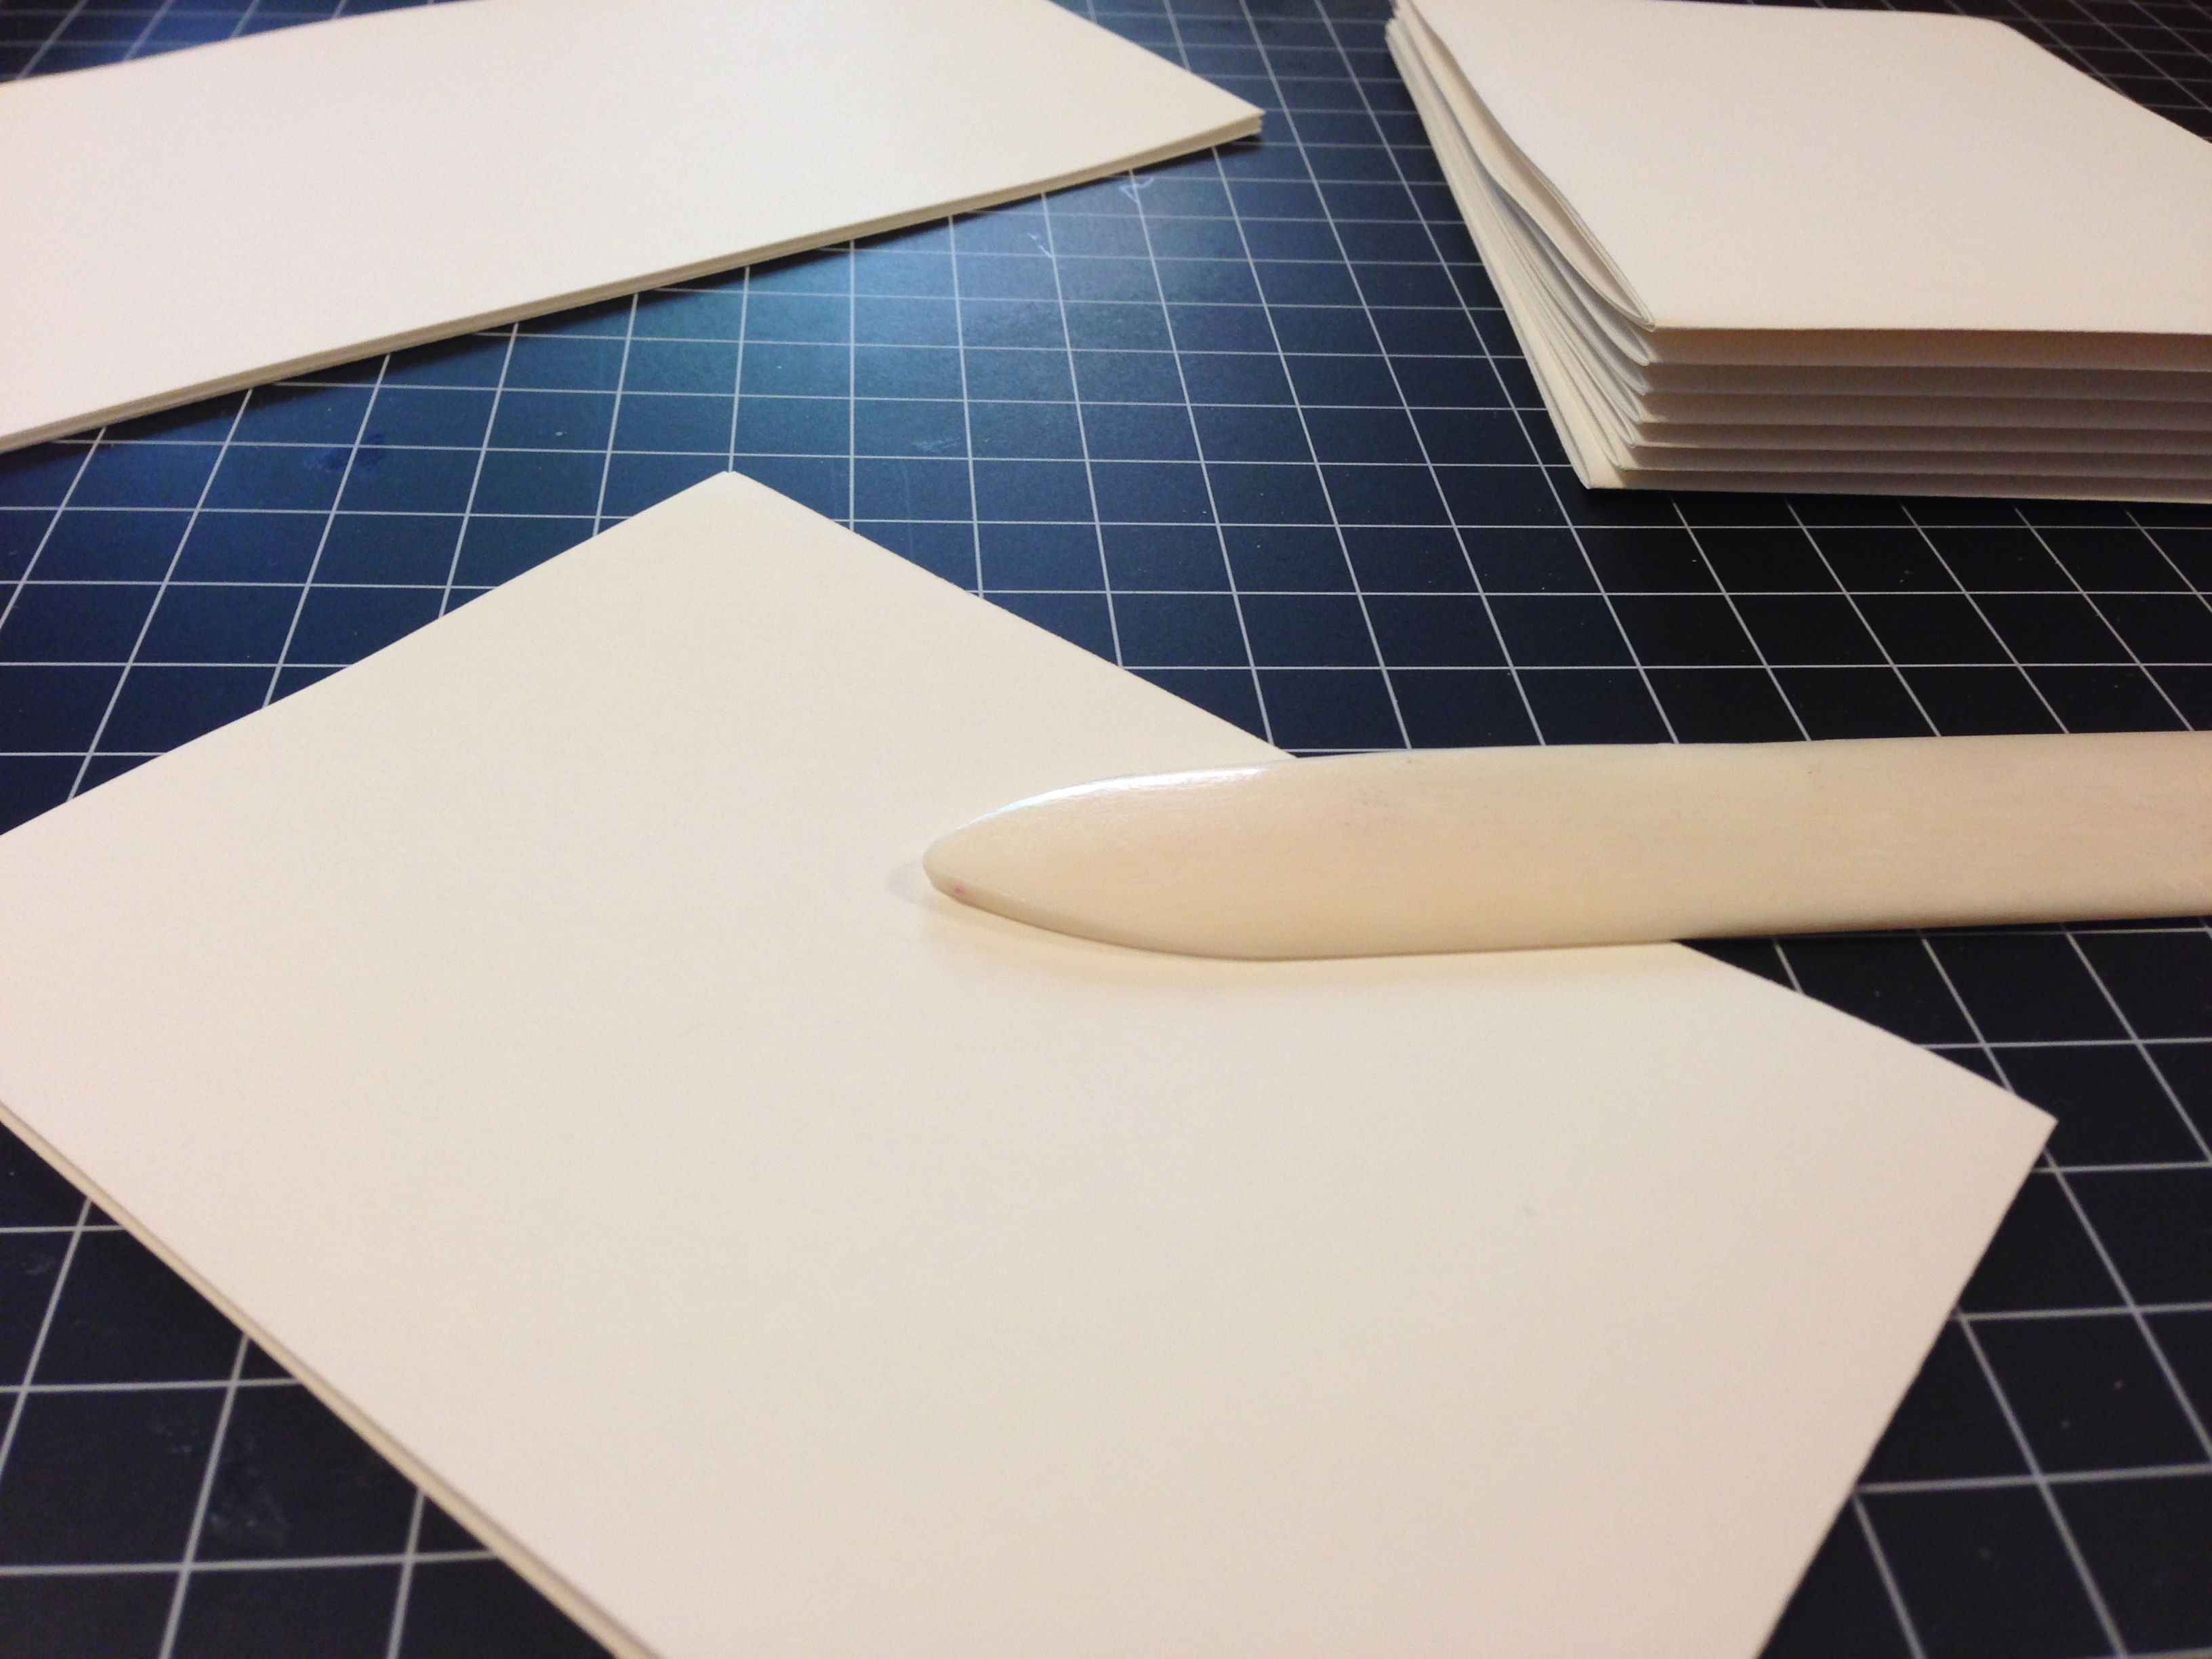
Before you can begin the process of stitching, you need to prepare your signatures. In her video, Jennifer suggests using four sheets of paper per signature, folded in half. Her text block is bigger than mine because I am creating a mini book. Whatever size of paper you choose to use, fold each sheet in half, and smooth the fold with your bone folder or bone folder substitute. One of the nice things about bookmaking is that you don’t have to buy all kinds of expensive equipment to get started. Use what you have on hand, and look for alternatives when you’re missing a tool.
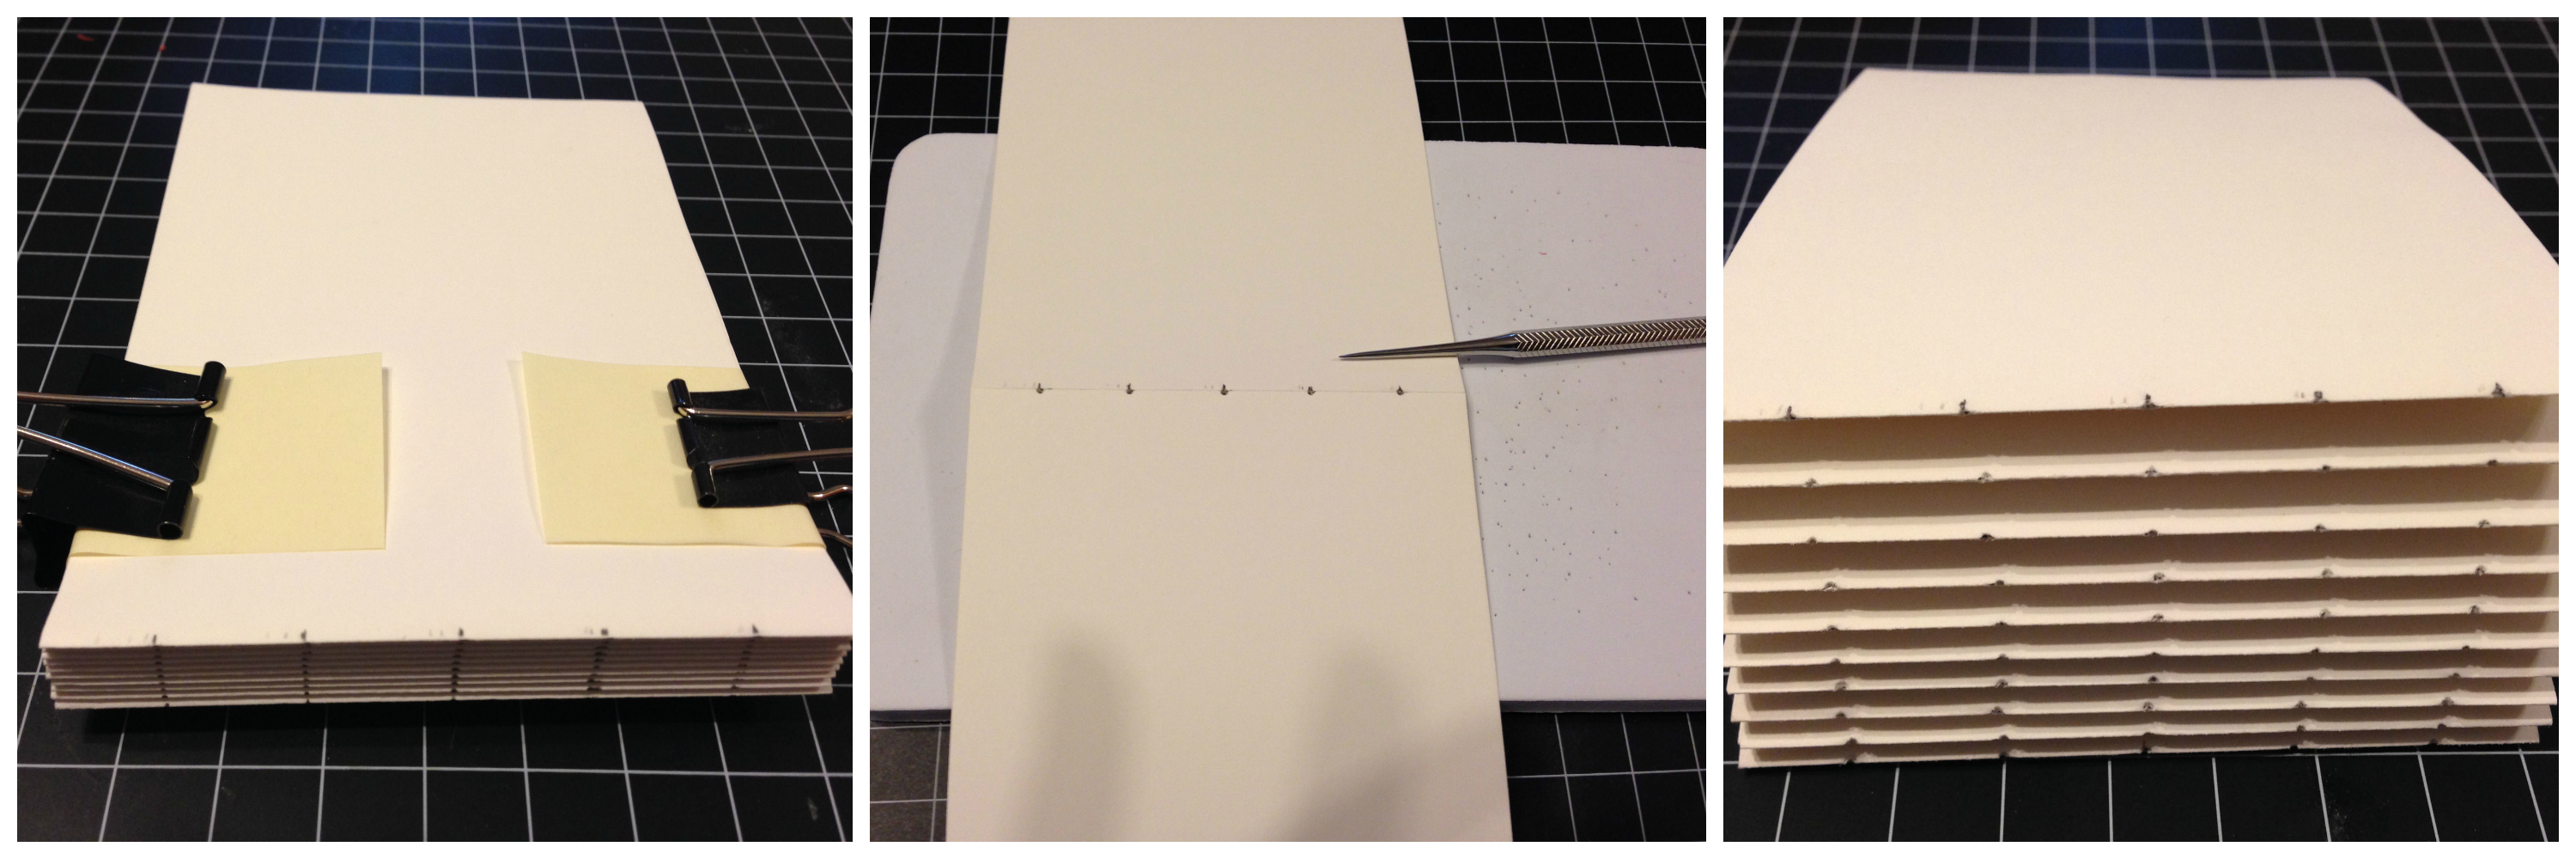
When you have 10 signatures, you’ll need to mark where you will be punching holes. Take one of the signatures and use it as a template. Space out your markings evenly, starting in the center of the fold, and make a small pencil mark. Then move out to the edges and add the remaining marks. I recommend adding marks for an uneven set of holes. Jennifer’s larger text block has seven holes, spaced one inch apart, while my text block has five holes, spaced 7/10ths of an inch apart. (I used a typography ruler.) When you have finished marking your template, stack all of your signatures, putting the template on top. Keep the stack aligned with binder clips. I slip scrap paper between my binder clips and the signatures so I don’t leave a dent or mark in the paper. Next, use your ruler or a square of chipboard as a guide, and draw a vertical line along the spine from each mark on your template down to the bottom of the stack. All of your markings should line up from one signature to the next. Finally, open up each signature, one at a time, and punch holes where your markings are.
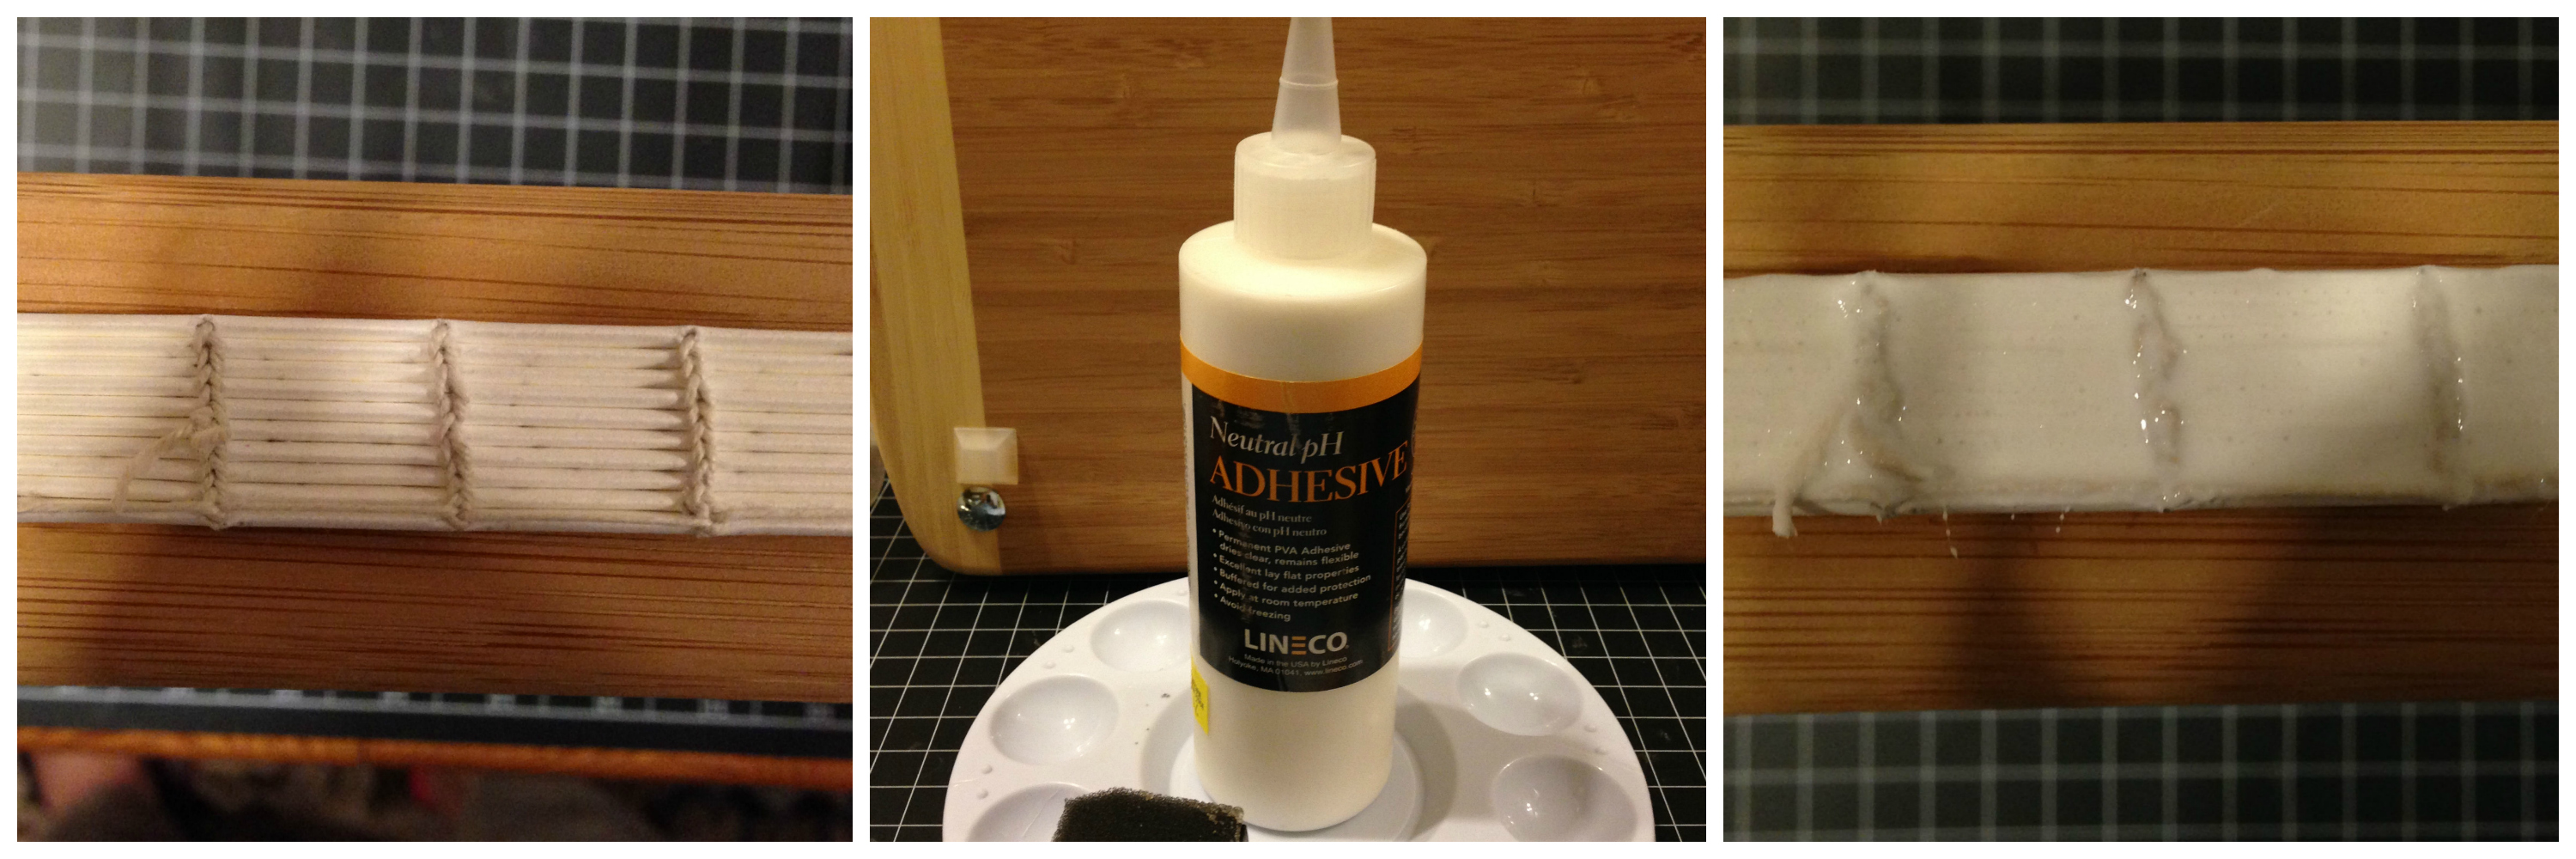
Refer to Jennifer’s video at the top of this post for instructions on how to stitch the signatures together. You don’t have to use binder’s thread, as I did, but can instead use a doubled-up cotton sewing thread, or linen thread. In all cases, I do recommend waxing the thread. Limit the length of the thread to 30 inches. Jennifer doesn’t use any kind of joining method when she runs out of thread; she simply ends the stitching by tying a knot and pulling it from the inside of the signature to the outside through a hole. I recommend instead tying a weaver’s knot with the new thread, which is essentially a slip knot whose loop (not the knot itself!) is wrapped around the short thread and pulled tight. Directions for a weaver’s knot can be found HERE. This is what your text block looks like when the stitching is finished. The thread ends sticking out from the spine are the result of not using a weaver’s knot. The spine will be covered, so in one way it doesn’t matter, but the loose threads do add bulk to the spine. I simply prefer the cleaner look you can achieve with a weaver’s knot. I didn’t know about that option when I sewed together my signatures, a case of Murphy’s Law!

If you have a book or paper press, you’ll be using it in this next step to both flatten the text block and to apply glue to the spine. Don’t have one? Stack books above and below your text block, and you can achieve the same thing. Make sure you use PVA glue when you spread glue over the entire spine. PVA stands for polyvinyl acetate. It’s acid-free and flexible, which is essential if you want to keep your spine from cracking. The glue reinforces the spine and fills in the gaps between the signatures. Apply about two coats of PVA glue with a foam brush or paint brush (your preference), allowing the glue to dry between each coat. This process does not take long.
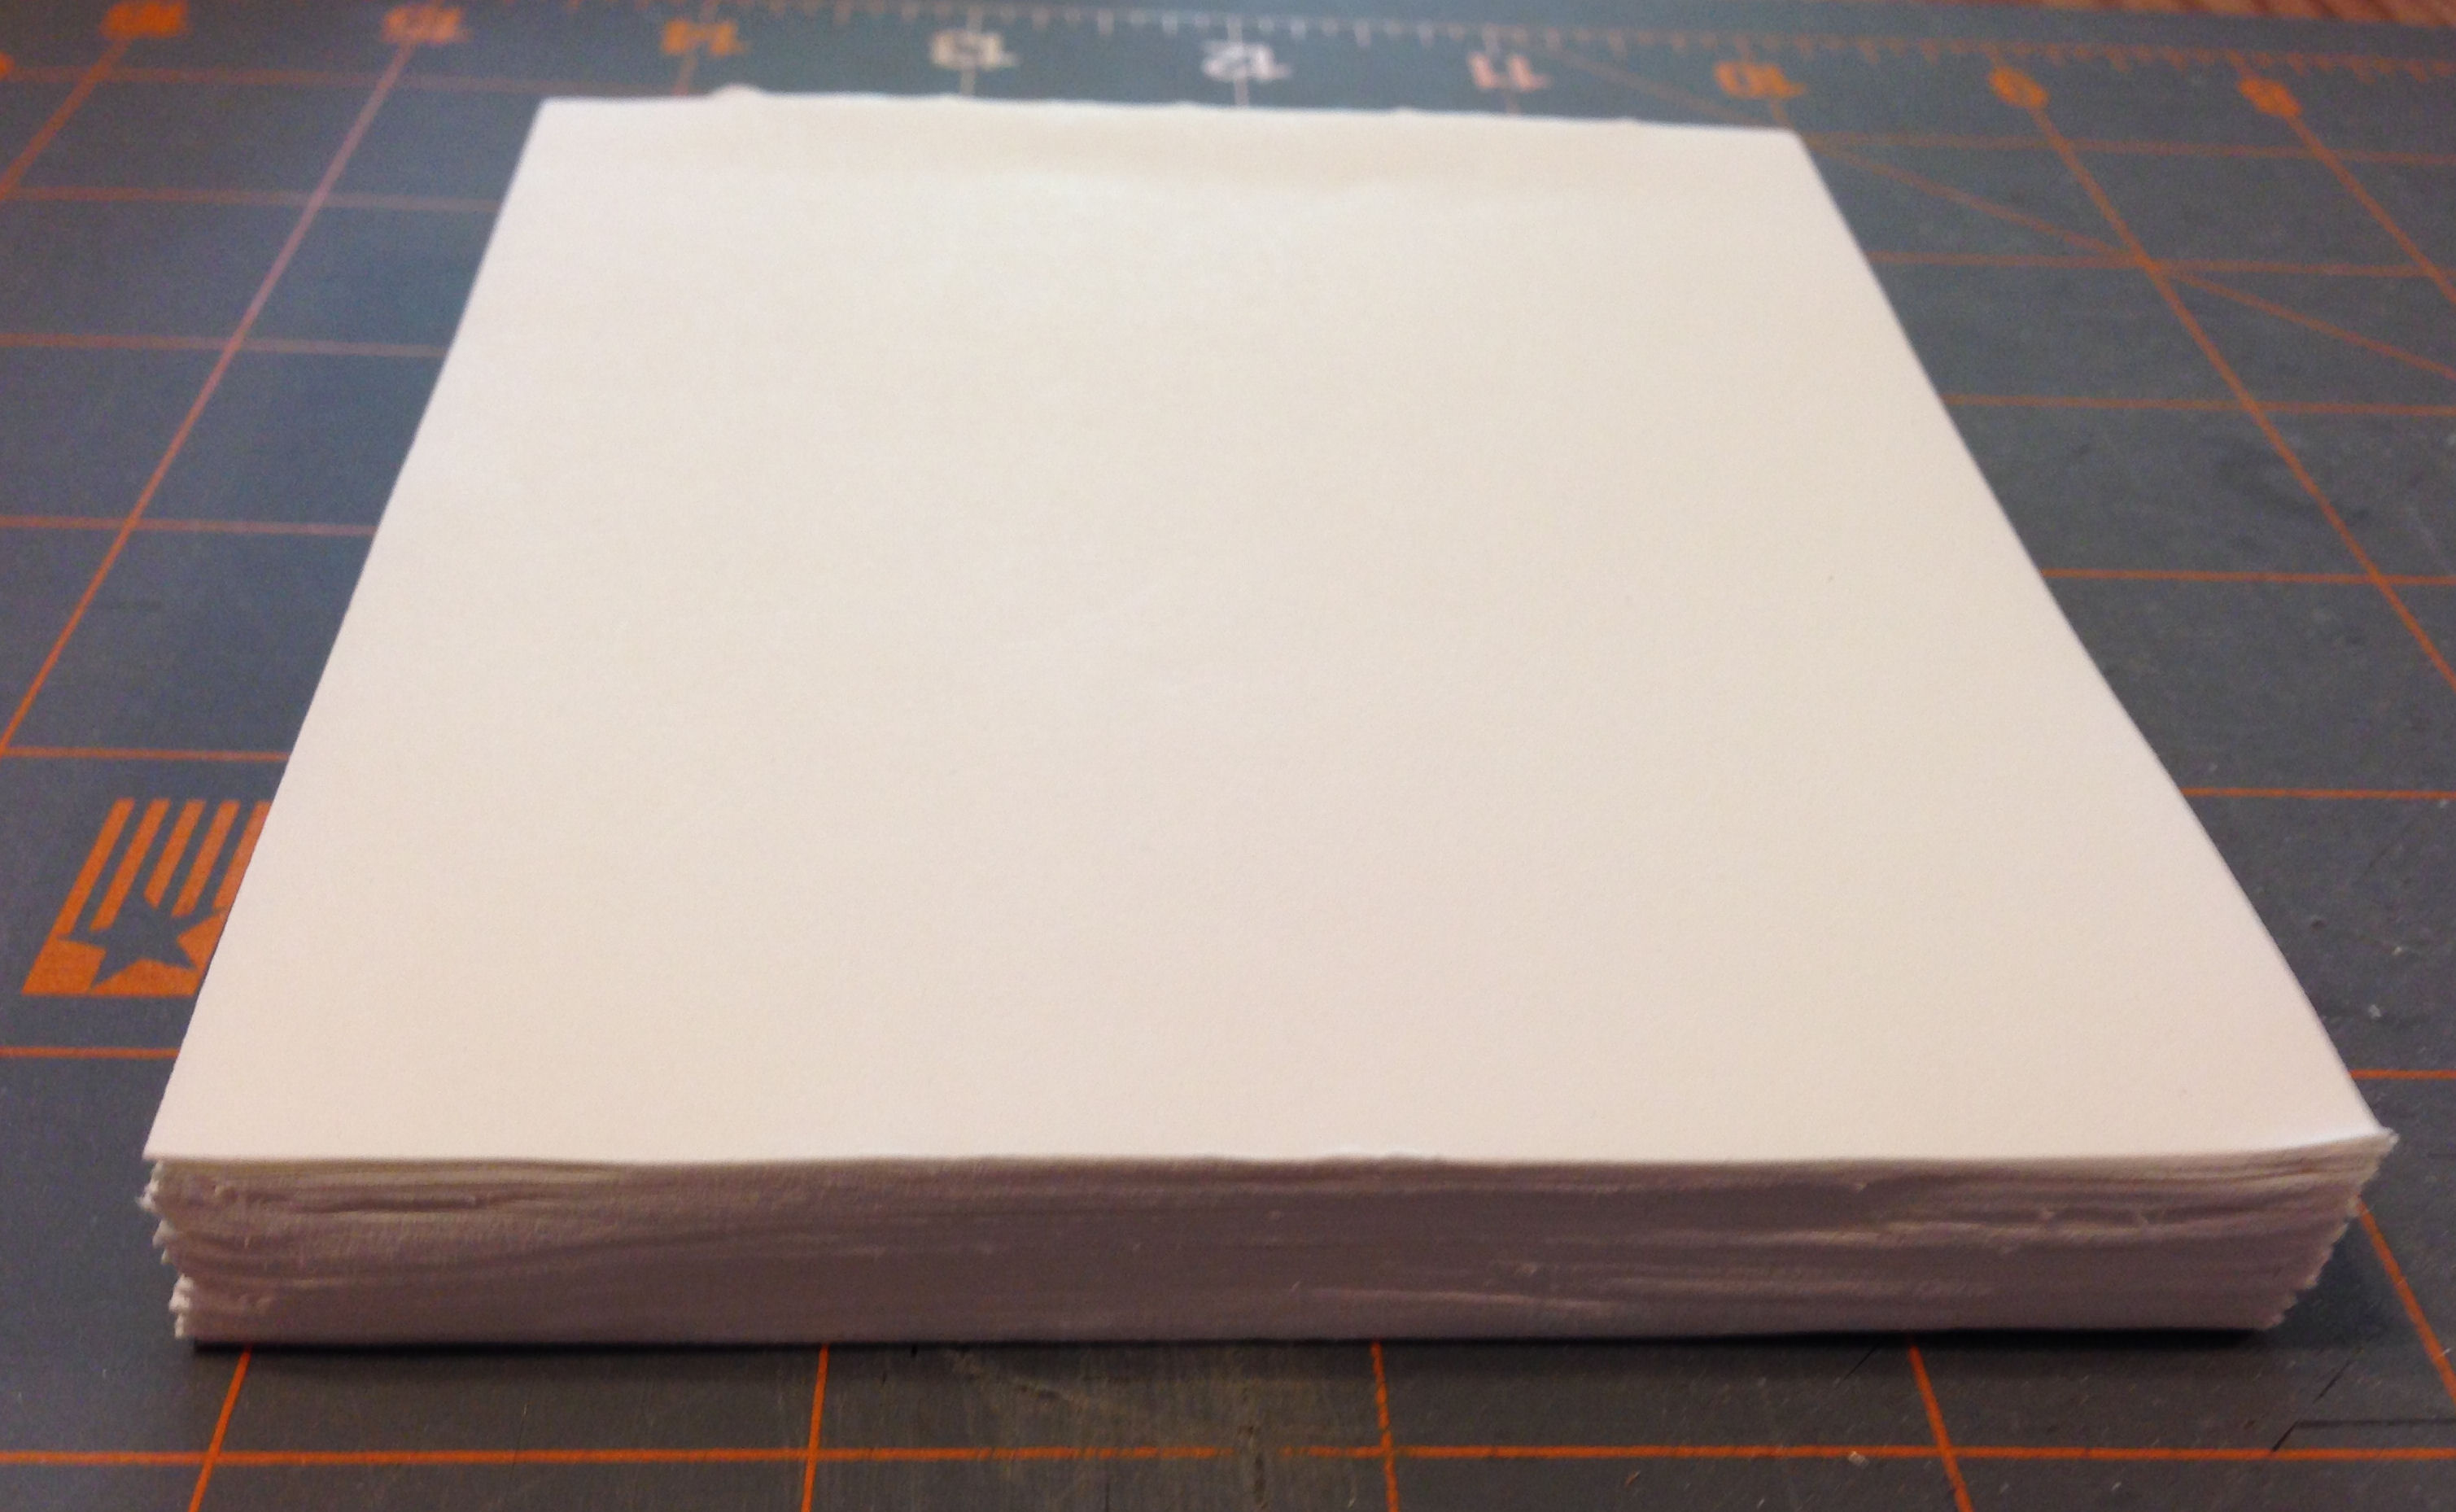
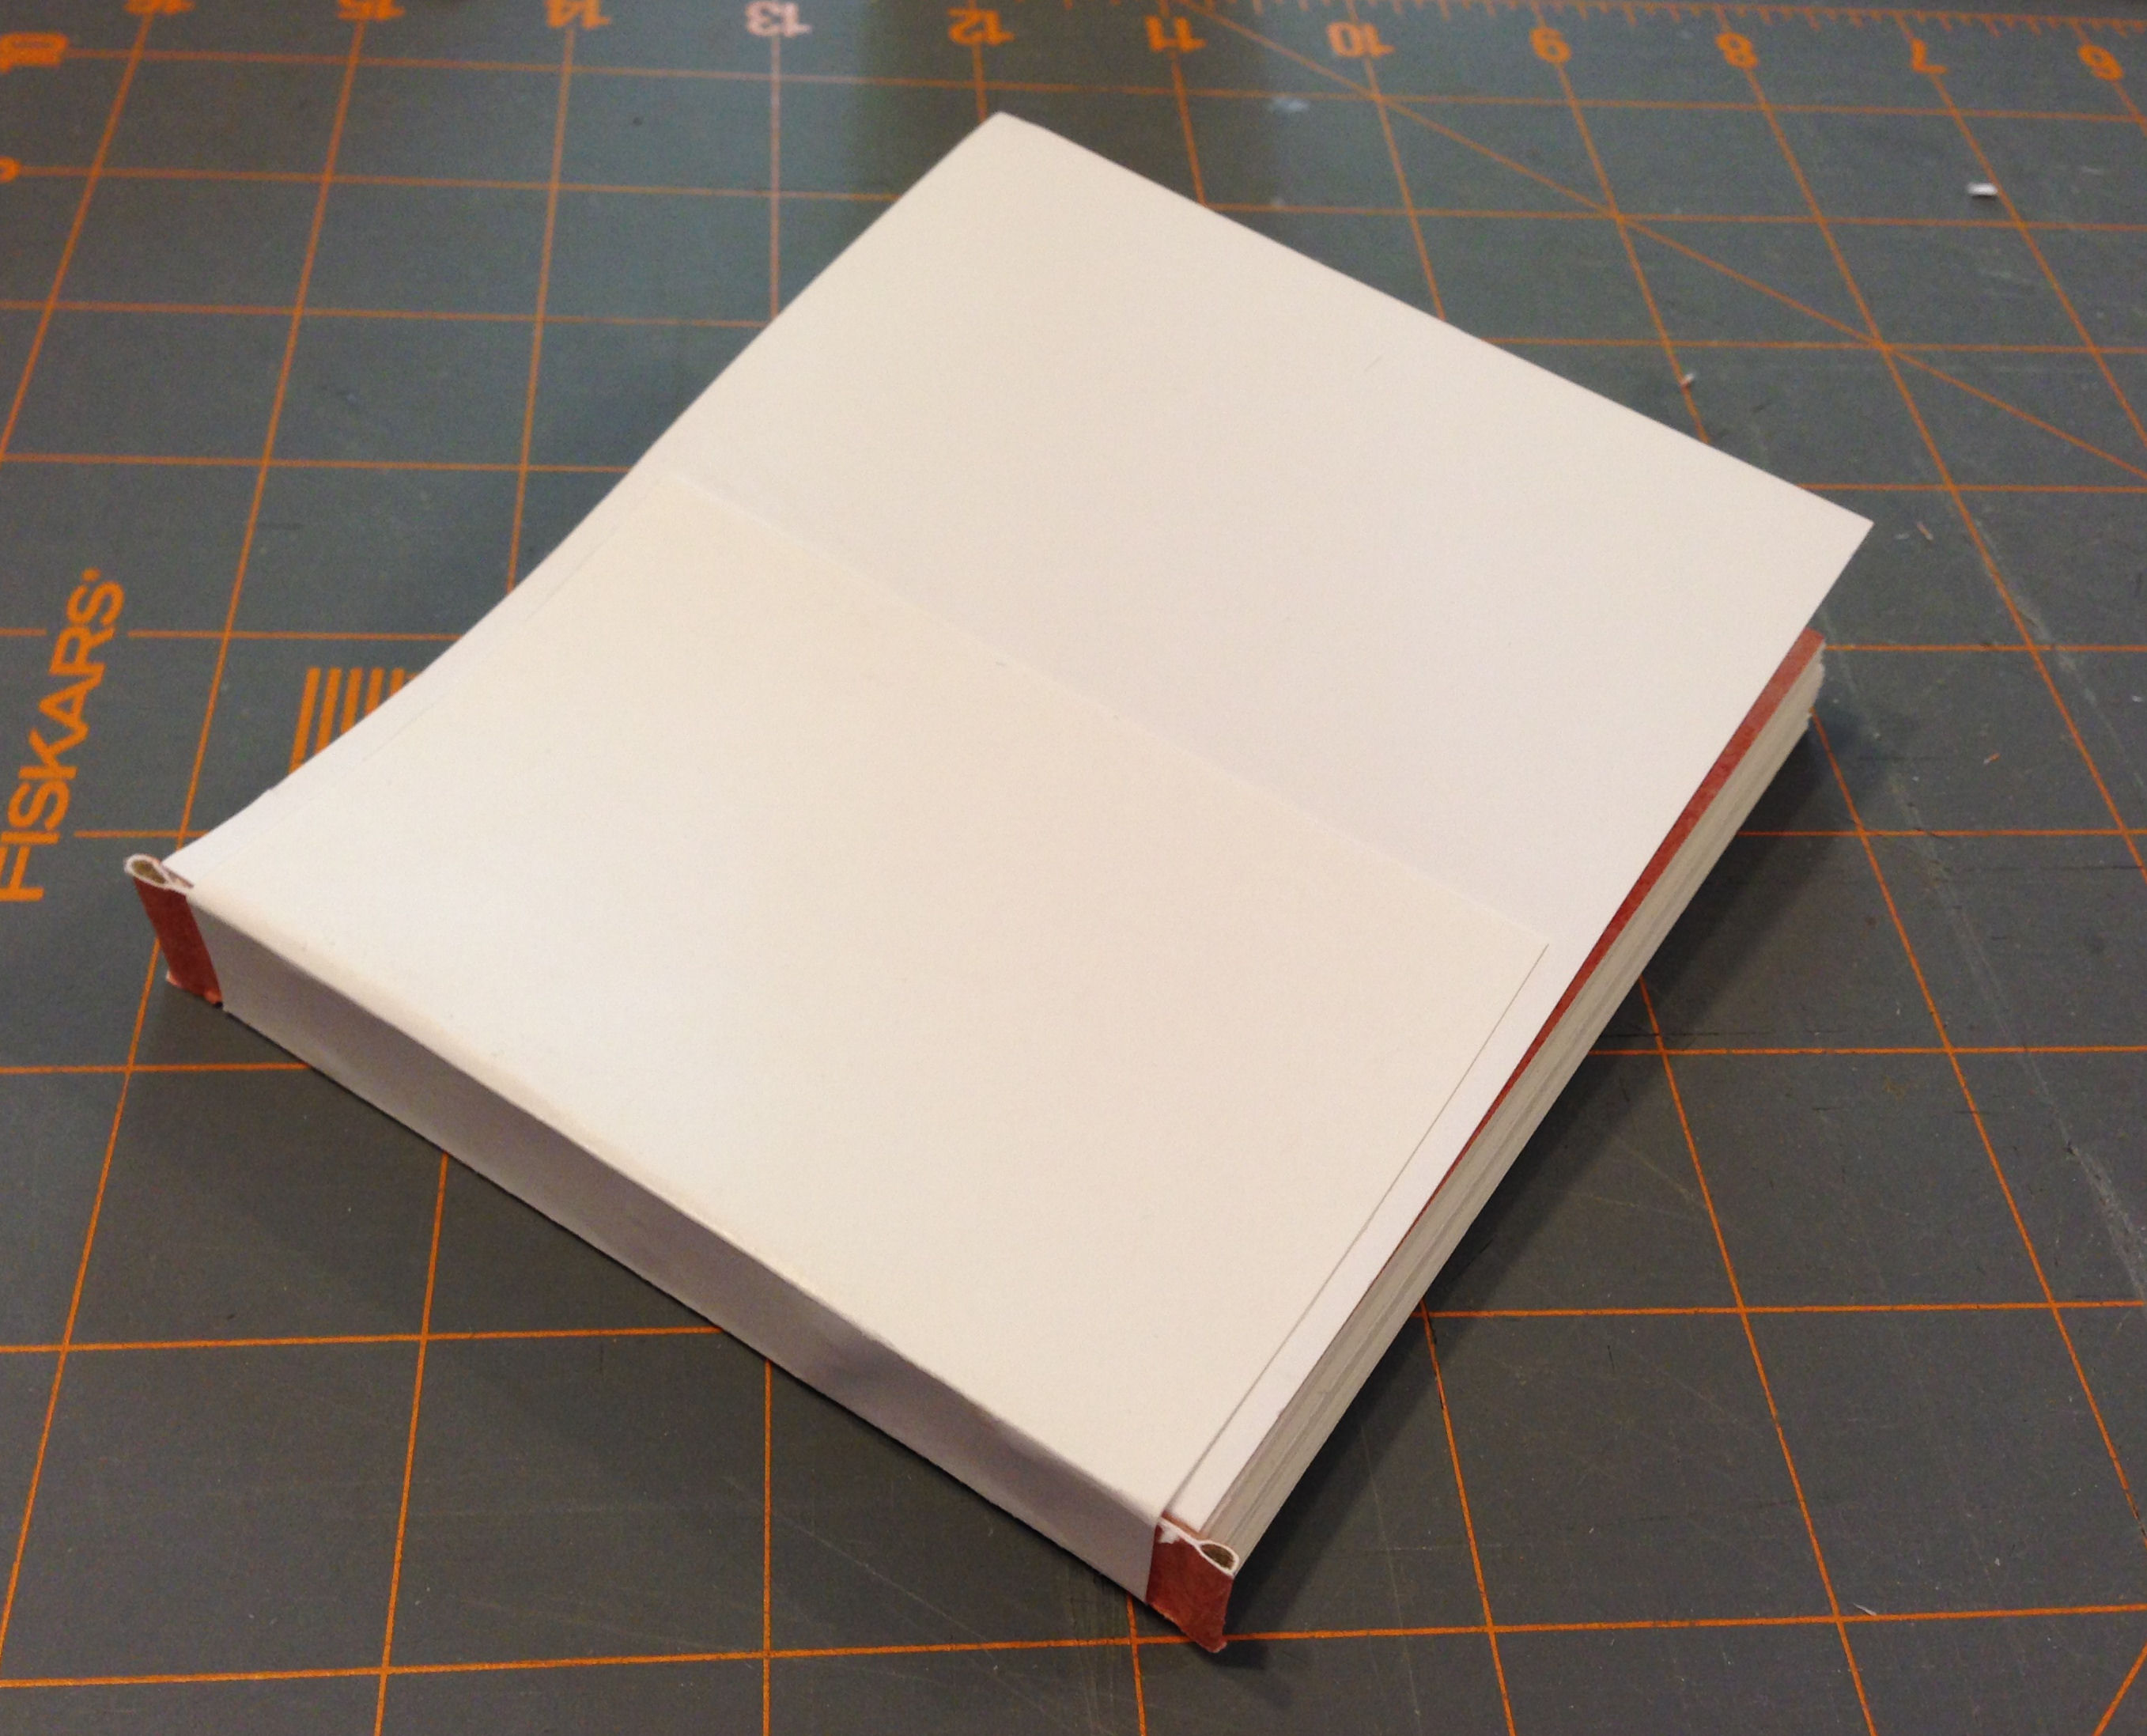
Most bookmakers trim the front edge of their books. They use a tool called a bookbinding plough that makes the process of trimming a lot easier than when you don’t have one. I tried trimming the front edge of my text block with a utility knife, and all I can say is that it was an epic fail. Then I tried a craft knife, and had equally poor results. In desperation, because my book was getting narrower and narrower, I asked my husband to try. He had better control over the blade than I did, but I still had to sand the paper edges to smooth out imperfections. Not perfect, but it will do for a first text block. Or I suppose I could elect to not trim the pages. This is what the text block looked like before I sanded it.
In a perfect world, what I would really love to own is the bookbinding plough sold by Jim Poelstra at Affordable Binding Equipment. Cost? Two hundred twenty dollars. Well, a girl can dream, can’t she?
Before your text block is finished, you need to add end papers to both the front and back. Cut decorative or solid-colored paper the same height as your pages, but double the width. Fold in half and set aside. Paint a quarter-inch of PVA glue next to the spine, then adhere the folded edge of one of the end papers next to the spine. Repeat for the back side of the text block.

Adding headbands to the top and bottom of your text block is entirely optional, but I like the look. A classically-trained bookmaker would probably stitch this, but the casual bookmaker will take a shortcut. Find some patterned card stock or scrapbook paper, and cut a narrow strip that is wider than the spine of your book. Fold it in half, apply glue to one half, then insert a length of twine, jute, hemp, or narrow cording (even gift wrap cording left over from the holidays) in the fold. Press both halves together and allow to dry. Use the tip of your bone folder or a fingernail to create a ridge where the cord is located. Using PVA glue, you’ll glue the headbands onto either end of the spine, making sure the ridge extends beyond the spine. Return the book to the paper press (or between the stacks of books) and allow the glue to dry. Then remove the text block and trim the headbands to the width of the spine using either scissors or a craft knife. I didn’t do a very neat job because my craft knife was dull, but the spine won’t be visible once the book cover is added, so it really doesn’t matter.

The last step for your text block is reinforcing the entire spine “package” by gluing a piece of paper or card stock to the spine and end papers. This is a substitute for a traditional bookbinding material called “mull,” a woven net-like material of cotton or linen that is stiffened with starch. (Some people will use cheesecloth.) The paper should cover the spine and at least one inch of the end papers on both sides of the text block, and it should measure about an inch shorter than the height of the text block. If you’re using paper, simply wrap it around the spine and use your bone folder to help shape it to the text block. Then apply PVA glue to the spine, adhere the paper to it, and paint the rest of the paper with glue. Smooth out any air bubbles with your bone folder, then allow it to dry in your paper press or between your stacks of books. I always put wax paper on both sides of my text block to make sure it doesn’t get stuck to the wood of the press.
That’s it. There are quite a few steps to putting together a text block, which is why some folks prefer to purchase pre-made ones. There’s something really satisfying for me, however, in building each part of a book. If you’ve made a case bound book and have some suggestions for me that would make the process easier, I’m all ears. Next on the agenda is the cover.
© 2014 Judy Nolan. All rights reserved.
Wow! Great instructions!! Will you be adding some of these books to your shop?
What fun to follow the process! Great instructions – thanks!