What I Learned from Bookmaking
The process of making books by hand is pleasurable and rewarding when you approach it with an open mind, take it step by step, and give it your full attention. In fact, there are lessons to be learned from the process of bookmaking that probably can be applied to different types of creativity: writing, woodworking, painting, sculpture, leatherwork, and many other forms.
- You’re never too old to learn something new. “Just because you’re not immediately good at something does not mean you won’t eventually get it,” says Tom Vanderbilt in Beginners: The Joy and Transformative Power of Lifelong Learning. It might be harder, but with practice, the unfamiliar becomes less threatening. In the process, you increase your plasticity, which is what Scott Barry Kaufman and Carolyn Gregoire in Wired to Create: Unraveling the Mysteries of the Creative Mind call the ability of your brain to engage flexibly with exploration and what’s new. Although I am not new to making books by hand, I am new to using traditional methods to make them. My first attempt at stitching needed some unraveling and I still need to watch a how-to video to get things right.
- Perfection is not the aim of tackling a new experience. The name of the game is progress through practice. Okay, I admit it. I am a perfectionist. But approaching something that is brand new is not a competition; no one is going to grade your effort. As you practice, you’ll get better. There are no expectations from others, so that should release you from expecting anything more than the joy of walking through a new door.
- “Use what you have,” says Ali Manning. Don’t let the lack of resources prevent you from participating in a challenge. Even if you’re a tool junkie like me, part of what makes a new experience fun and approachable is finding alternatives. Don’t have a bone folder? Use the smooth edge of a knife. Use a catalog instead of a punching cradle, or a thumbtack instead of an awl. No spreading spatula? Use a credit card, your fingers, or a spoon. No computer nearby? Use a notes or dictation app on your phone—or traditional paper.
- Passion is infectious. Share with others or teach someone what you know. Don’t hoard your knowledge. The next thing you know, others will also share; everyone wins! Online communities are perfect for making new connections, passing on knowledge, and—in the case of bookmaking—preserving an old art.
- Be prepared to unlearn what you have learned to make room for learning something new. In other words, approach a new challenge, a new task or new experience with the mind of a novice. Think about the joy of a toddler who masters walking for the first time. Openness to new experiences, according to Barry and Kaufman, in Wired to Create, is necessary to creativity.
- Follow your passion to find your creative direction. There is a link between passion and flow. What were you passionate about as a child? Is there something you do that causes you to become so absorbed that you lose track of time and your surroundings? This is when you are most open to focusing on new ideas and shutting out distractions. It probably also inspires your passion. When I am stitching one signature to another, nothing exists for me outside those moments. The same occurs when I write poetry.
Writing and making things by hand define the areas where I am most creative. Where are you most creative in your life, and what life lessons have you learned from this activity?
© 2021 Judy Nolan. All rights reserved
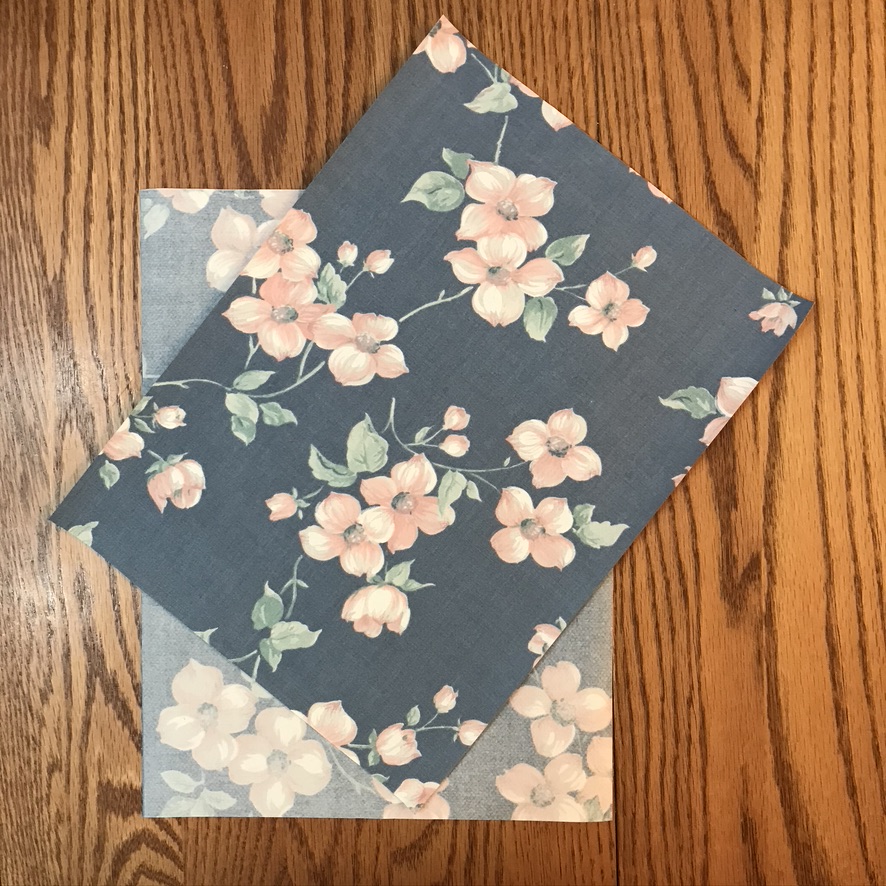
On Day 3, I used a utility knife to cut chipboard for the book covers, front and back. In a perfect world, a bookmaker would likely use Lineco Acid-Free Binder’s Board or Davey’s Binder’s Board, but I recycled heavyweight chipboard from unwanted 3-ring binders. I glued the handmade book cloth to the chipboard with PVA glue, cut end papers from scrapbook paper, and adhered them to the insides of the covers.

On Day 4, I punched holes with a heavy-duty awl in the covers for sewing. You need to be careful when you do this so that the holes are not too large. A thumbtack with a plastic head or other sharp object would probably work, too. Then, I punched corresponding holes in the signature folds using a punching cradle. It’s not necessary to use a cradle, but it sure is convenient to have one. I bought mine from a seller on Etsy years ago. If you don’t have a punching cradle, you can also use an old catalog, telephone book (if you can find one!) or a book you don’t mind damaging.

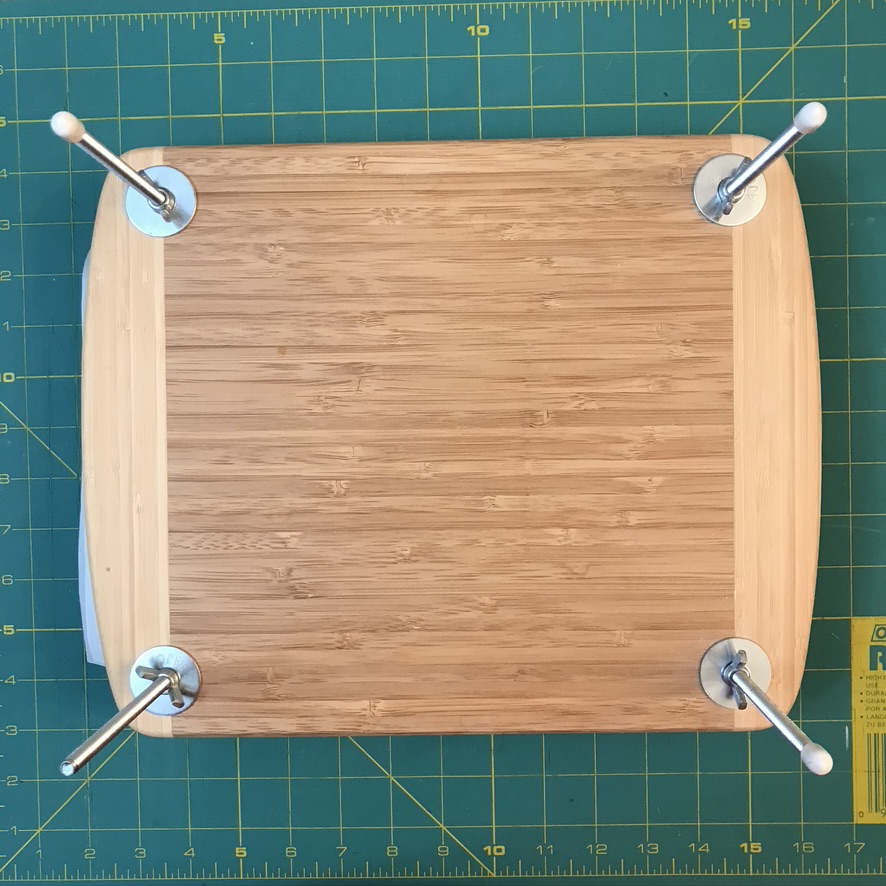
When I stacked the pages between the covers to see how thick the book would be, I realized the pages did not lie flat. The folded side of the book block was higher than the other side. When this happens, Ali suggests you flatten the folds with a bone folder. If that doesn’t work, you need to redistribute the number of pages in each signature. I tried both solutions. In the end, what flattened the signatures evenly was increasing the number of signatures from 8 to 12 signatures, each with four pages inside them. I thought it was interesting that 8 signatures with 6 pages apiece did not work, but that the same number of sheets, redistributed differently, did.
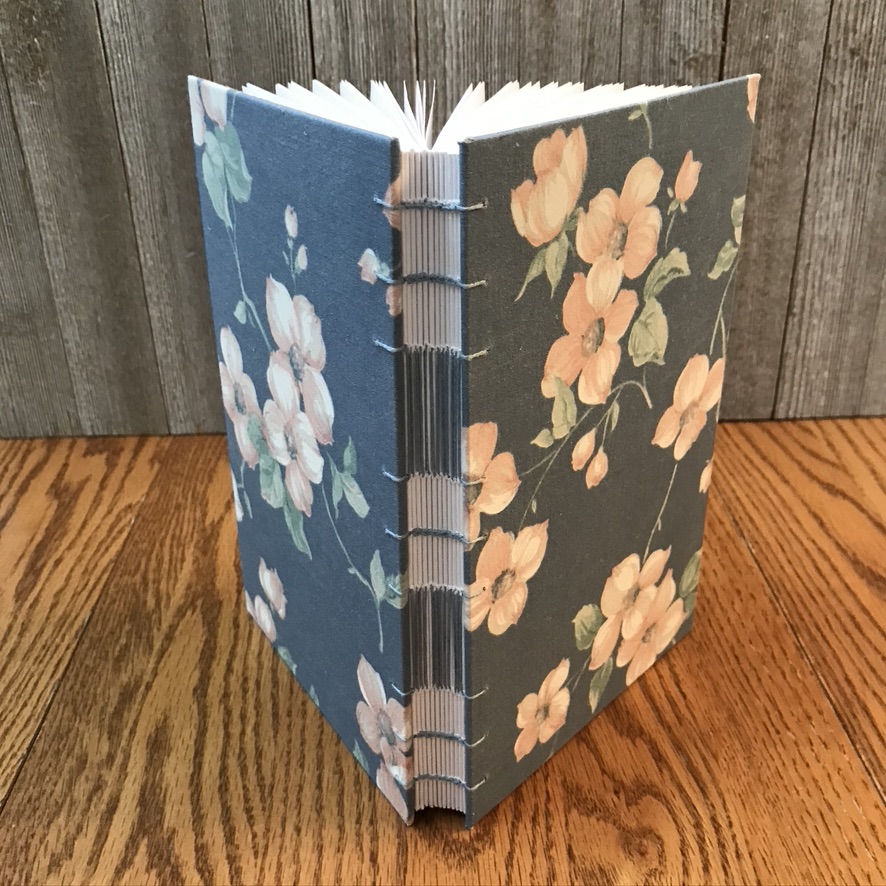
On Day 5, it was time to sew. I wanted to use linen thread, as it is strong and durable, but local stores did not carry this thread and I had to place an order from a shop in Indiana. I was eager to finish the book before the thread order arrived, and Ali had suggested that perle embroidery thread could be substituted. I ran this thread through beeswax (obtainable at any fabric store) to strengthen it and began sewing. The most important thing to remember, as you stitch, is to take your time. I was pleased with the results.

What I Learned from Bookmaking
The process of making books by hand is pleasurable and rewarding when you approach it with an open mind, take it step by step, and give it your full attention. In fact, there are lessons to be learned from the process of bookmaking that probably can be applied to different types of creativity: writing, woodworking, painting, sculpture, leatherwork, and many other forms.
- You’re never too old to learn something new. “Just because you’re not immediately good at something does not mean you won’t eventually get it,” says Tom Vanderbilt in Beginners: The Joy and Transformative Power of Lifelong Learning. It might be harder, but with practice, the unfamiliar becomes less threatening. In the process, you increase your plasticity, which is what Scott Barry Kaufman and Carolyn Gregoire in Wired to Create: Unraveling the Mysteries of the Creative Mind call the ability of your brain to engage flexibly with exploration and what’s new. Although I am not new to making books by hand, I am new to using traditional methods to make them. My first attempt at stitching needed some unraveling and I still need to watch a how-to video to get things right.
- Perfection is not the aim of tackling a new experience. The name of the game is progress through practice. Okay, I admit it. I am a perfectionist. But approaching something that is brand new is not a competition; no one is going to grade your effort. As you practice, you’ll get better. There are no expectations from others, so that should release you from expecting anything more than the joy of walking through a new door.
- “Use what you have,” says Ali Manning. Don’t let the lack of resources prevent you from participating in a challenge. Even if you’re a tool junkie like me, part of what makes a new experience fun and approachable is finding alternatives. Don’t have a bone folder? Use the smooth edge of a knife. Use a catalog instead of a punching cradle, or a thumbtack instead of an awl. No spreading spatula? Use a credit card, your fingers, or a spoon. No computer nearby? Use a notes or dictation app on your phone—or traditional paper.
- Passion is infectious. Share with others or teach someone what you know. Don’t hoard your knowledge. The next thing you know, others will also share; everyone wins! Online communities are perfect for making new connections, passing on knowledge, and—in the case of bookmaking—preserving an old art.
- Be prepared to unlearn what you have learned to make room for learning something new. In other words, approach a new challenge, a new task or new experience with the mind of a novice. Think about the joy of a toddler who masters walking for the first time. Openness to new experiences, according to Barry and Kaufman, in Wired to Create, is necessary to creativity.
- Follow your passion to find your creative direction. There is a link between passion and flow. What were you passionate about as a child? Is there something you do that causes you to become so absorbed that you lose track of time and your surroundings? This is when you are most open to focusing on new ideas and shutting out distractions. It probably also inspires your passion. When I am stitching one signature to another, nothing exists for me outside those moments. The same occurs when I write poetry.
Writing and making things by hand define the areas where I am most creative. Where are you most creative in your life, and what life lessons have you learned from this activity?
© 2021 Judy Nolan. All rights reserved
I’ve learn some just right stuff here. Definitely value bookmarking for revisiting. I wonder how so much attempt you put to create one of these magnificent informative site.
Jayme Silvestri