Each month members of the Blogging Business Artisans team on Etsy are challenged to stretch their creativity. This month’s challenge was conceived by Edi of Memories for Life Scrapbooks:
In February we celebrate Valentine’s Day. My challenge to you: Create a love-themed item.  You can write a creative love letter, make a valentine, make a love-themed home decor item, etc.  Be Creative and Have Fun!
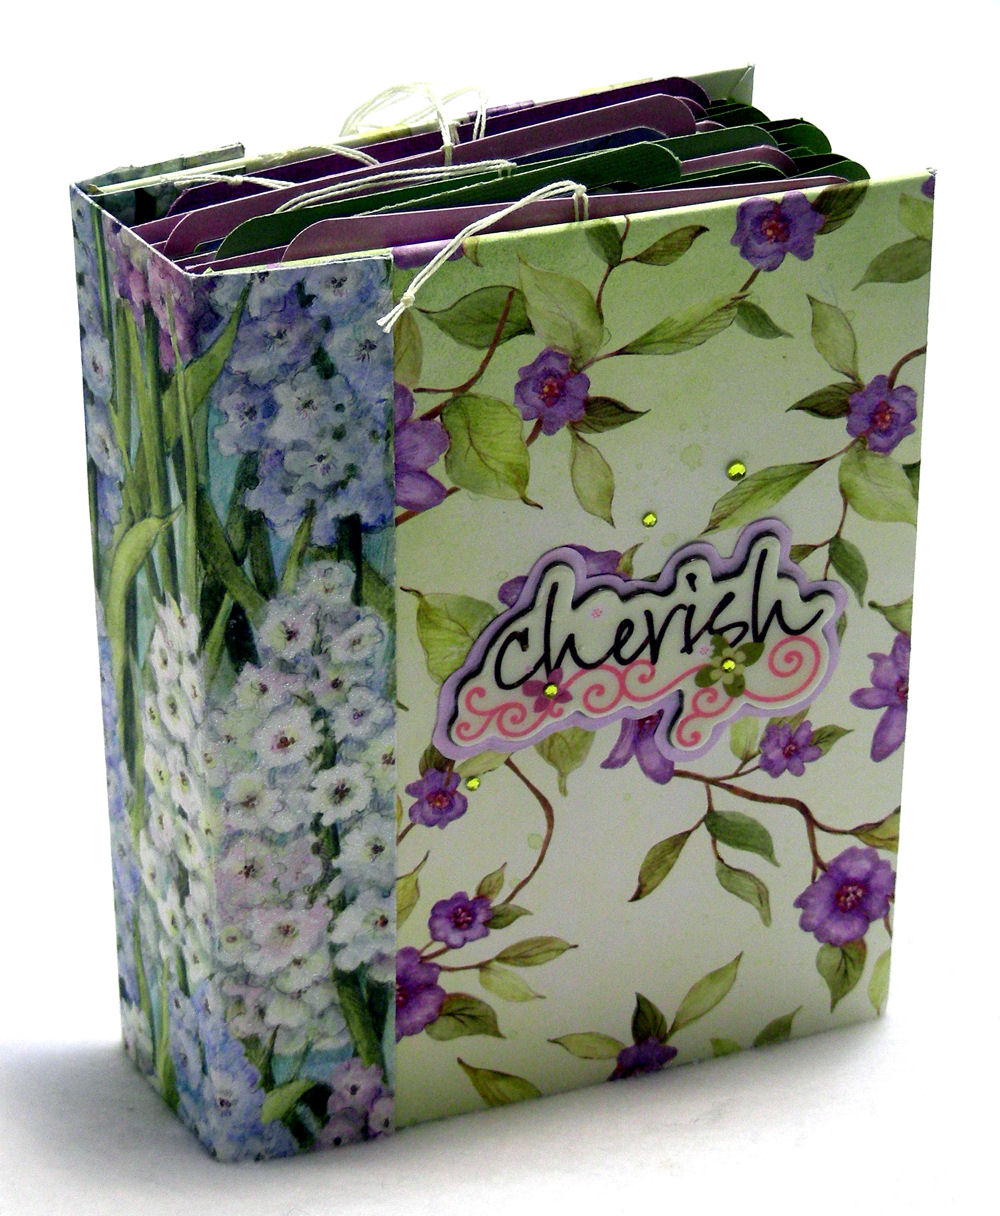
The way in which I chose to implement this challenge was to craft my first-ever hardcover book, a photo journal whose pages consist of modified envelopes, covered with designer card stock cut and folded to form pockets. The theme for this journal, which is a gift for a family member, is “Cherish,” which suggests the relationship between a couple. My German-born mother (now deceased) used to tell us as we were growing up, “People are for cherishing, not for teasing,” so I’m reminded of her with this single word on the cover of the journal.
I learned the techniques for making a hardcover book, creating pocket pages and binding them by watching several YouTube videos, among them the Envelope Mini Album Series (click on the link for the first video) by Kathy Orta of Paper Phenomenon, Stack the Deck Mini Albums by Laura of The Paper Trail, and Robyn’s Scrapbook Mini Album Binding Technique by Robyn of Injoy Stampin’. I blended these techniques, made some mistakes along the way, and adjusted.
The most fun part of the project was making the photo-matted cards. I adhered various patterned paper shapes, collage-style, onto textured card stock, forming a patchwork of colors and patterns. Each photo-matted card was unique, as well as a surprise, since I simply moved the pieces around until they pleased me.
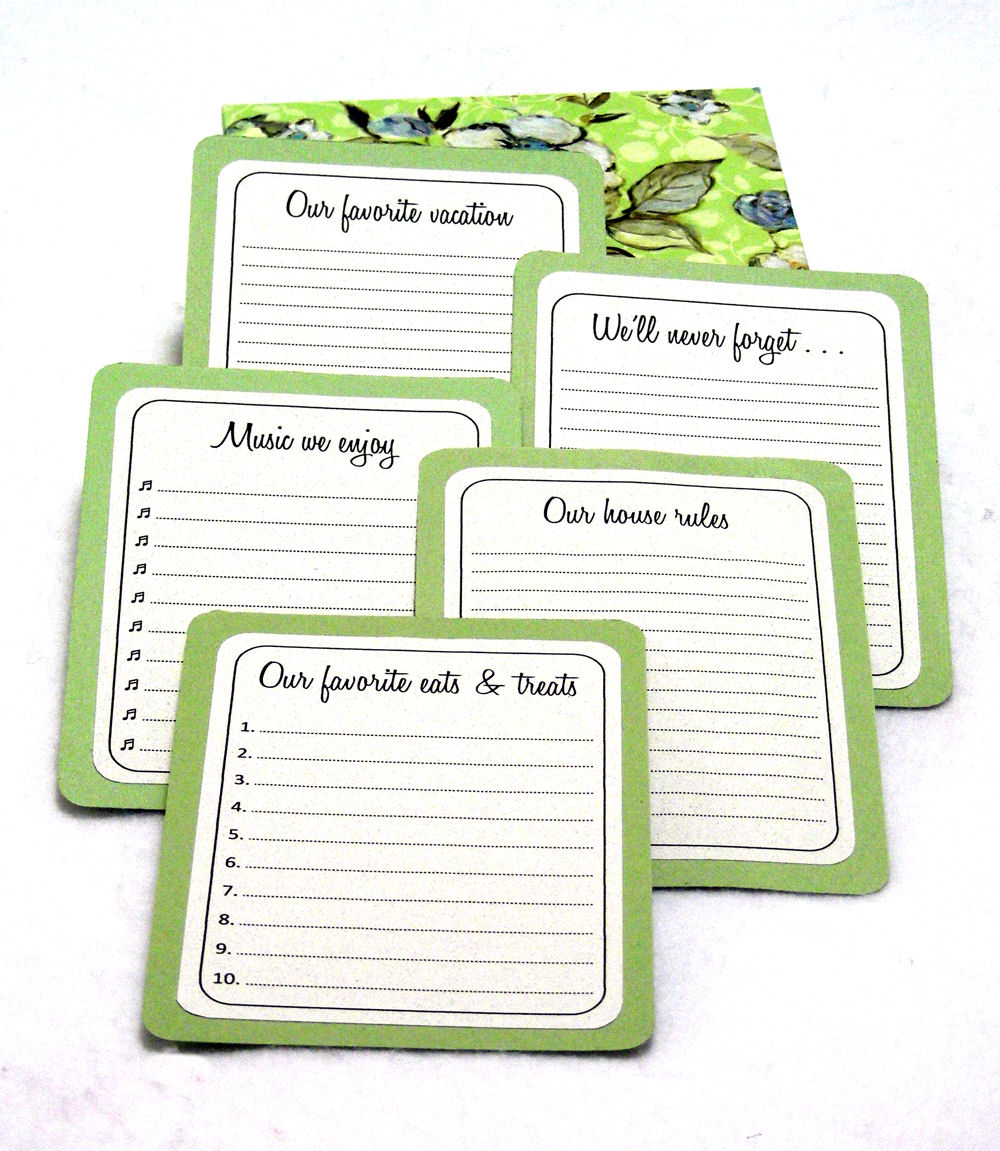
Another part of the photo journal project that I thoroughly enjoyed was designing journaling tags with different topics, such as Favorite eats & treats, How we met, Words we live by, Our house rules, Our recipe for love, Our favorite vacation and We’ll never do that again! Once upon a time I ran a home-based desktop publishing business, developing all of the forms, brochures, newsletters and other designs using Corel® WordPerfect® software. I used the same software to design the journaling tags. You could use Microsoft® Office Word software just as easily; I simply prefer the former program. There were 24 journaling tags by the time I was done, not all of which will fit in the journal. However, I figure that if some of the topics don’t strike a chord with the recipient, others will do the trick . . . or they can simply be used in another journal.
I inserted some of the journaling tags in the book itself, and put the remainder in a gift box I made from patterned card stock. For each half of the box, I decided how big I wanted the box to be and added 2 inches to that, cut a rectangle with those dimensions, and scored each side of the shape at the one-inch mark. I folded along the score lines and cut corner flaps, and glued into place. If you don’t have a scoreboard, you can accomplish the same very easily by following this tutorial by Nancy Fallon of The Life and Times of One Loopy Knitter in How to Make a Card Stock Gift Box.
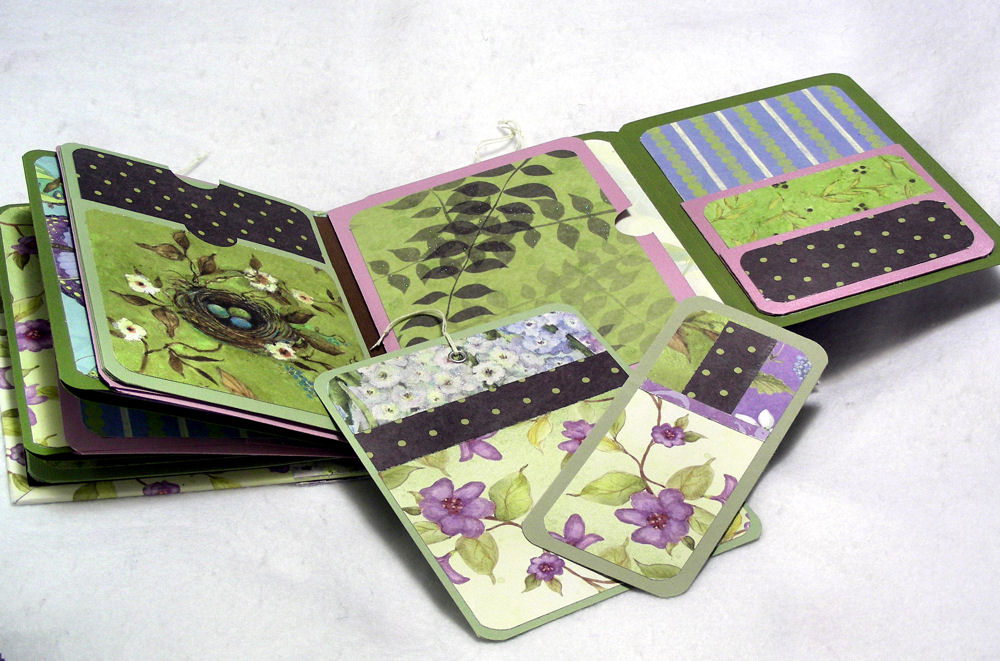
The book was supposed to have six envelopes for its foundation pages, but I made the mistake of not leaving enough space between the last page and the back cover, and it tore off. The lesson I learned was to create a wider spine. Also, the video tutorial called for library-style pockets on both sides of one page. I really think this makes the page too heavy, and would not do this in the next book. This extra weight probably contributed to the last page tearing off. I salvaged the pockets and adhered them to the front and back inside cover. You can see one of these pockets on the left side in the next photo.
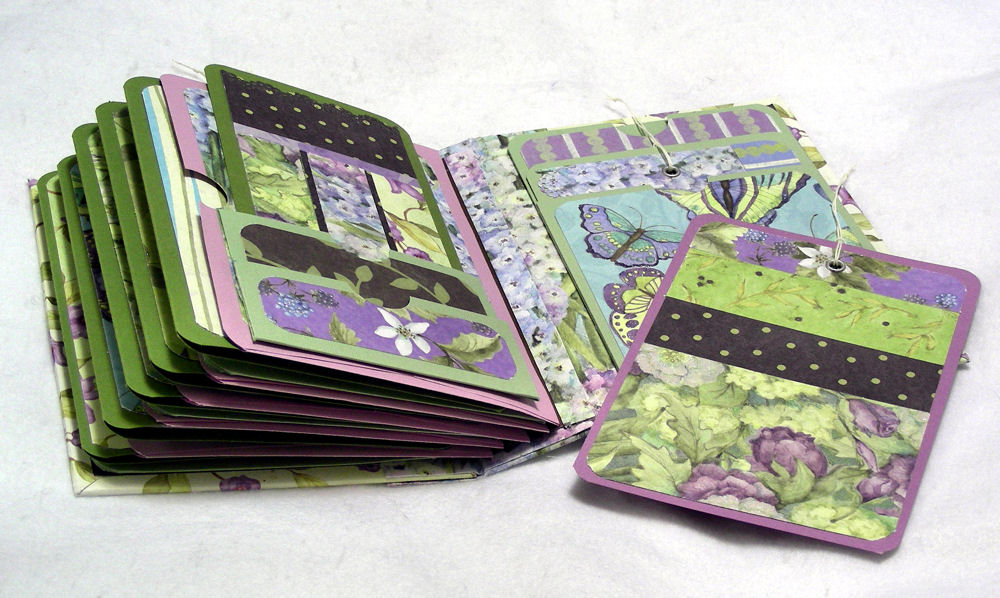
You’ll notice, in the above photo, that the far right pocket (actually, a double pocket) is kind of bulky. The video tutorial suggested you use a smaller envelope to form this pocket. On another page, I decided to use card stock instead. Take a look at the difference below.
You can see the “salvaged” library-style pocket on the back inside cover. In my next book, particularly because there are so many tags, I will add a few more pages, keeping in mind that the spine needs to be wider. I would be interested to see if this book would be less bulky using card stock instead of envelopes, too.
I learned a great deal from this challenge, and look forward to making my next hardcover book.
© 2012 Judy Nolan. All rights reserved.


This turned out great! I love all the interactive pieces that the pockets provide! Lots of room for photos and journaling!
And I love that you used the love theme, but didn’t add any hearts. Goes to show that love comes in all shapes and forms 🙂
This is so very pretty Judy. I am sure it will be cherished.
I absolutely love your Book of Memory with it tags, etc. The colors are beautiful, of course, I am always partial to anything with flowers. What a great idea Edi has to write or create something memorable with a spark of Love.
Going to check out the Team.
this paper is great! AND time consuming is right! But for the sis – who cares! It’s Beautiful! {:-D
It is so beautiful! I love your “cherish” story…what a wonderful memory. 🙂 Well done!
I agree with Edi about your use of the love theme. I can see now why this book was so time consuming! The result is gorgeous, though. I love the variety of components that the book has.
What a lovely and really special thing you have made for your sister.
You are amazing! This is such a wonderful idea. I’m going to guess there’d be a market for them!
Such a gorgeous journal!
It looks beautiful. Great project!
Judy- it’s so so gorgeous! I like the tidbit about what your mother said. It’s also cool to see a bit of your process and hear about how you learned to make these and evolved your methods along the way. Thanks for the mention as well!
This is just lovely, thanks for sharing.