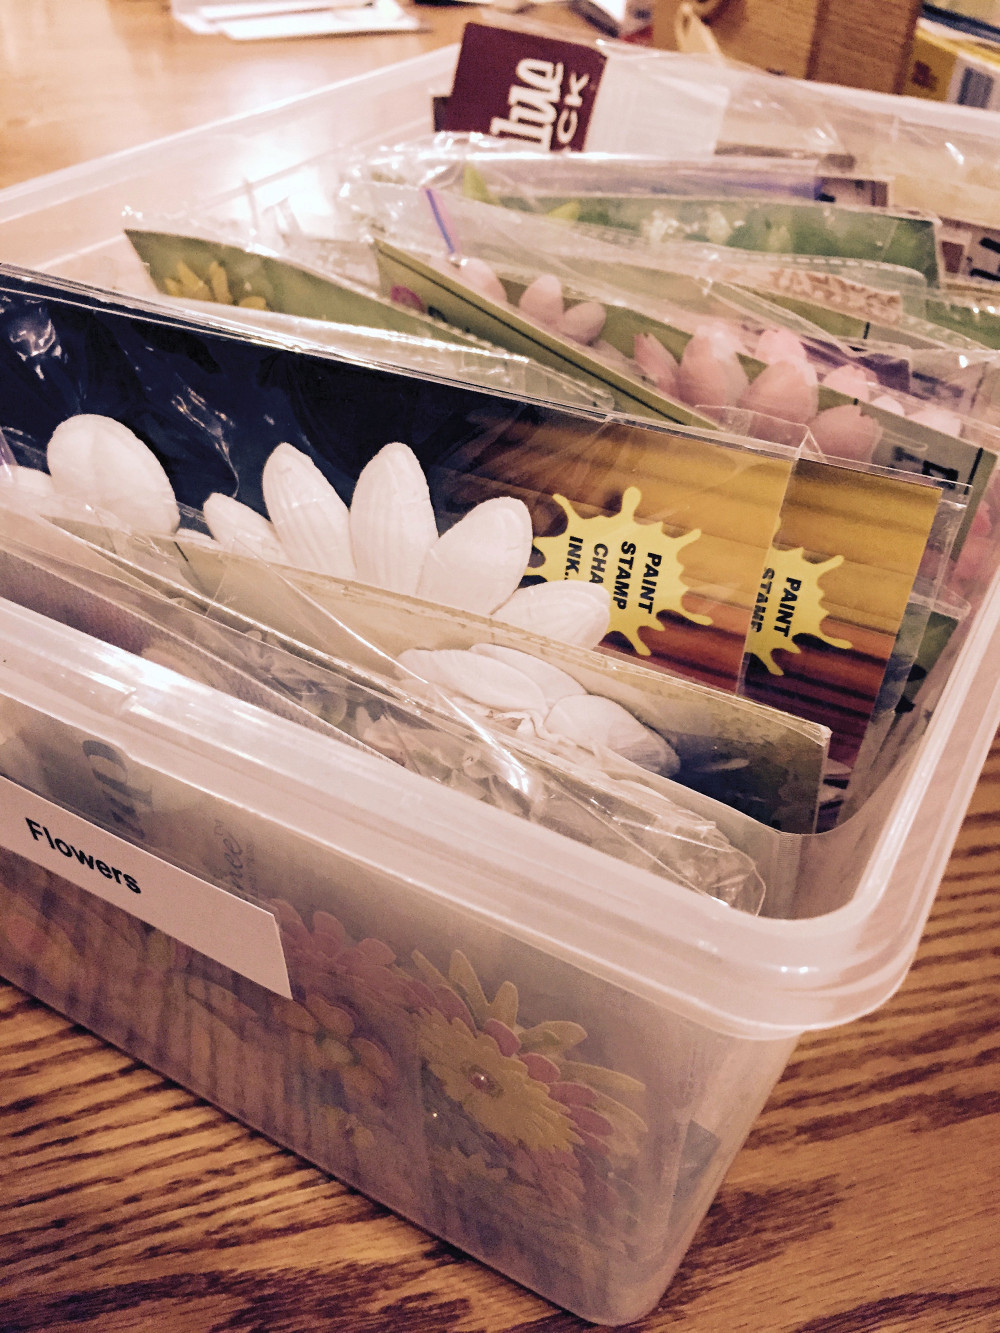
Earlier this week I mentioned that one of my goals in 2015 is to find ways to streamline my creative process. In other words, I want to work more efficiently. A second goal is to be more thrifty—to use more of the materials I have on hand instead of buying new ones so frequently. Right now I am working my way through a box filled with packages of paper-and-fabric flowers from Petaloo, Pink Paislee, Prisma and lots of other companies whose names don’t begin with the letter “P.” Some of the flowers are too big to use for my mini books, so I will have to find other uses for them.
One fact is certain, however. I will likely run out of some colors of flowers faster than others, and will need to replace them. My intent is to use the scraps of paper I save after crafting projects are completed. I throw few scraps away, as you can tell from the messy three-ring binder below, in which I’ve grouped papers into approximate color families. The binder is hyper-extended when closed, so it’s obvious that I have plenty of paper scraps to craft flowers. It takes time to do so, but is creatively satisfying.
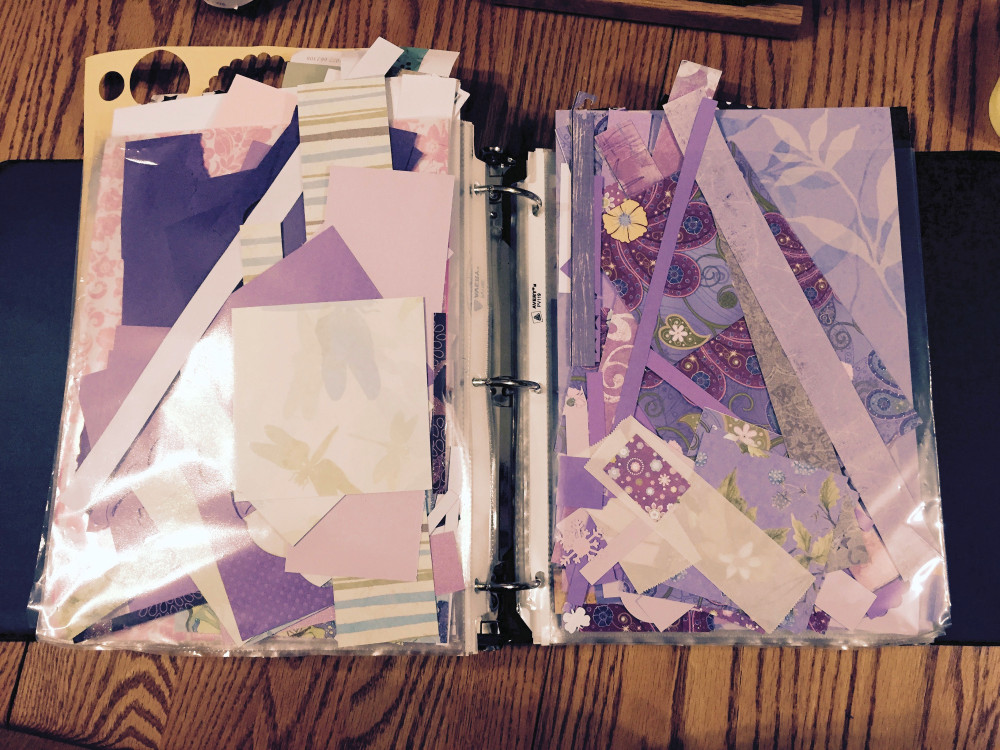
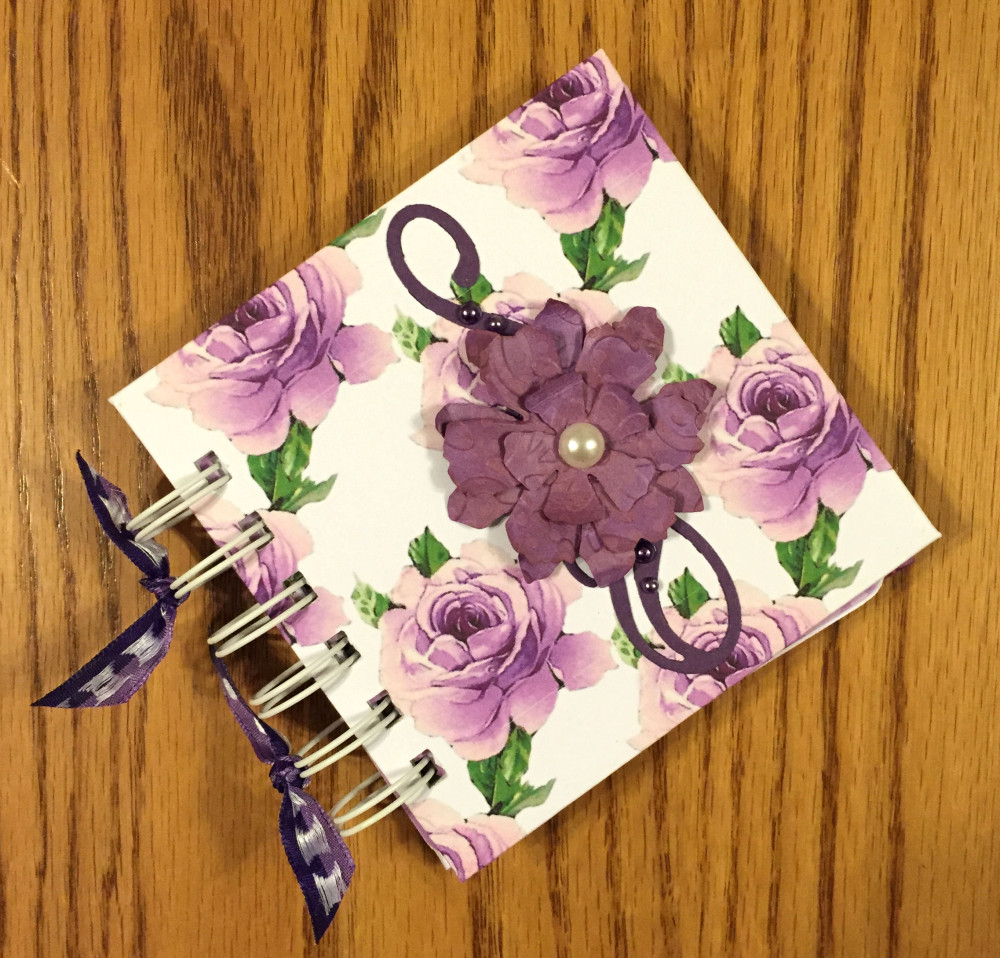
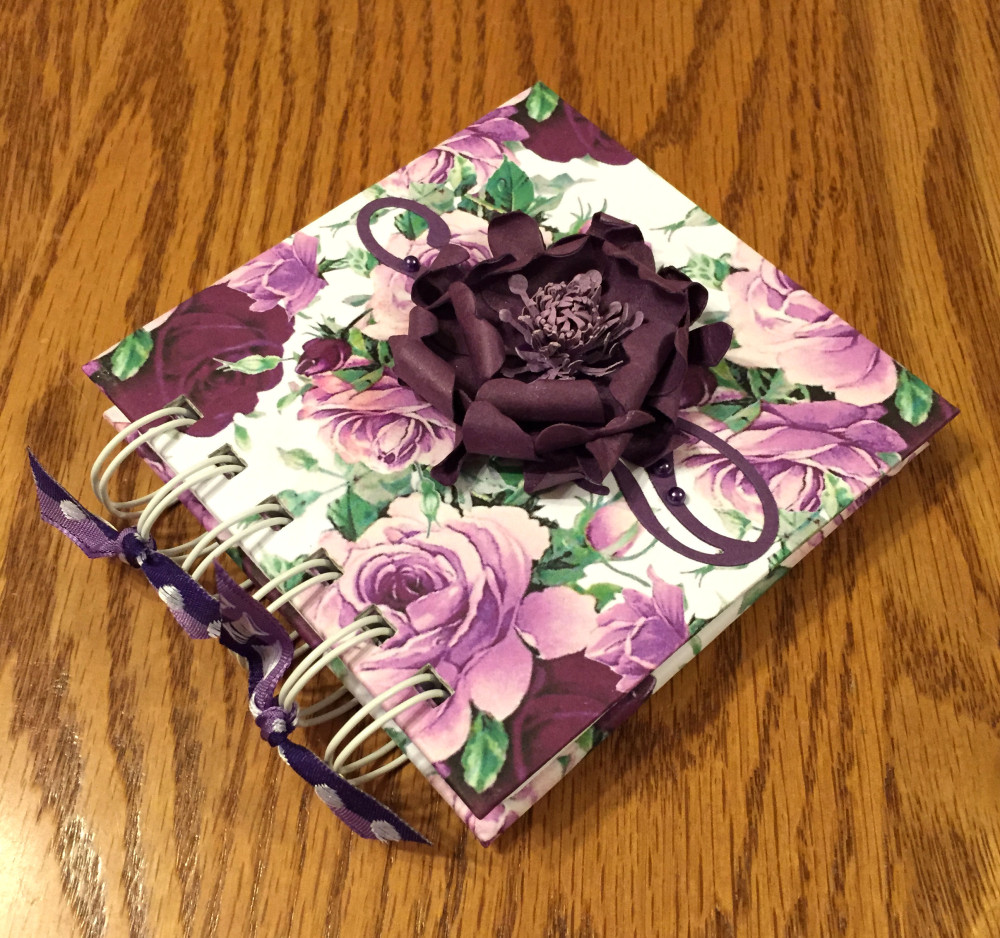
I have run out of certain shades of purple flowers, and have no lavender ones at all, so when I needed to complete a book cover a couple of days ago, I flipped through the pages of my scrap paper binder until I found the color I needed. It took very few items to assemble my flower:
- paper, glue and scissors
- Tim Holtz® Alterations Movers & Shapers™ dies and a Bigz die, all of them from the Tattered Florals line
- Sizzix Starry Night embossing folder to texturize the paper
- Tim Holtz® Distress Ink in Victoria Velvet to modify the color of the paper somewhat
- a skinny paintbrush whose handle was used to curl the petals in a random fashion
- an adhesive pearl for the center of the flower
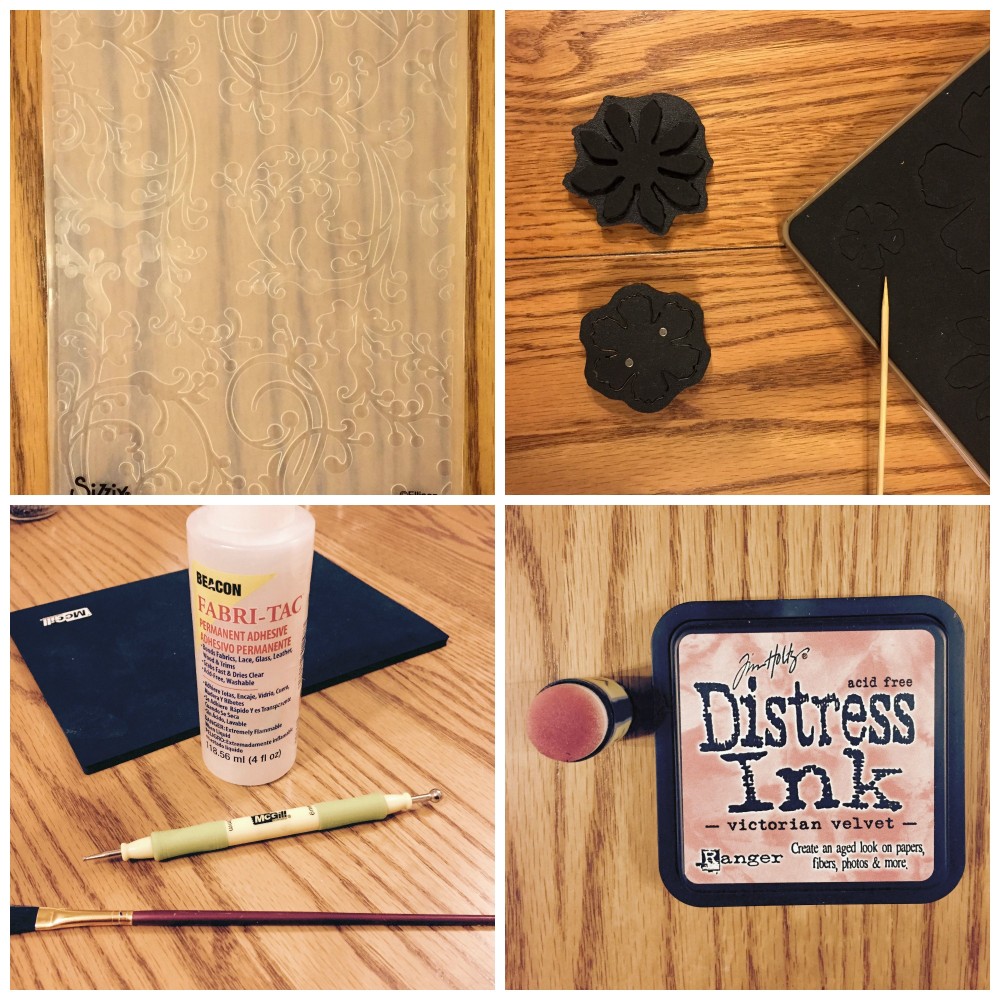
All I had to do was cut out the flowers with my Big Shot die cutting machine, emboss them, color them, curl the petals, and glue the pieces together. If you don’t have a cutting die, I honestly think you could draw the flowers freehand and cut them out with scissors. It’s a simple process.
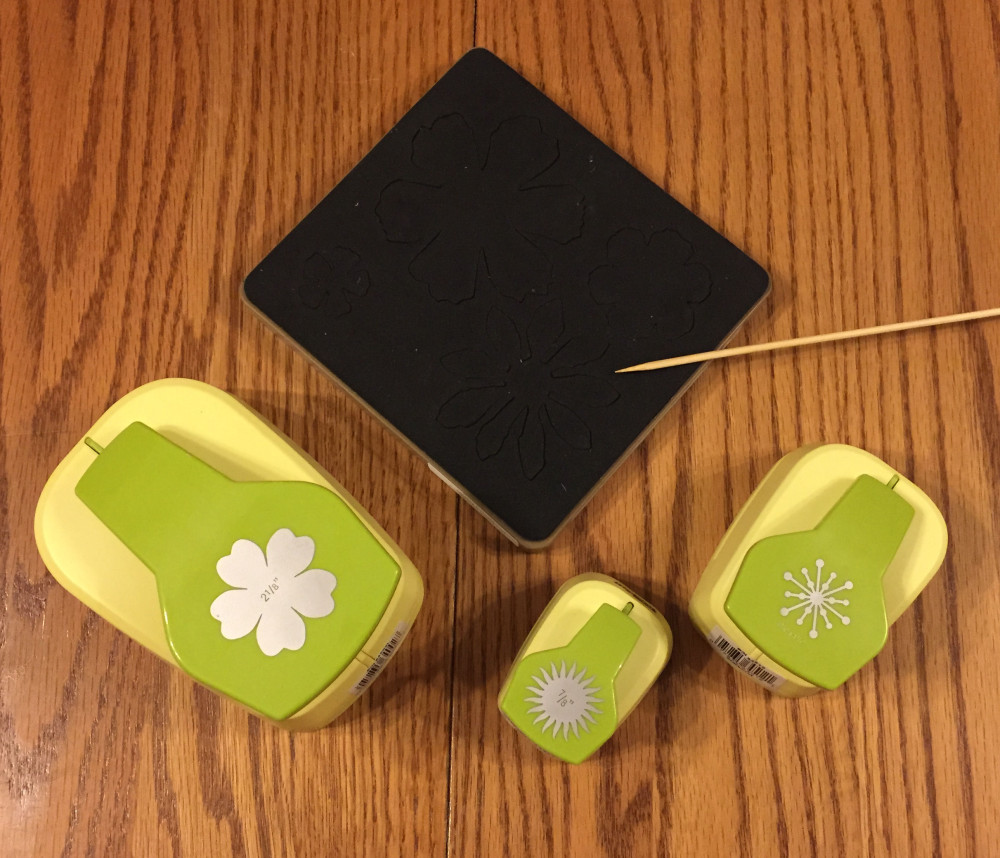
The assembly process for the above flower was so easy, in fact, that I decided to challenge myself yesterday by crafting a second flower using a tutorial from talented scrapbooking artist Lisa Nazario-Gregory of the blog, What a Beautiful Mess, not to be confused with the Web site, A Beautiful Mess. They are two completely different sites. Almost two years ago, Creative Director Tim Holtz of Ranger Industries ran a design contest using Tattered Flowers cutting dies. Lisa was one of the five winners. You can see her beautiful flowers in the first photo in this post, and you can find her tutorials in the side bar of her blog. I skimmed through her tutorials, searching for the ones that used Tattered Florals dies, until I narrowed my choice down to the Fairy Cosmos Flower. This flower uses a combination of McGill flower punches, as well as a Tattered Florals die.
Lisa does such a wonderful job of outlining the steps for making this flower that I am going to refer you directly to her tutorial.
One of the nice things about the Tattered Florals dies is that there is virtually no wrong way to assemble the flowers, as long as you build them up from the largest layer to the smallest. You can make your flowers from paper, fabric, foil, corrugated cardboard, grunge board or grunge paper, leftover clear plastic packaging, and I’m sure there are materials I’ve left off of this list. Basically, you’re limited only by your imagination. In the video below, Sizzix art room designer Debi Adams discusses many possible materials that can be used with the Bigz XL Jumbo Tattered Florals Die by Tim Holtz®.
As for me, my version of Lisa Nazario-Gregory’s Fairy Cosmos Flower matches the gratitude book I created over the weekend. I can’t wait to see what other kinds of flowers I can craft using Tattered Florals dies.
© 2015 Judy Nolan. All rights reserved.
Your flowers look even better than the store bought ones!
Working more efficiently is one of my goals this year as well.
Very pretty! And thrifty, too! Bonus.