If we can avoid it, most of us prefer not to re-do our craft storage systems. We’d rather use that time for crafting! I’m no different—when I originally stored my wafer-thin steel dies and foam-backed dies inside a combination of three-ring binders and plastic storage boxes (see How to store your wafer-thin cutting dies), I felt pretty good about both systems.
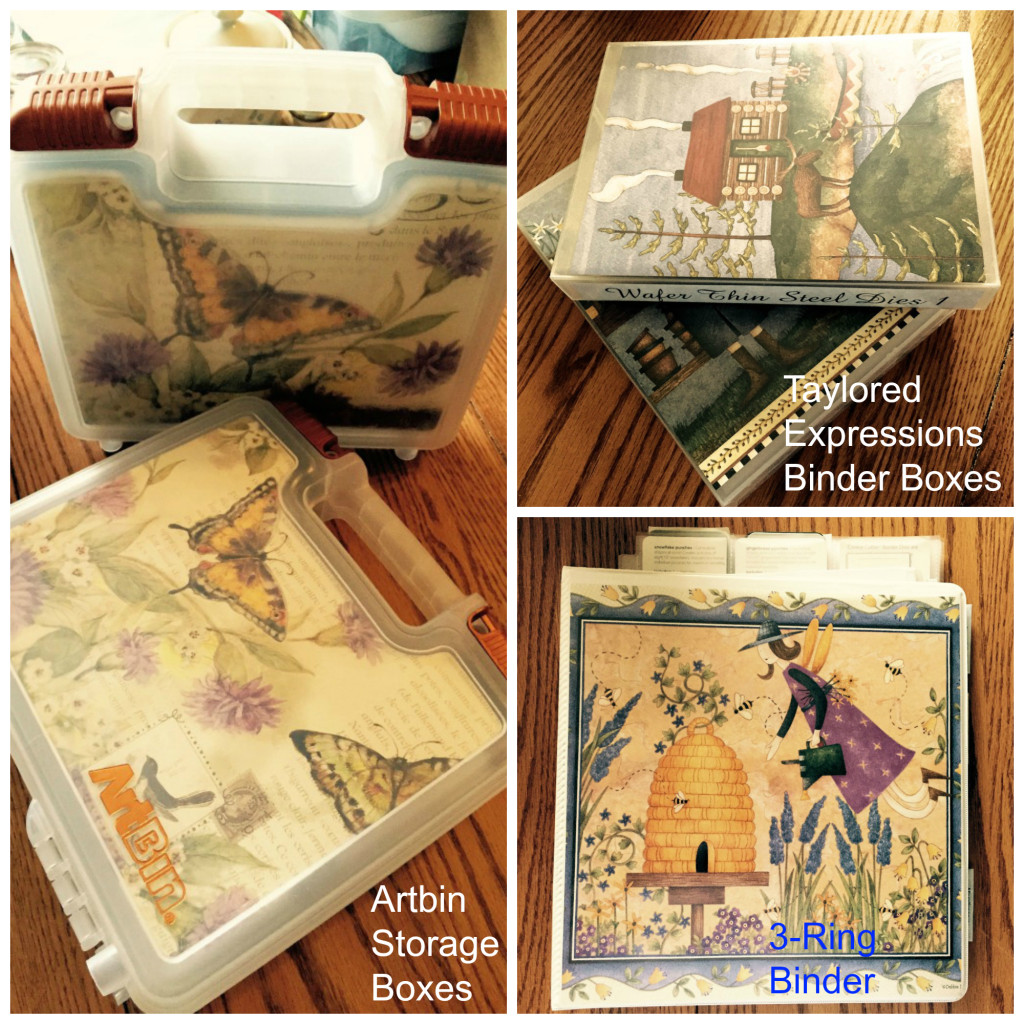
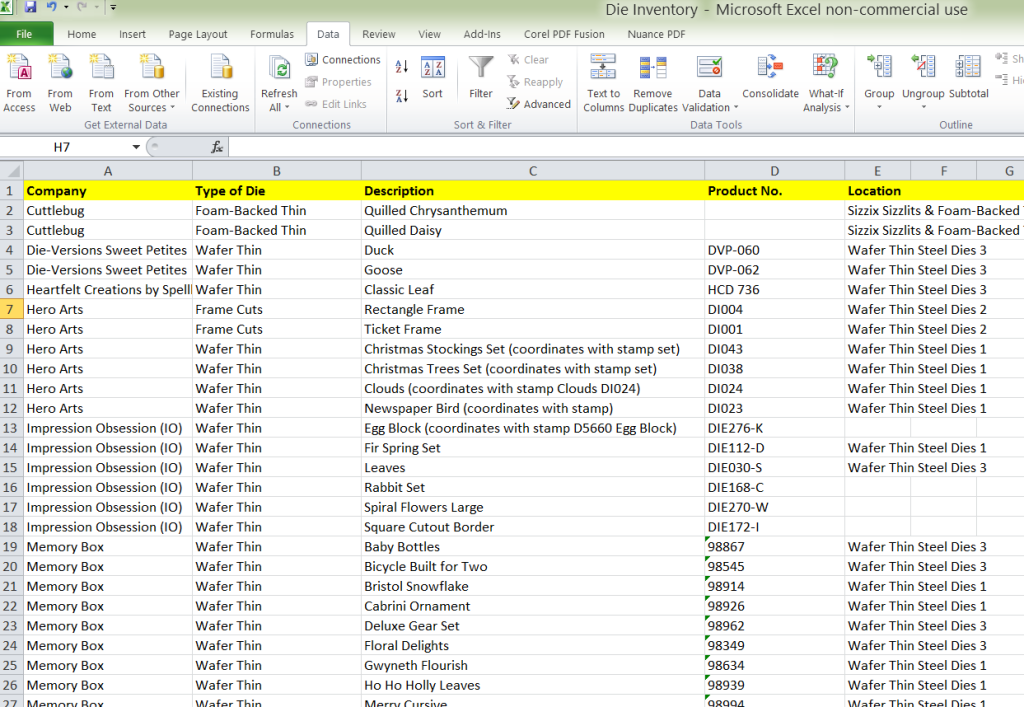
The binders I use for my thin foam-backed dies still work just fine, as this collection is not too large. But my collection of thin steel dies is immense, making it difficult to locate the one I need in a snap. I tried to solve this issue by developing a spreadsheet with a “Location†column (see Create a master inventory system for your cutting dies), but while this has helped me to locate the box or binder where dies are stored, it doesn’t allow me to zoom in on the exact location for dies stored in plastic boxes.
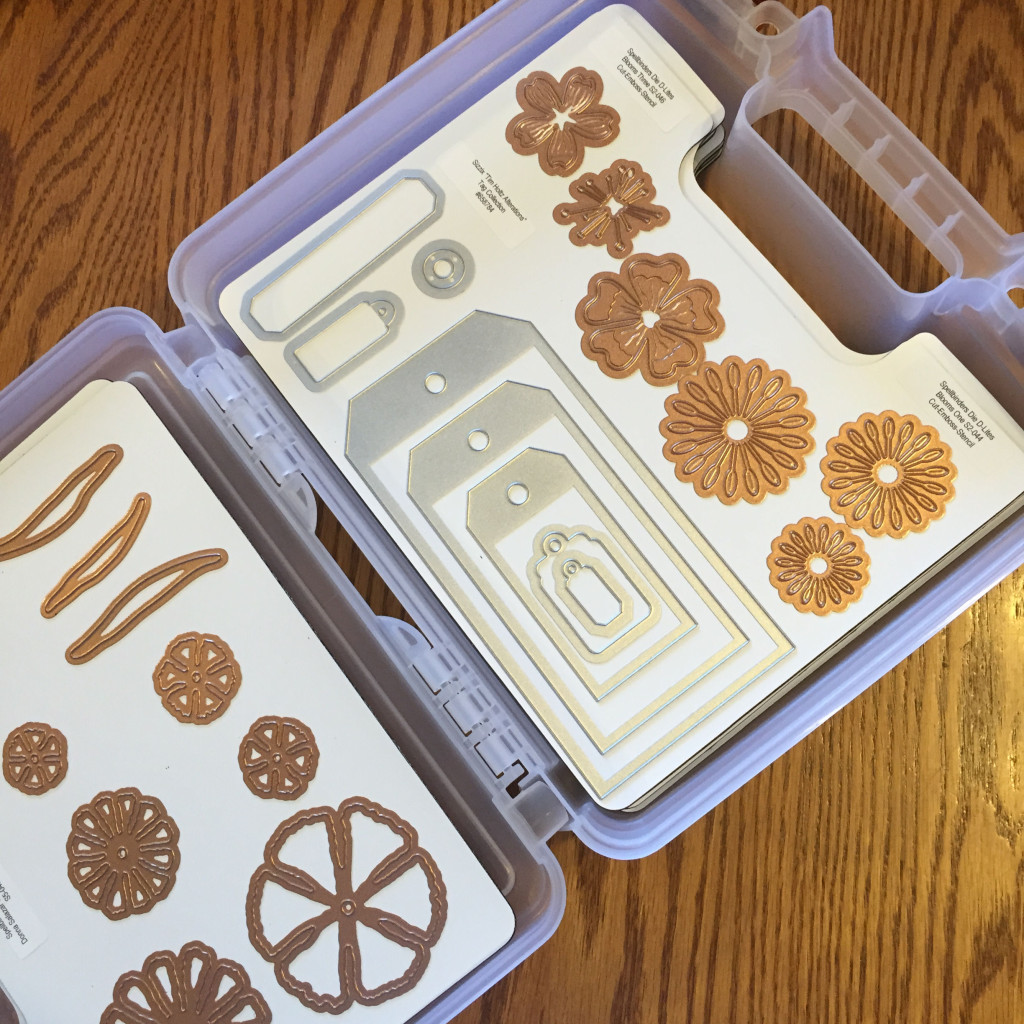
I find myself paging through randomly stored magnetic sheets until I find the correct one. This can sometimes take quite a while.
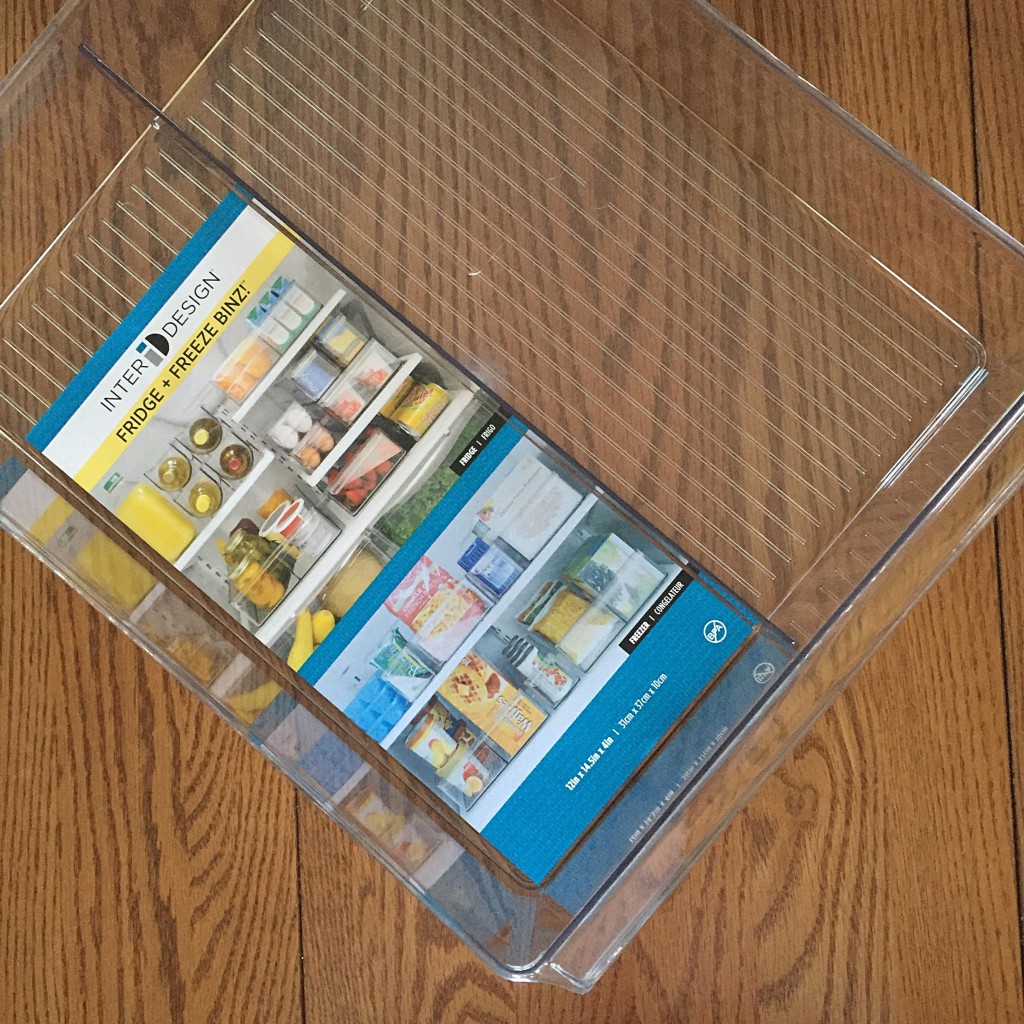
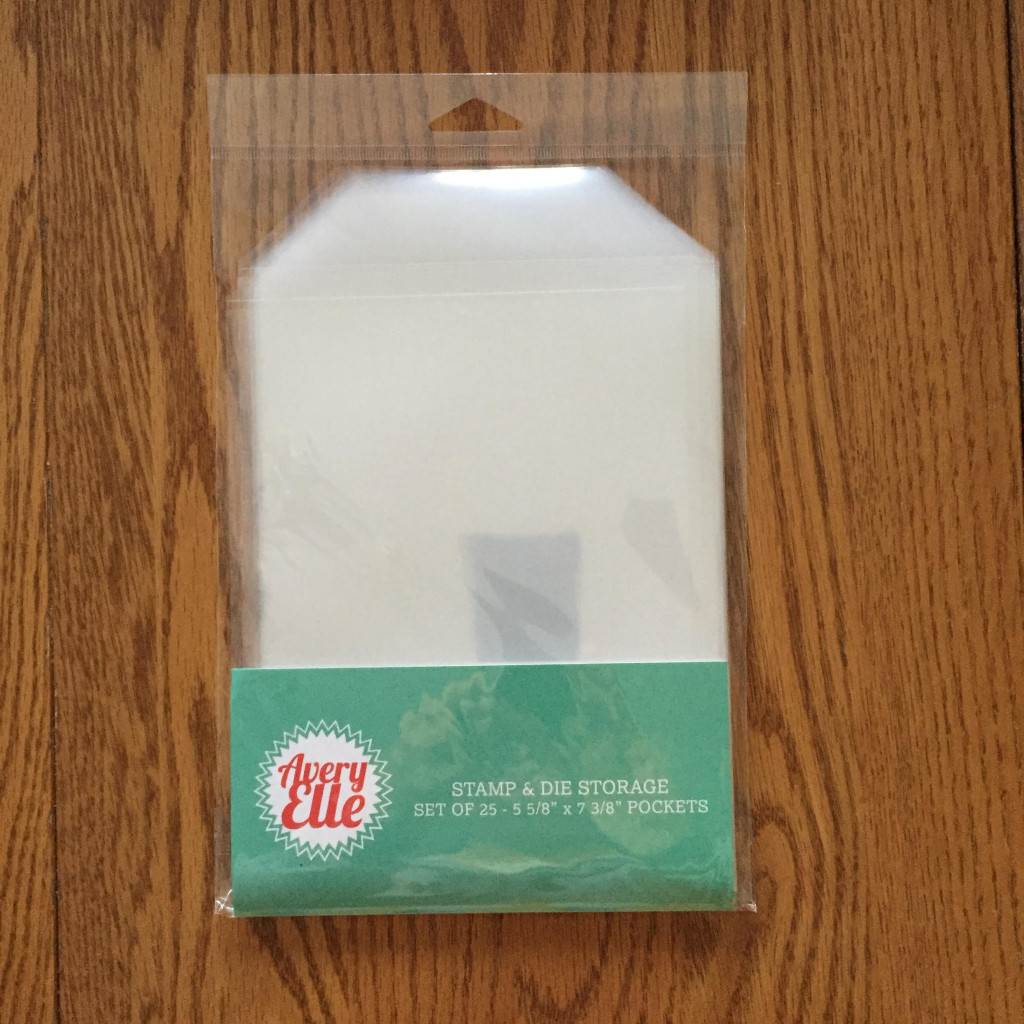
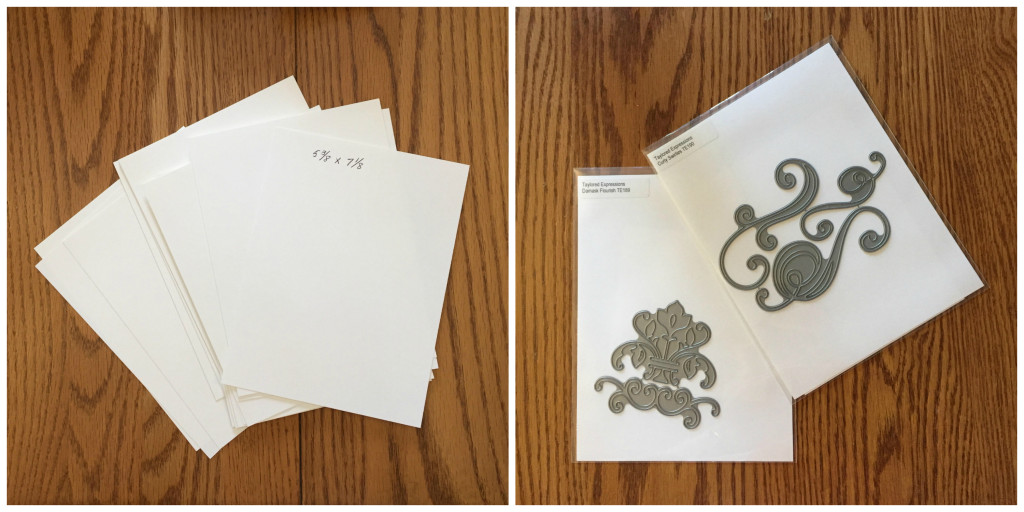
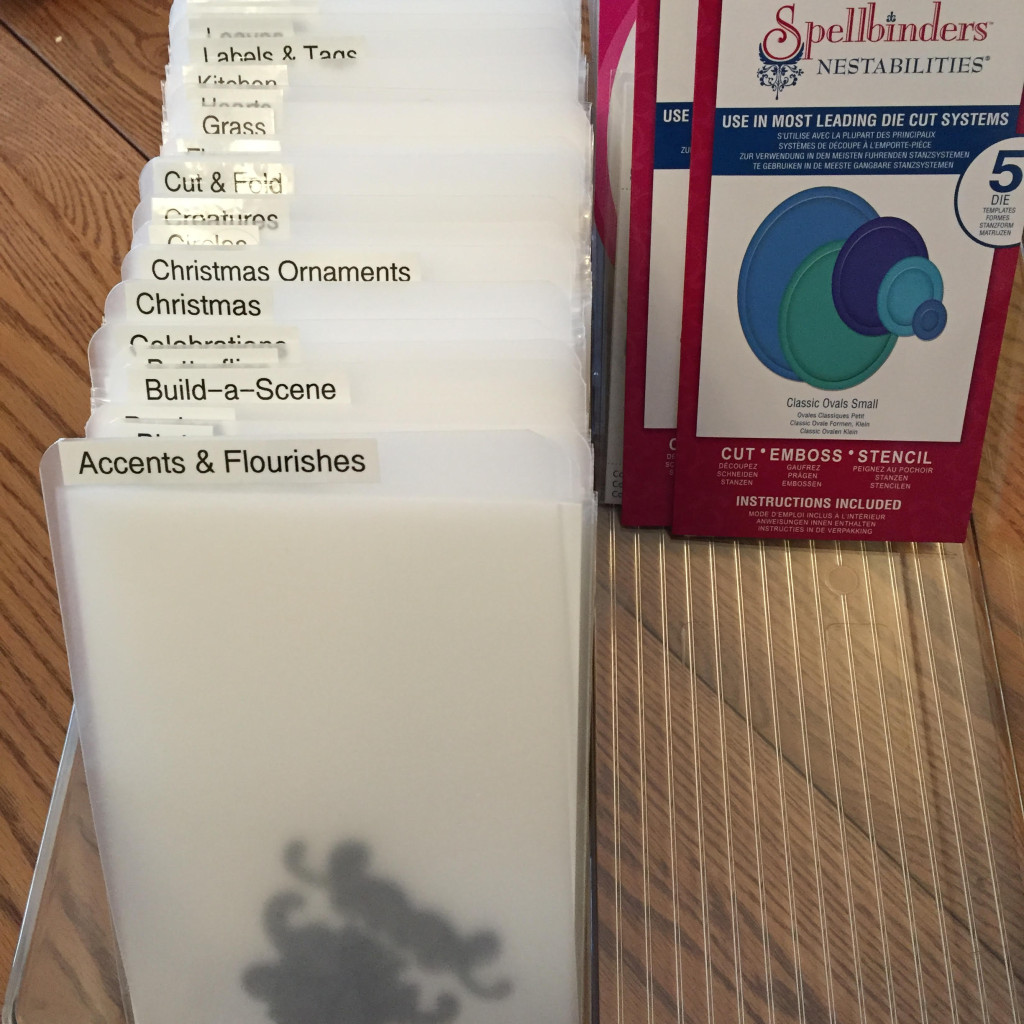
In the end, I decided to adopt the wafer thin steel die storage system recommended by Jennifer of Jennifer McGuire Ink in her Craft Organization and Storage videos, among them Die Storage from 2013, and Staying Organized (Stamps, Dies and More) from 2015. Jennifer stores her dies upright in a combination of square 5×5 CD sleeves, 5×8 or 6×9 job ticket holders, and 5-5/8 x 7-3/8 inch Avery Elle Stamp & Die Storage Pockets. The pockets are then stacked, one behind the other, inside clear, sturdy InterDesign refrigerator bins you can purchase online or at your local Bed Bath & Beyond store in the kitchen storage section. This makes all dies easily visible and quick to find. The bins are portable, so you can store them on an open shelf or carry them to your worktable.
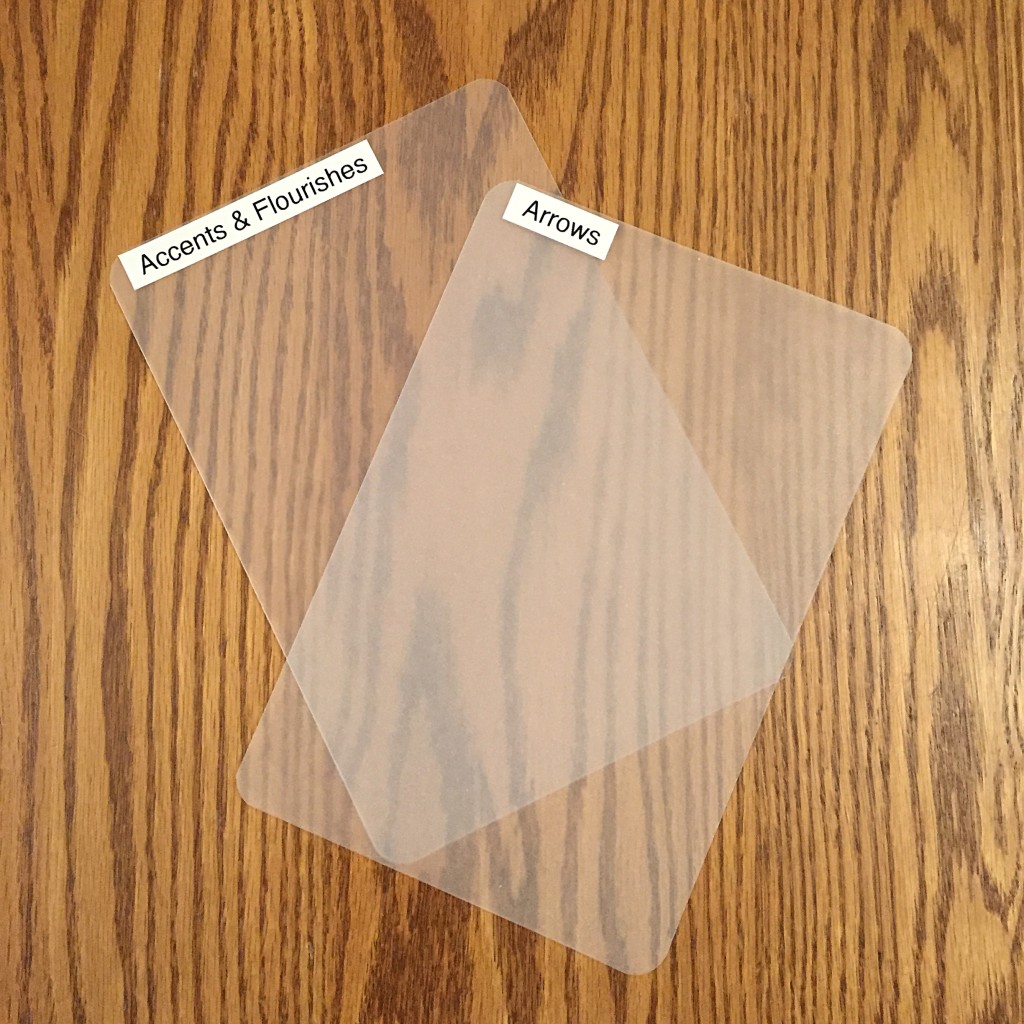
Dies are separated into categories and identified with labeled dividers, and each die pocket is labeled, too. For the most part, I am using Avery Elle clear protective pockets as shown below.
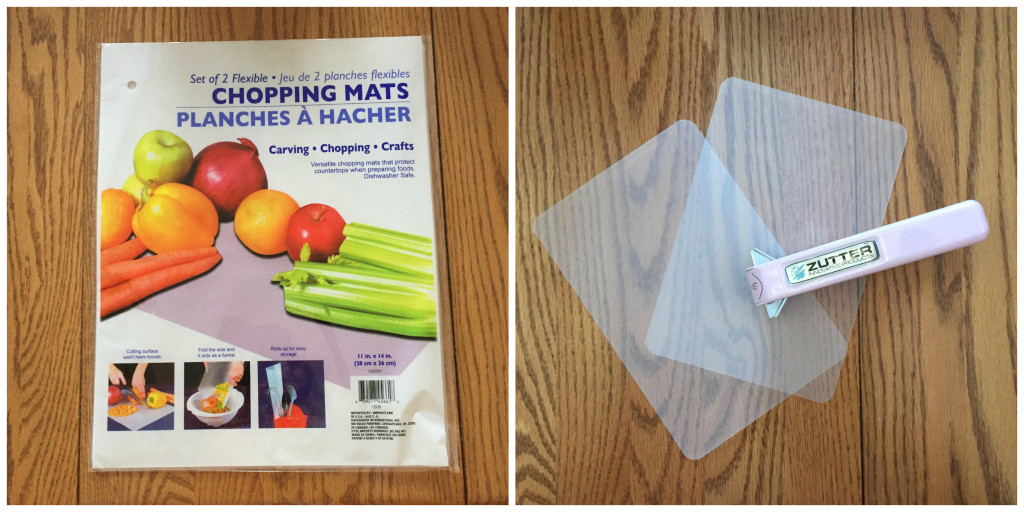
When I decided to adopt Jennifer’s system, I adapted a couple of elements to suit myself. First of all, Jennifer uses inexpensive colored vinyl folders to use as category dividers. She cuts them to size, rounds the corners, and tosses the leftover folder bits. I decided to use white kitchen cutting mats you can purchase from your local Dollar Store or online, and cut them to size in the same way that Jennifer does. The difference, I think, is mainly that your dividers will be white, and they may be cheaper to buy as a package of two cutting mats for one dollar than they would be if purchased as individual vinyl folders. On the other hand, if you prefer colored dividers, visit your local office supply store and purchase colored vinyl folders or vinyl index page dividers. Whether you use vinyl folders, pre-cut dividers (that you still have to trim), or vinyl cutting mats, they are all about equal in weight and sturdiness.
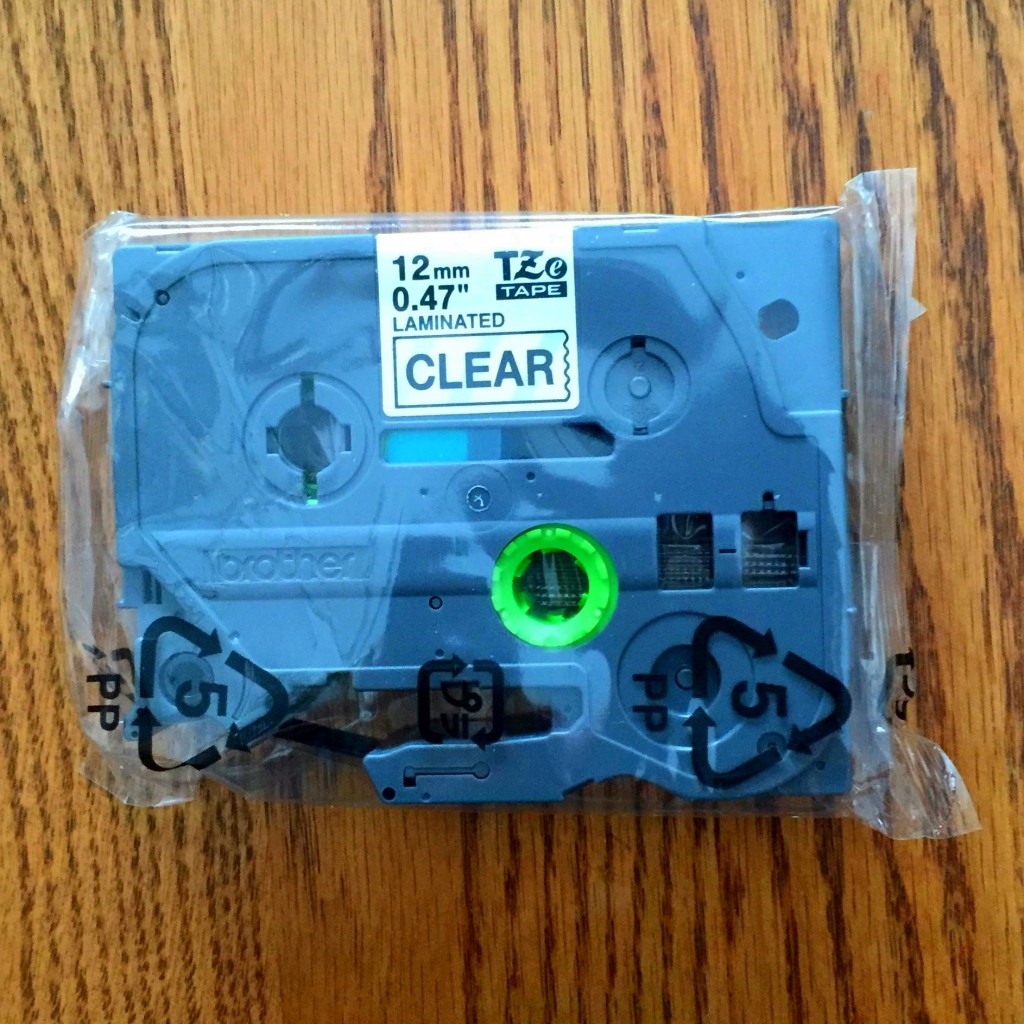
Jennifer uses a Brother label maker to label all of her category dividers and clear protective pockets. I own a Brother PT-D400 Label Maker, not the same model as Jennifer’s, but mine works pretty much the same as hers. If you purchase one, make sure you purchase an adapter with it, as it will save you the dollars you would otherwise spend on batteries.
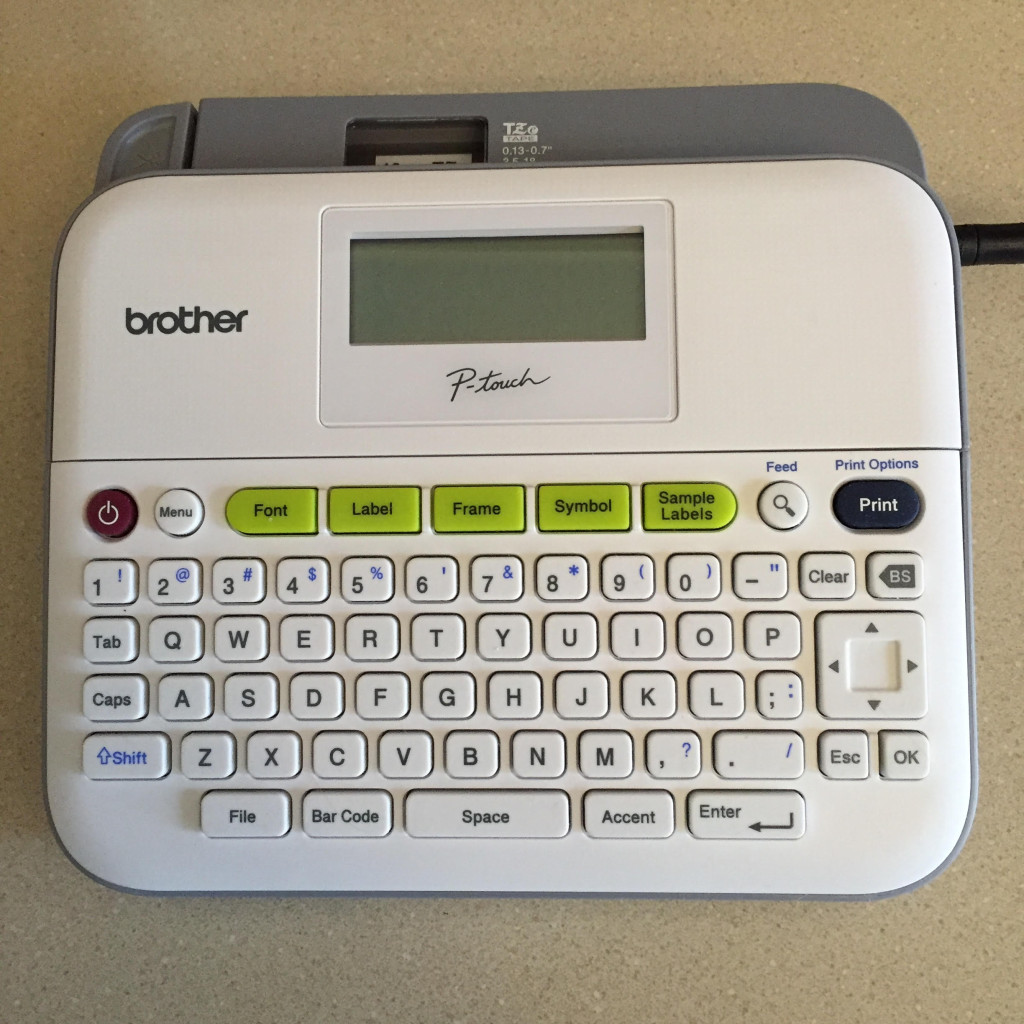
If you have a Brother label maker or are thinking about getting one, I highly recommend you watch Jennifer’s video, My Favorite Crafty Things: Organization from 2015 (advance the video to 8:08), where she provides tips for how to conserve your labeling tape. The label maker has a feature called “chain print†that allows you to print multiple labels closely together, instead of advancing the tape an inch or more after every label. After all of your labels are printed, you can snip the tape between labels with a pair of scissors.
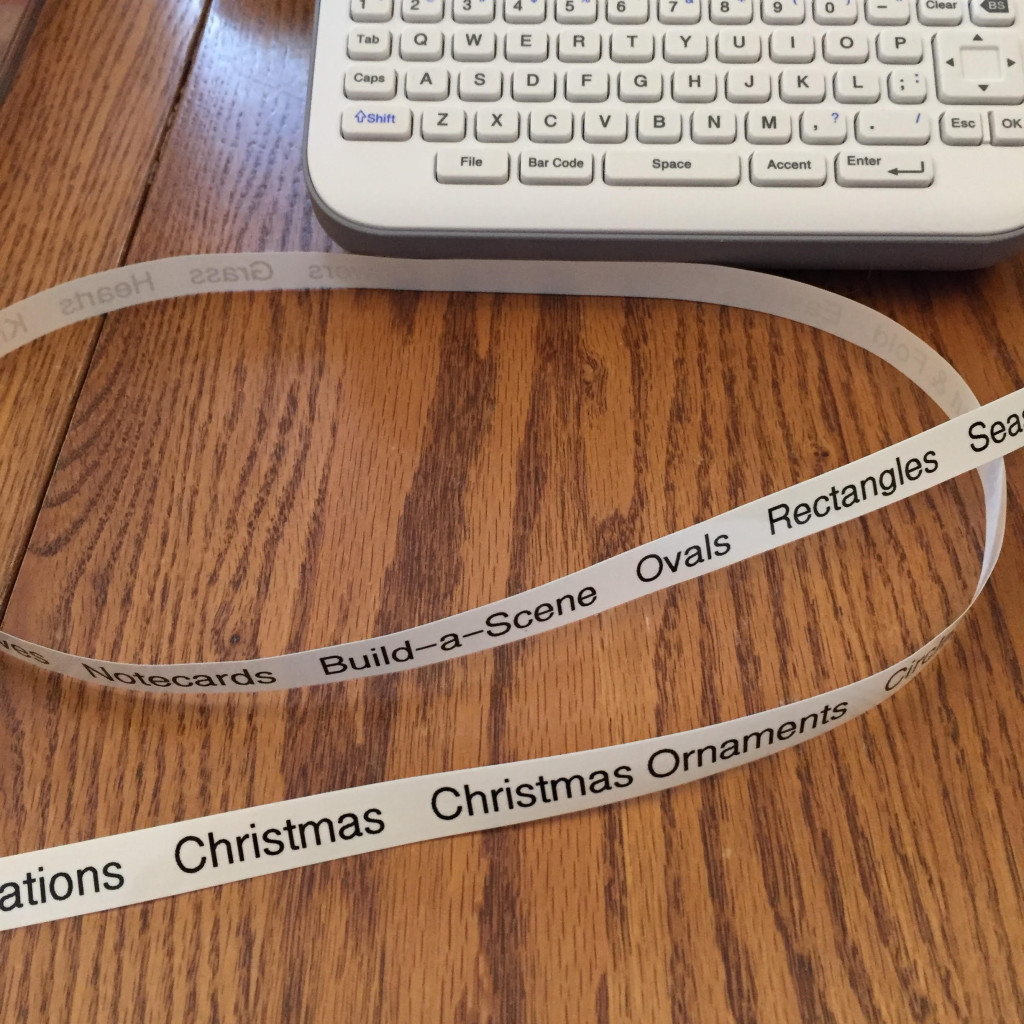
The tapes, which do work well, have one drawback—they are rather expensive. If I buy labeling tape from my local office supply store, it costs $18.99 for 26.2 feet, so I look for a coupon first. Otherwise, I search online for the best deal, such as Amazon, where the last time I checked the cost was $9.66. Quite a difference!
Jennifer uses labeling tape for just about everything in her craft room. So far, in regard to die storage, I only use it for my category dividers.
For my clear protective pockets, I use Avery Laser Labels 5267. Please note that these labels work for both laser and inkjet printers. The labels are compact, measuring ½ inch by 1-3/4 inches, and come 80 labels to a sheet. I use Arial Narrow in a 10-point font to identify the die’s manufacturer, design and item number.
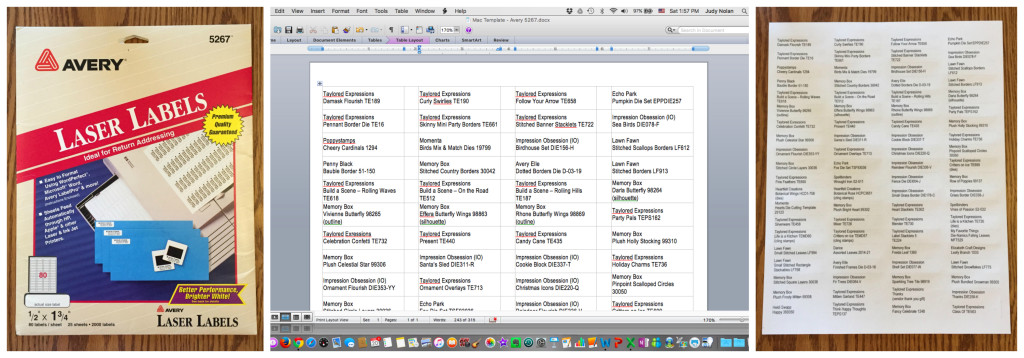
I discovered one drawback to these labels: they peel off the clear protective pockets as quickly as you adhere them. The solution is easy. I insert a rectangle of white card stock inside each pocket to make the die visible, but also to provide a place for special instructions or a matching stamp. I insert the die in front of the card stock insert, and other items behind it. Instead of adhering the Avery label to the pocket, I stick it to the card stock insert. This system is much faster than using a label maker because you can type and print many labels in a jiffy. I save the file for these completed labels from one typing session to another so that I know where the next label is located. I simply highlight the new labels and print that selection.
I have not completed my new die storage system, but as you can see, a refrigerator bin storage system holds many dies. In the photo below you see more than 90 dies, and there is space for many more. When not in use, I store the bin on a bookshelf. Otherwise, I simply move it to my craft table. One storage bin accommodates hundreds of dies. In contrast, my previous plastic box system stored fewer than half of my dies and took up four boxes.
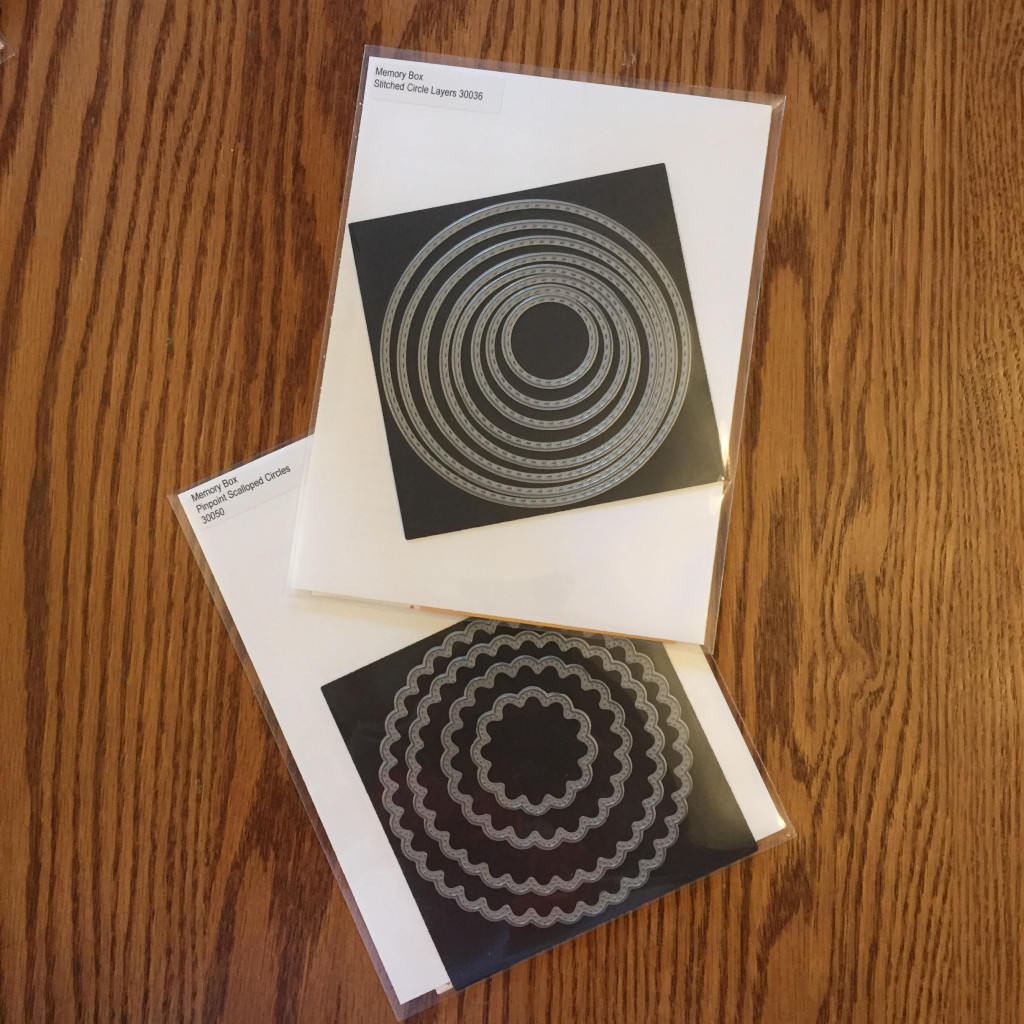
You might be wondering what I will do with my old plastic die boxes. To be honest, I am still thinking about alternate uses; if you have suggestions, let me know in the comments below. I may sell them for $5 apiece, plus shipping. If you’re interested, you can email me at judynolan@aol.com. But the magnetic sheets inside them are being cut up, as needed, to accommodate layered sets of dies inside the pockets for the new system. Of course, some dies already come with magnetic sheets.
If you have a boatload of wafer thin steel cutting dies, what storage system works best for you?
© 2016 Judy Nolan. All rights reserved.
Neat! That does seem like it will save a lot of timing since you won’t be digging through stacks. I did recently re-do my craft storage, but I don’t have a spreadsheet of everything! Well, not of where it’s located. I labeled all my bins, though, and have tried to store things vertically to minimize digging. I even started folding my fabric and storing it vertically – it’s saved me so much time when I need something.
Wow! I don’t label anything at all in my art studio! I just rummage away 🙂
You are SO organized!!
Ugh…my “organizational system” is always evolving and changing. Just about the time I think I have something down that will work, I get more supplies/inventory and the old system needs redone. Never fun!
I’m glad you found a new system that will make finding your dies much easier and quicker. It sounds like the time it takes to set it up with be well worth it.
That’s incredible! I have so much respect for you. As an artist, I try to keep my mediums in separate storage areas when they aren’t scattered about my studio. Your left brain is on point!