Last July Edi Royer, one of my fellow teammates from Blogging Business Artisans, sent me one of her laser-engraved wooden buttons. She sent several people buttons, in fact, and we all promised to feature her buttons in one of our handmade projects. Well, July led to August, the start of Iowa’s Destination Imagination season, and August led to September’s team recruiting efforts and updating of the state Web site, along with preparations for conferences in October and November, followed by training workshops in December, January and February. It is now tournament season, and Edi’s button has been waiting all this time to be included in a project. Did I mention previously that my husband and I are retiring from Iowa’s state Board at the end of the season? I think it is time for us to move on to new adventures and to reclaim our personal schedule.
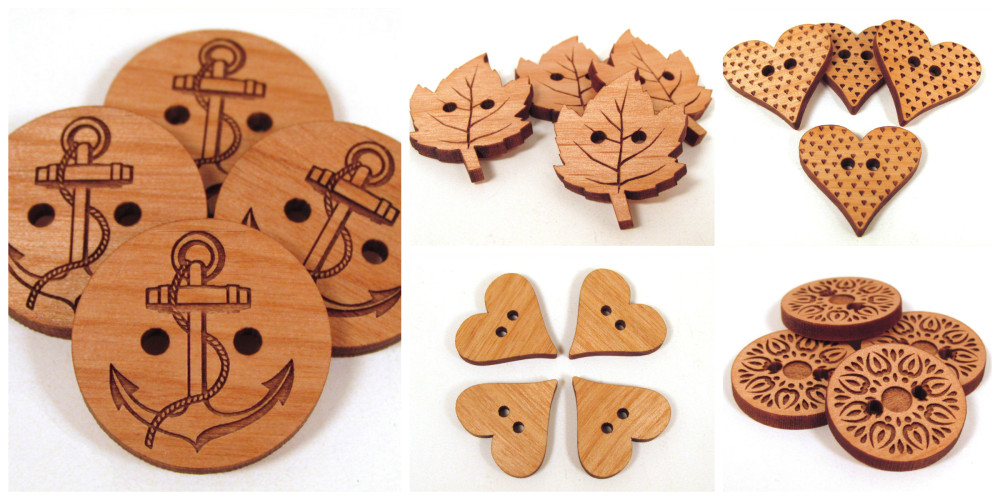
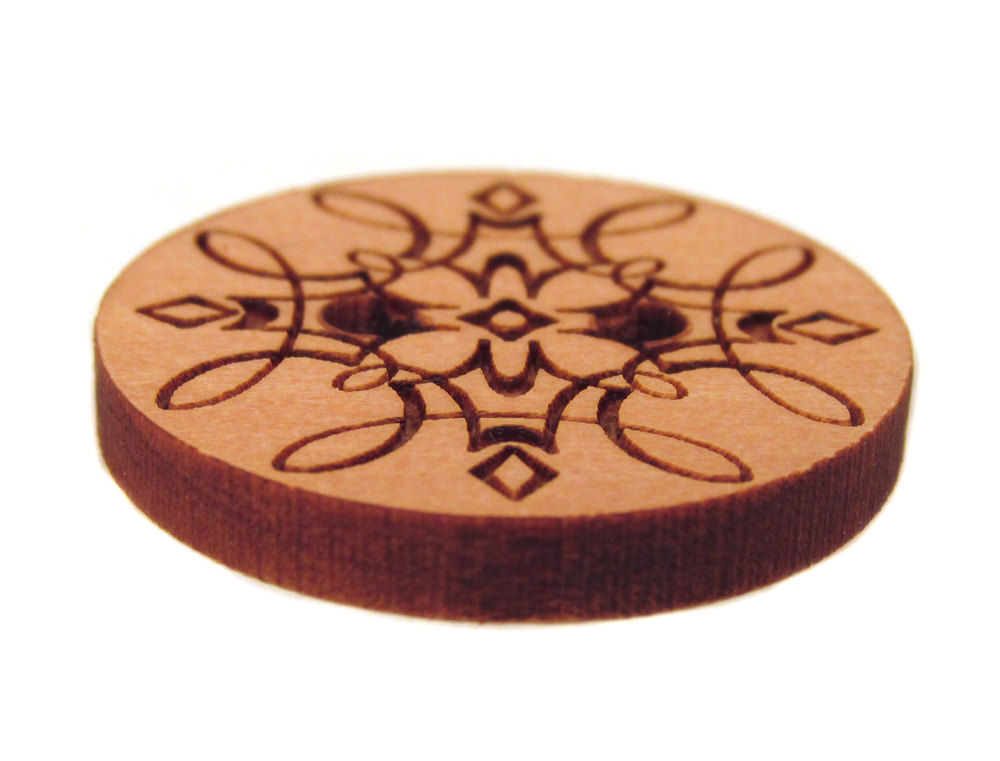 But back to Edi’s button, or should I say buttons? Edi, who lives in Essex, Iowa, is the owner of Memories for Life. She uses her laser engraving equipment for all kinds of creative projects: books with wooden covers, seasonal ornaments, etched glassware, magnets, cuff links, wooden buttons, and much more. Her buttons, however—and how I used the one she sent me—are what this post is about. They are perfect for journal covers, fabric flowers, hair ornaments, purses, jewelry and lots of other creative endeavors.
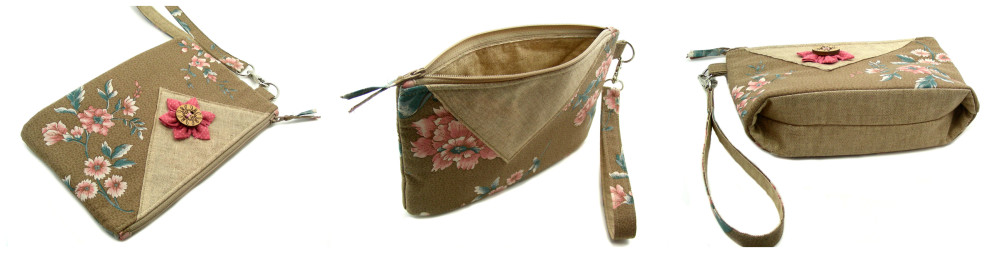
What did I do with the button I received from Edi? I finally finished my sewing project yesterday, an Atkinson Designs Lollipop Bag that uses Edi’s button instead of a “lollipop flower” as an embellishment for the clutch. More precisely, it is the center of a fabric kanzashi flower.
 I had mentioned previously that I am sewing some “warm-up” bags of lesser complexity before I tackle the more detailed patterns that are part of the Bag of the Month Club I joined in January. Here is what I learned from completing the above bag:
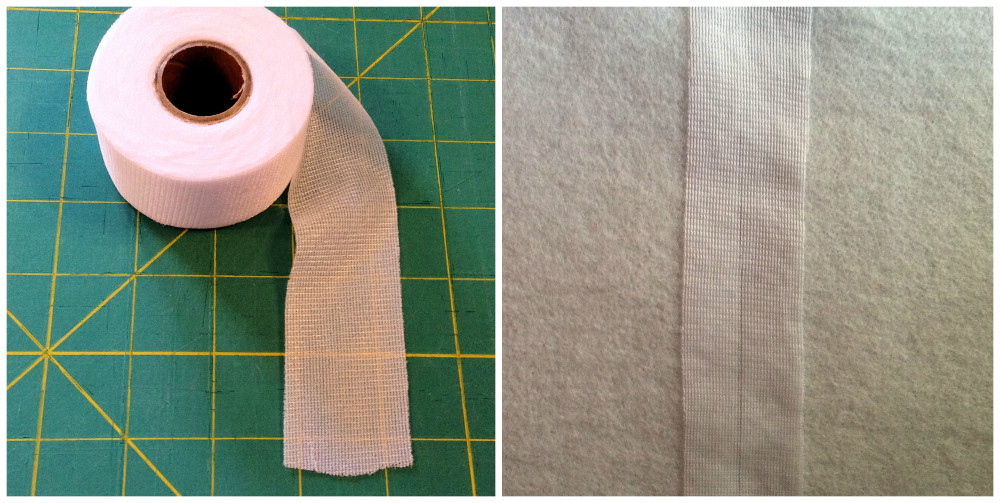
1. A good way to use up all of your fusible batting is to butt the ends together and fuse them with Heat Press Batting Togetherâ„¢, an acid-free, almost weightless product from Jeanne Harwood Designs. I paid $7.99 for this product at my local quilt shop, but you may discover a better price online. A roll of this stuff measures 1.5 inches by 15 yards, and a little goes a long way. Let’s face it: interfacing and lining products are expensive, so you may as well save and use all of your scraps. The seam is invisible once you fuse your batting to the fabric.
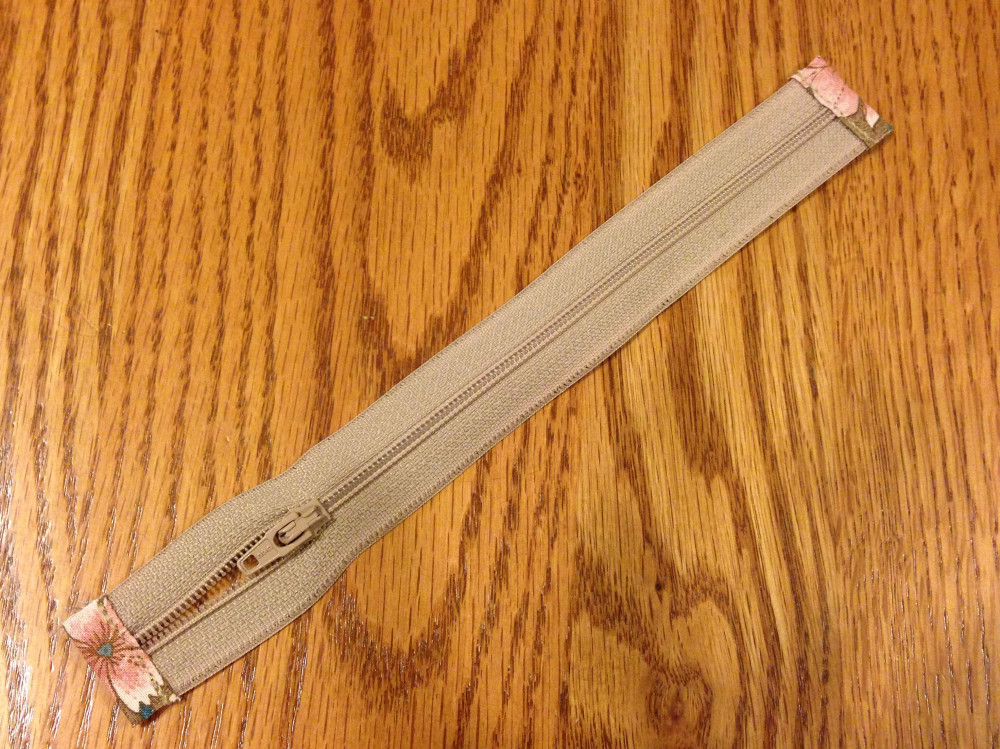
2. I learned how to install a zipper by covering the zipper ends with fabric. This is a professional, very clean finish for a bag zipper. Basically, you cut your zipper an inch shorter than the width of your bag, and then cover the ends with folded fabric. Before you insert it into the bag, this is what the zipper looks like.
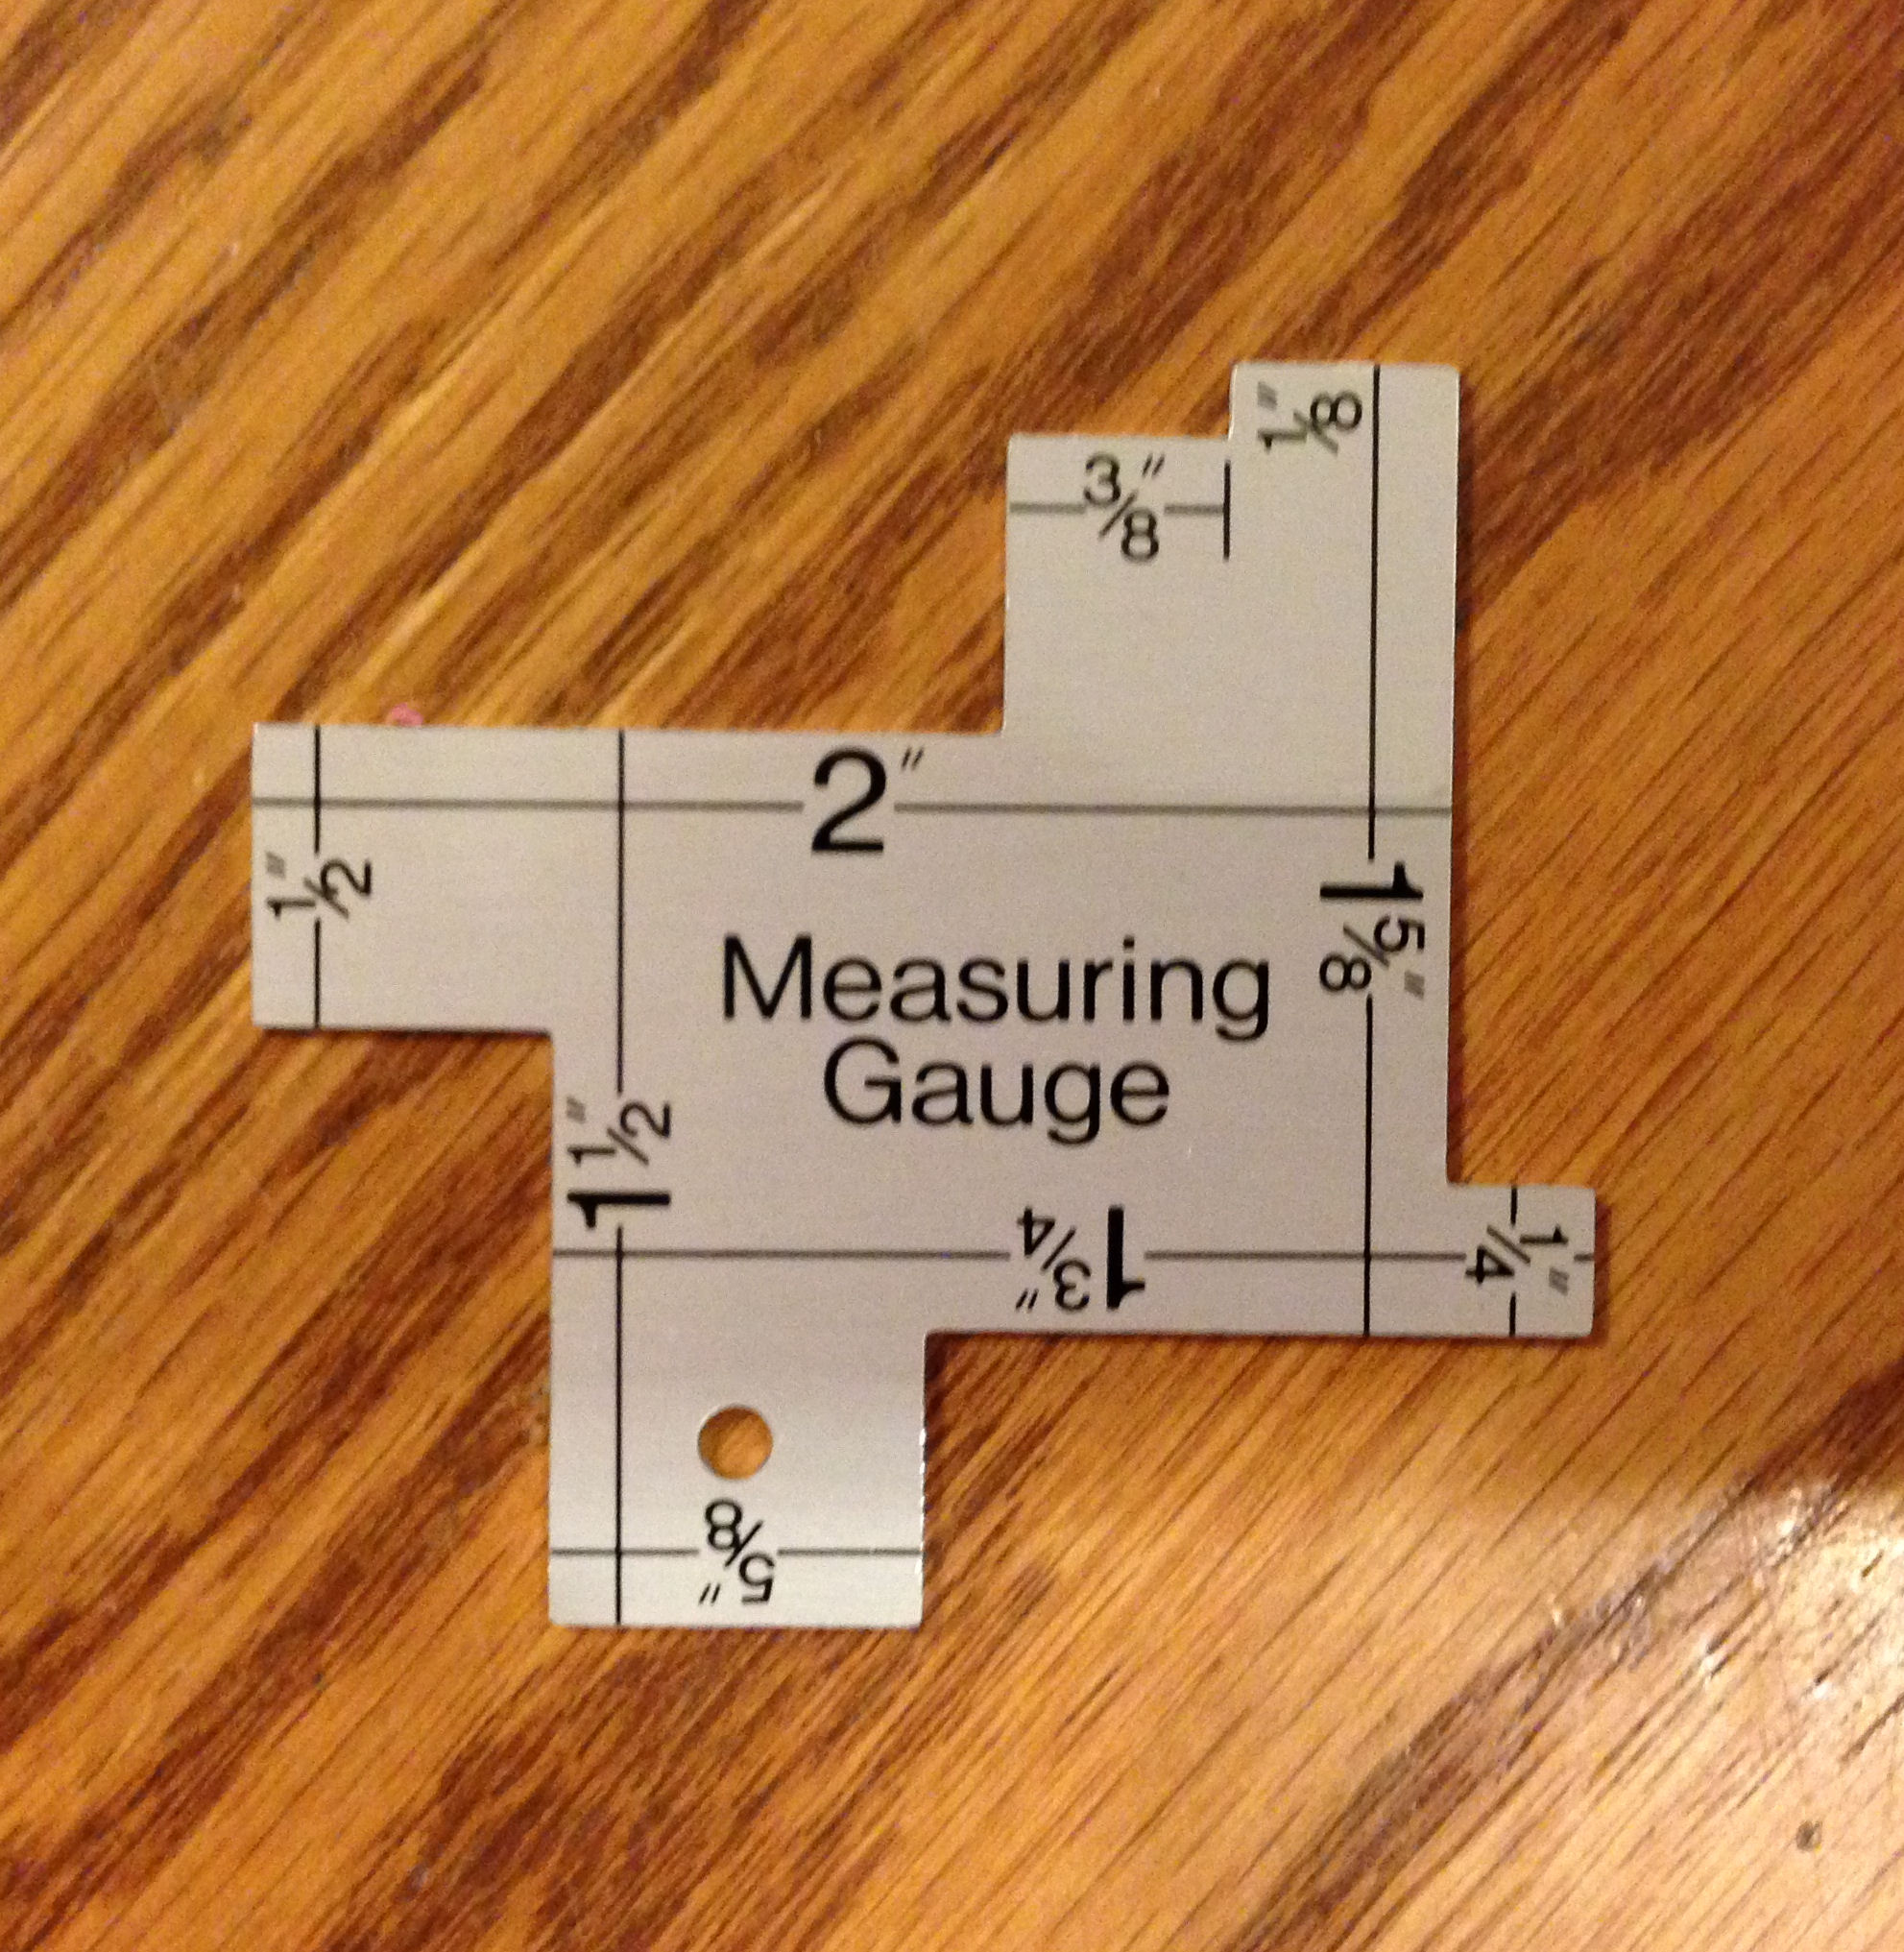
3. A measuring tape is indispensable when you’re trying to center a design on anything, but a really handy measuring tool called the Dritz Quilting 14-in-1 Measuring Gauge is even better. This two-sided aluminum gadget has all the basic measurements commonly used in sewing, from 1/8 of an inch to 2 inches.
4. I learned how to make a strap for a wristlet using a swivel hook and a D-ring. The instructions in the pattern called for sliding your swivel hook onto the fabric strap, folding over one end by a quarter inch and sliding the other end under the fold, then sewing a straight line to anchor the hook in place. I didn’t like this method because it left the raw edge of the fabric exposed. Instead, I followed the instructions found on Emmaline Bags‘ blog, which involved sewing a rectangle onto the strap. I think this is more secure and also more attractive. I don’t know if you can really see this in my photo, but if you click on the photo below, you can zoom in.
 5. The above photo shows a fairly flat bag, but Atkinson’s design includes a clever hidden bottom gusset in a contrast fabric that allows the bag to stand up on its own, and to open up wider at the bottom if you need to insert more items in the bag.
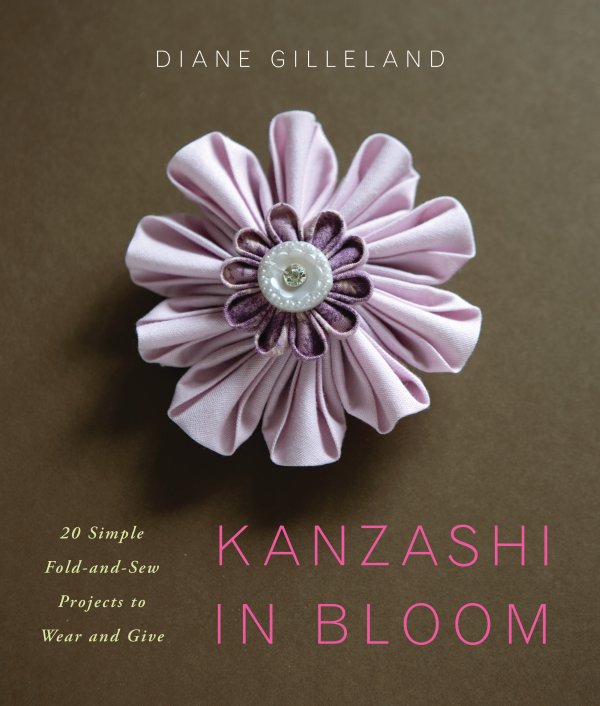
6. Sewing kanzashi flowers is fun, f-u-n, FUN! What are they, you ask? Kanzashi are ornamental hair flowers made by folding fabric origami-style. They go back to the 1600s and originated in Japan, but today you’ll find them on garments, bridal headpieces, bags, jewelry—pretty much anywhere your imagination leads you. You can learn about many more ways to use kanzashi flowers in Diane Gilleland’s book, Kanzashi in Bloom. A great interview with Diane can be found at This Love Forever in Kanzashi: Flowers in Bloom Interview with Diane Gilleland.
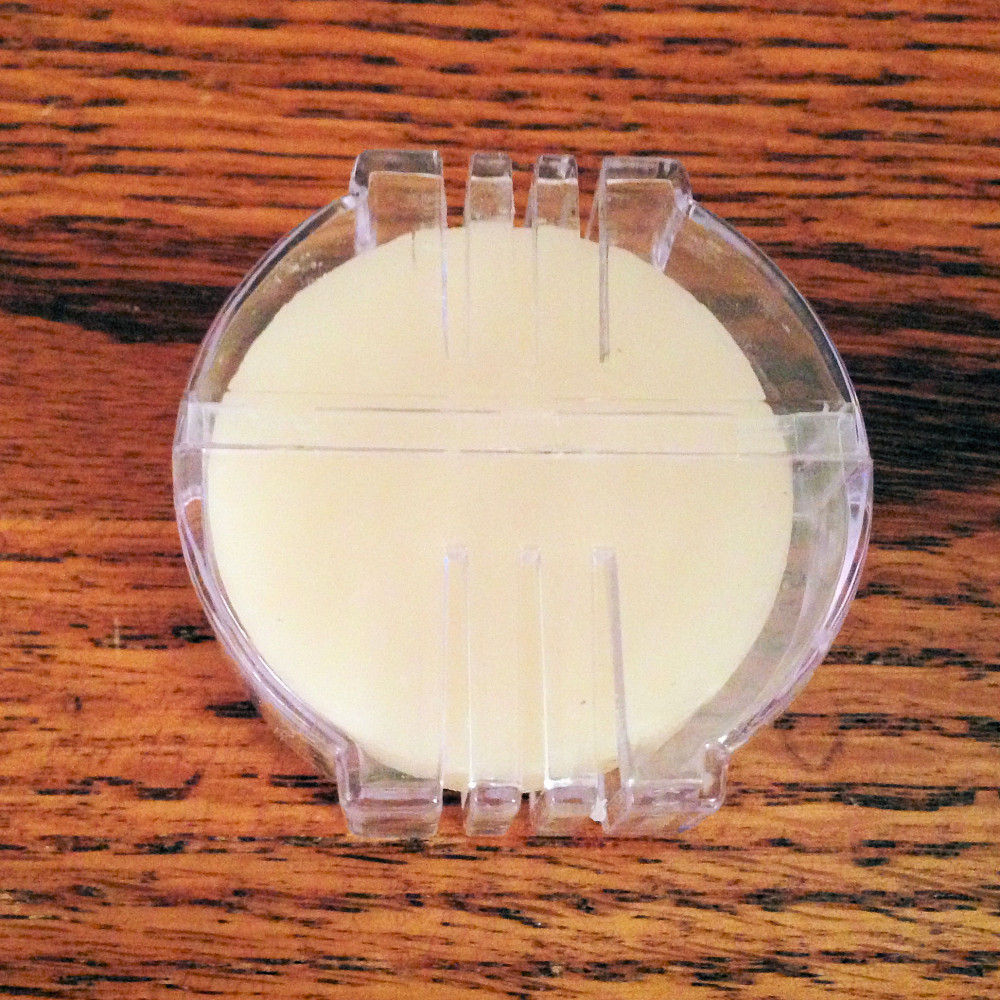
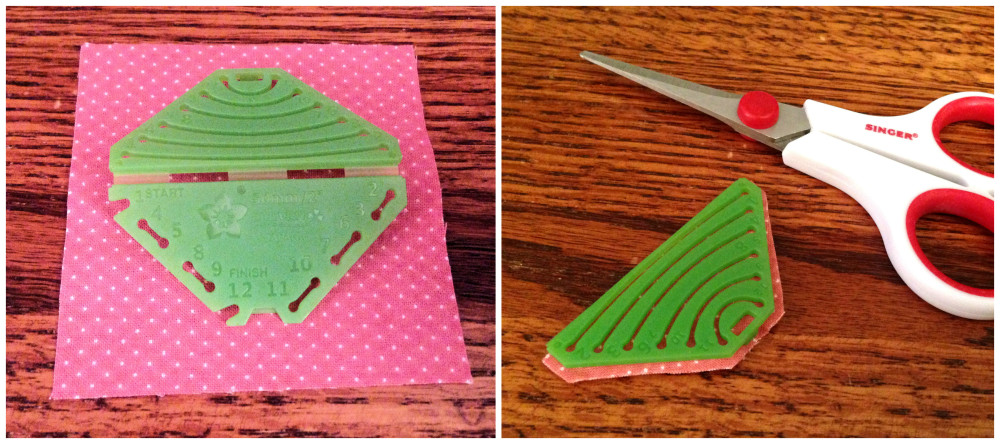
You sew kanzashi flowers a petal at a time by hand, but the process is goof-proof when you use one of Clover’s Kanzashi Flower Makers. I started off by cutting five 3-inch by 3-inch squares of fabric to make five petals, but later I cut another square because I decided I liked six petals better. The green bit of plastic is the Clover Kanzashi Flower Maker. There are many types and sizes from which you can choose. The one below produces a two-inch flower.
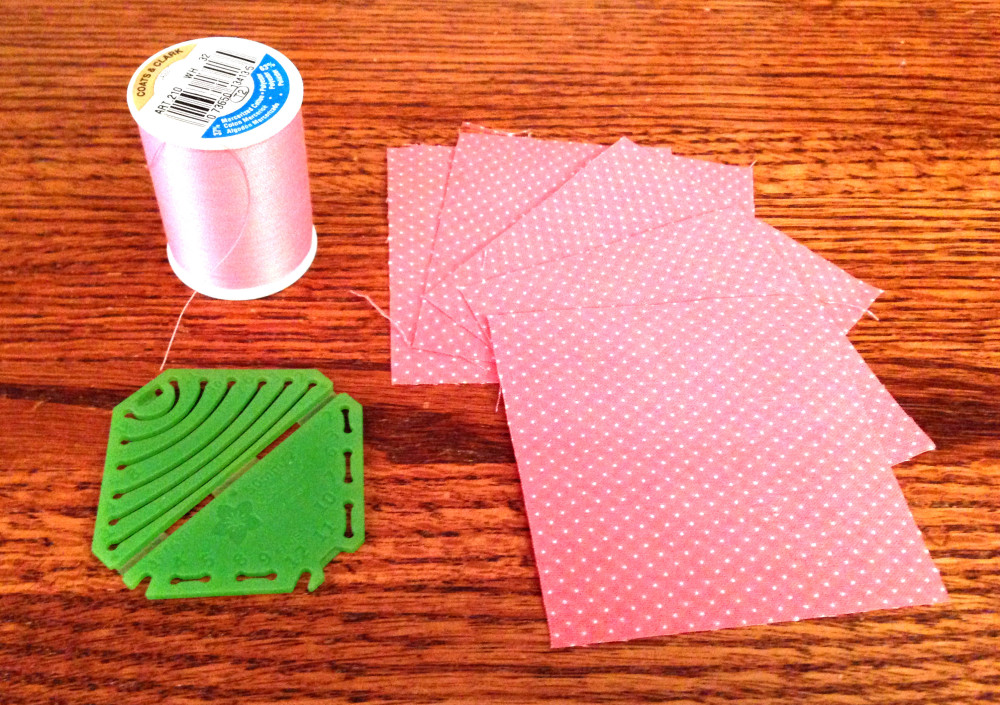
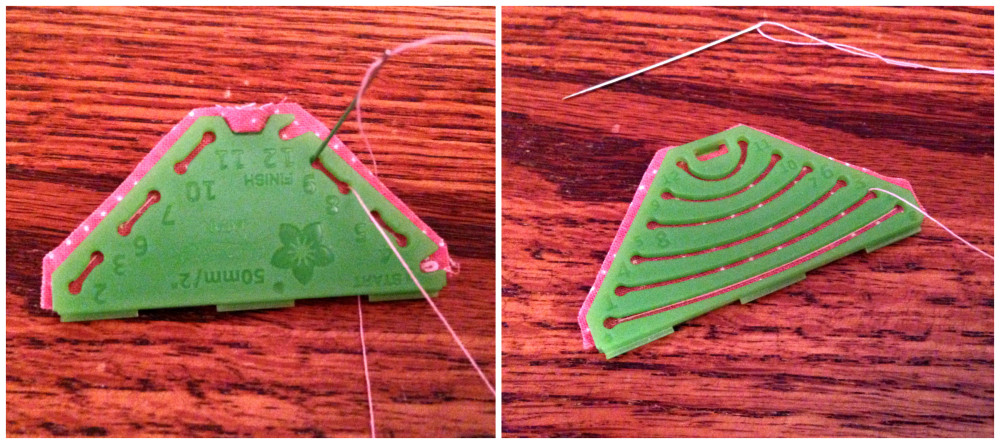
I coated my thread with beeswax to keep it from tangling, but also to strengthen the thread and keep it from breaking. I used 24 inches of thread to sew all six petals.
You begin by laying the template onto the right side of the fabric. Then you fold both the fabric and the template in half, and lock it into place. Trim the excess fabric with scissors. You don’t have to be very precise.
The template is numbered on both the front and back side. Knot your thread and insert your needle into “1” on the back side (where it says “Start”), come up at “2,” go down at “3,” and continue until you have hit all the numbers and arrive at “12” (“Finish”). This is what the back and front sides of the kanzashi template look like.
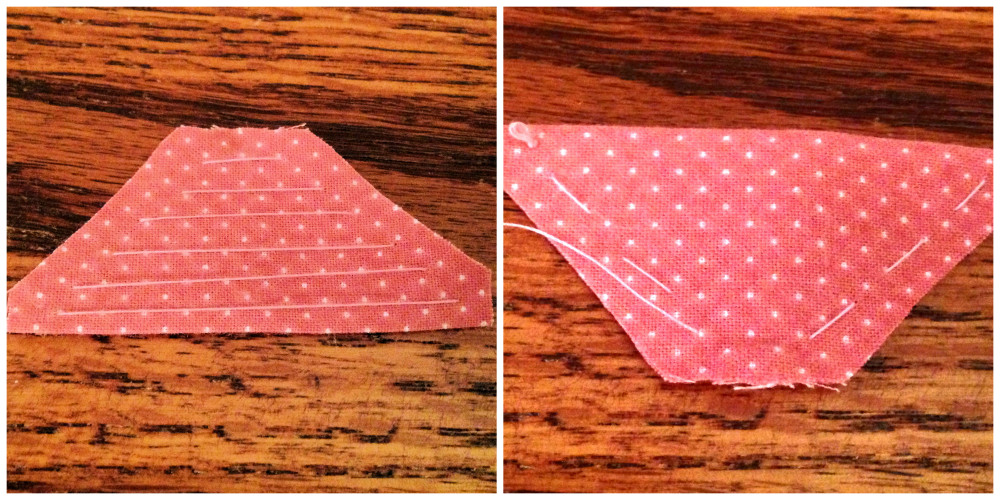
Open up the template, remove the fabric, fold it in half with the long stitches on the inside of the fold, and simply pull the thread. A petal forms without any effort at all. In the photos below, you can see what both sides of the fabric look like when you remove it from the template.
Leave the petal on the thread because you will use the remainder of the thread to make additional petals. Leave 4 to 6 inches of thread between the end of the previous petal and the one you’re working on, then slide each petal next to the previous one when it is completed.
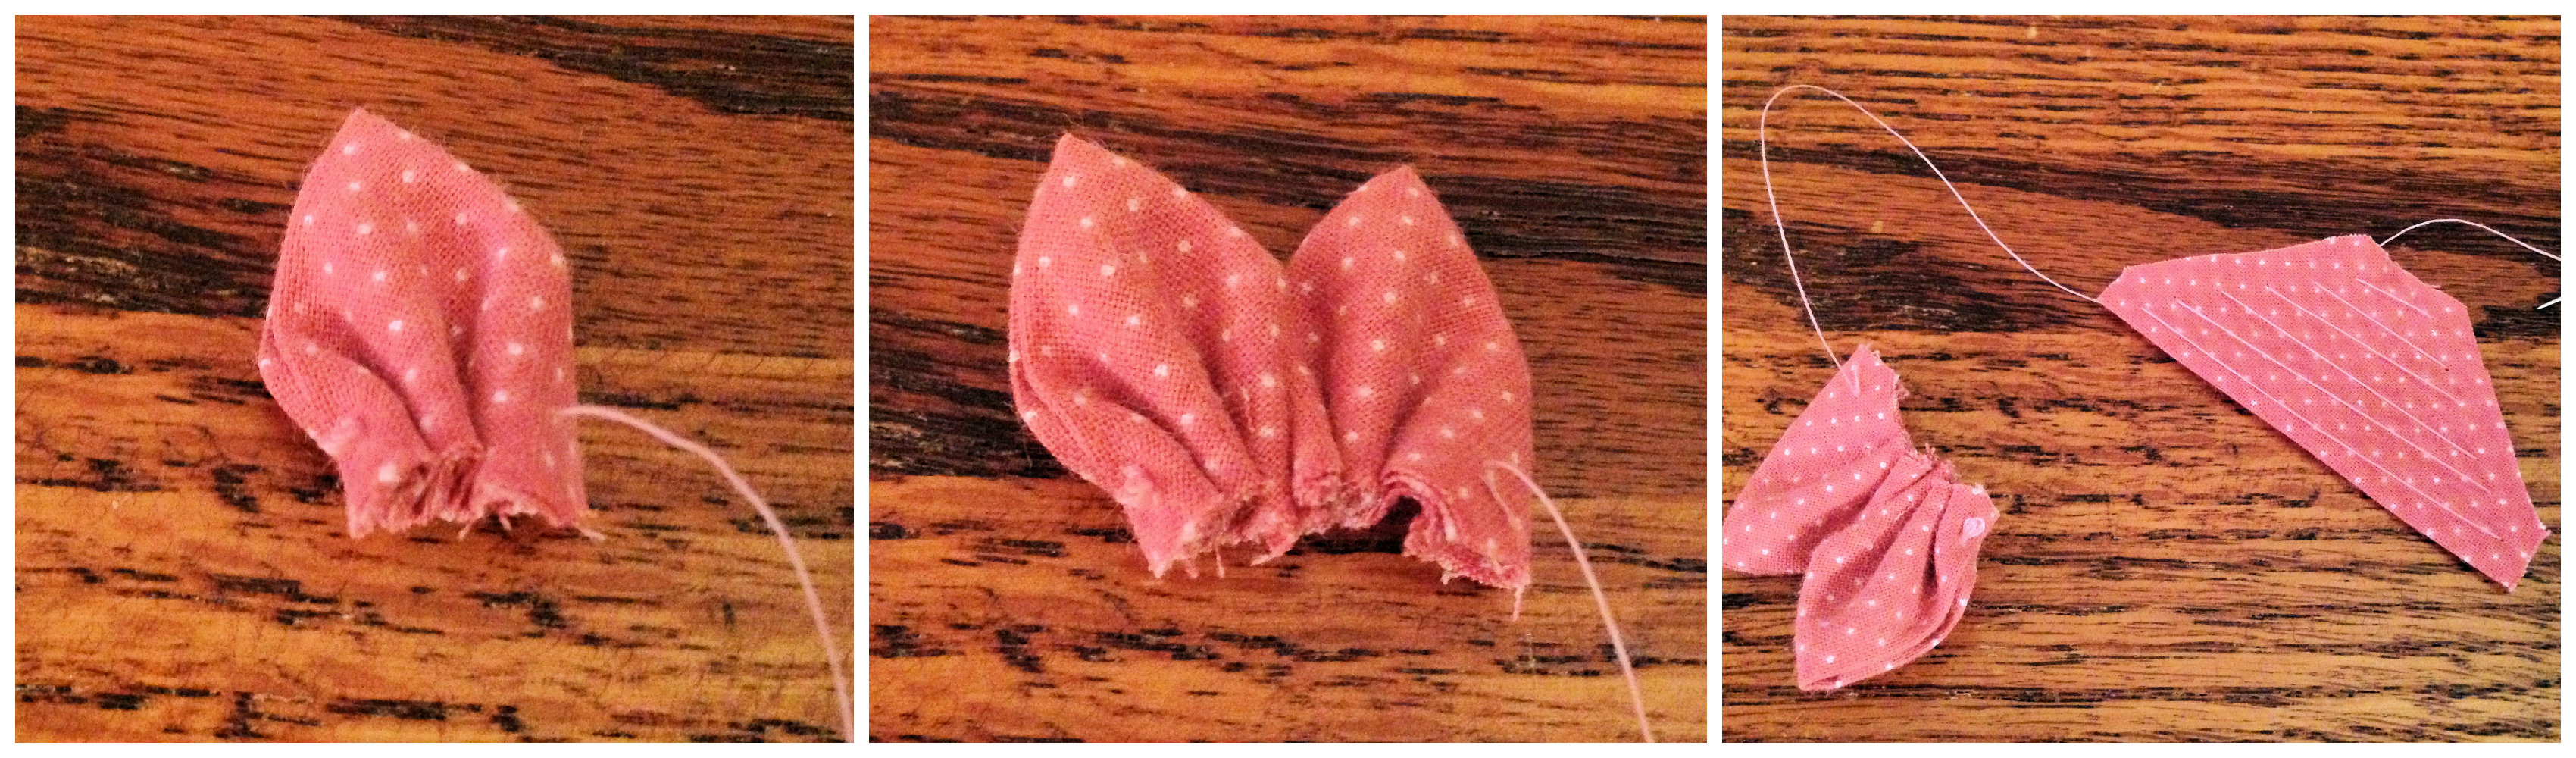
When you have finished all of the petals, insert your needle into a fold from the first petal a few times, and knot off. Sew a button in the center, and you’re done!
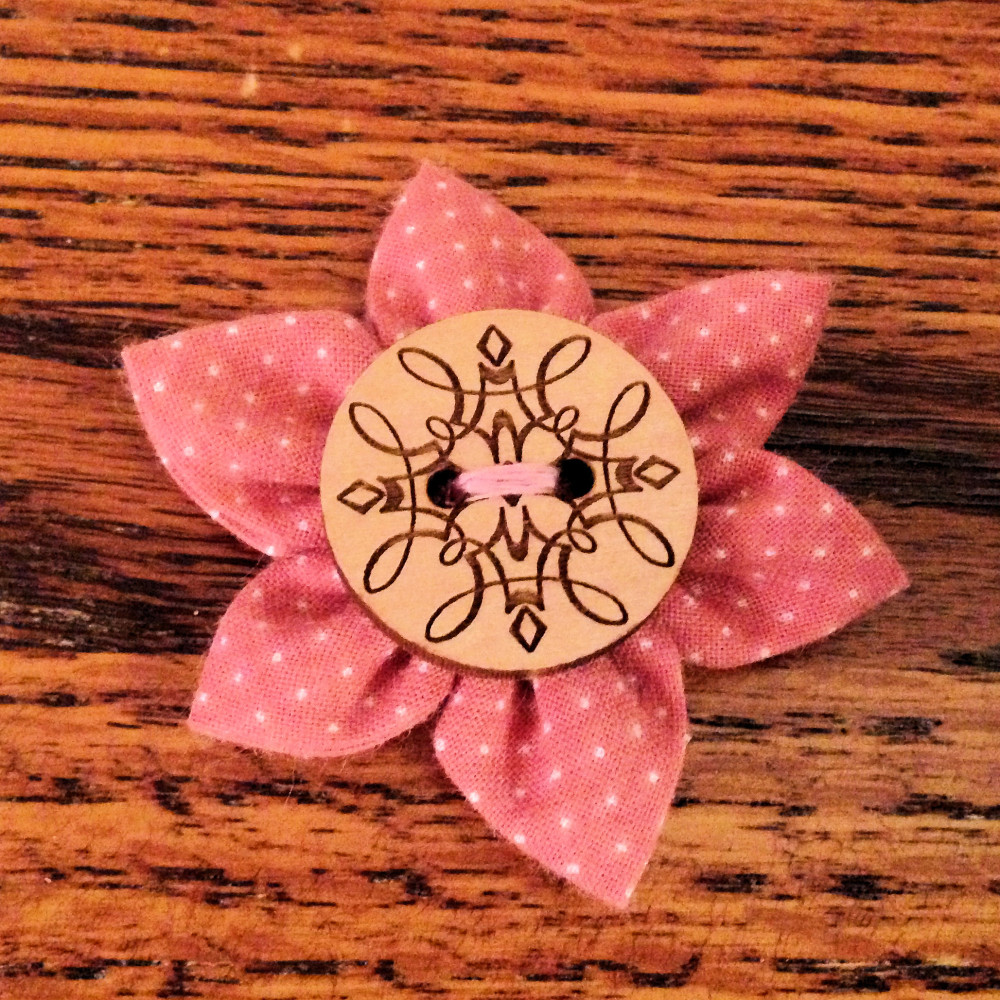
Although this wristlet clutch was fairly simple to sew, I guess I learned quite a bit. Because nearly everything I crochet or paper craft involves adding a flower, you can imagine that I’ll be adding flowers to the things I sew, too. And Edi’s wooden buttons add the perfect final touch!
© 2014 Judy Nolan. All rights reserved.
What a cute wristlet! And the button finished it off so nicely! It goes really well with the fabric you used.
You’re really doing a great job with your bags!
The wristlet turned out great! Edi’s button looks fabulous on the kanzashi flower!
Fantastic idea for fusing scraps of batting together – I have a whole bag full 🙂
What a great project! I love your fabric flower — and the wristlet finishing tip. Edi’s buttons are great.
That’s adorable, and Edi’s button looks great in the middle of the flower! Hooray for teamwork!
Also, I like how you install your zippers. That’s very clean-looking.
The wristlet turned out beautiful. I love the flower button. And Edi’s work, period.
what patience you must have! The bag is fabulous and the buttons are great. I’ll have to buy some the next (first) time I need buttons. Well done! {:-D